Introduction
Now that your project is ready, you can start to build the data model.
beVault uses the Data Vault methodology to structure the data model. This methodology relies on 3 main entities: hubs, links, and satellites.
The hubs represent the business concepts (customers, products, …) and contain only the list of unique business identifiers of those objects.
The links represent the different relationships between the business concept (hubs).
The satellites are related to a hub or a link and contain descriptive information about the business concept’s object (hub) or the relationship (link). There are always related to only one source and therefore will be created during the source management and not in this section.
The data model that we will create, as well as the sources that we will use, are documented here: Tutorial Scenario - WonderCar
The model that we will create has been analyzed beforehand:
Build the data model
-
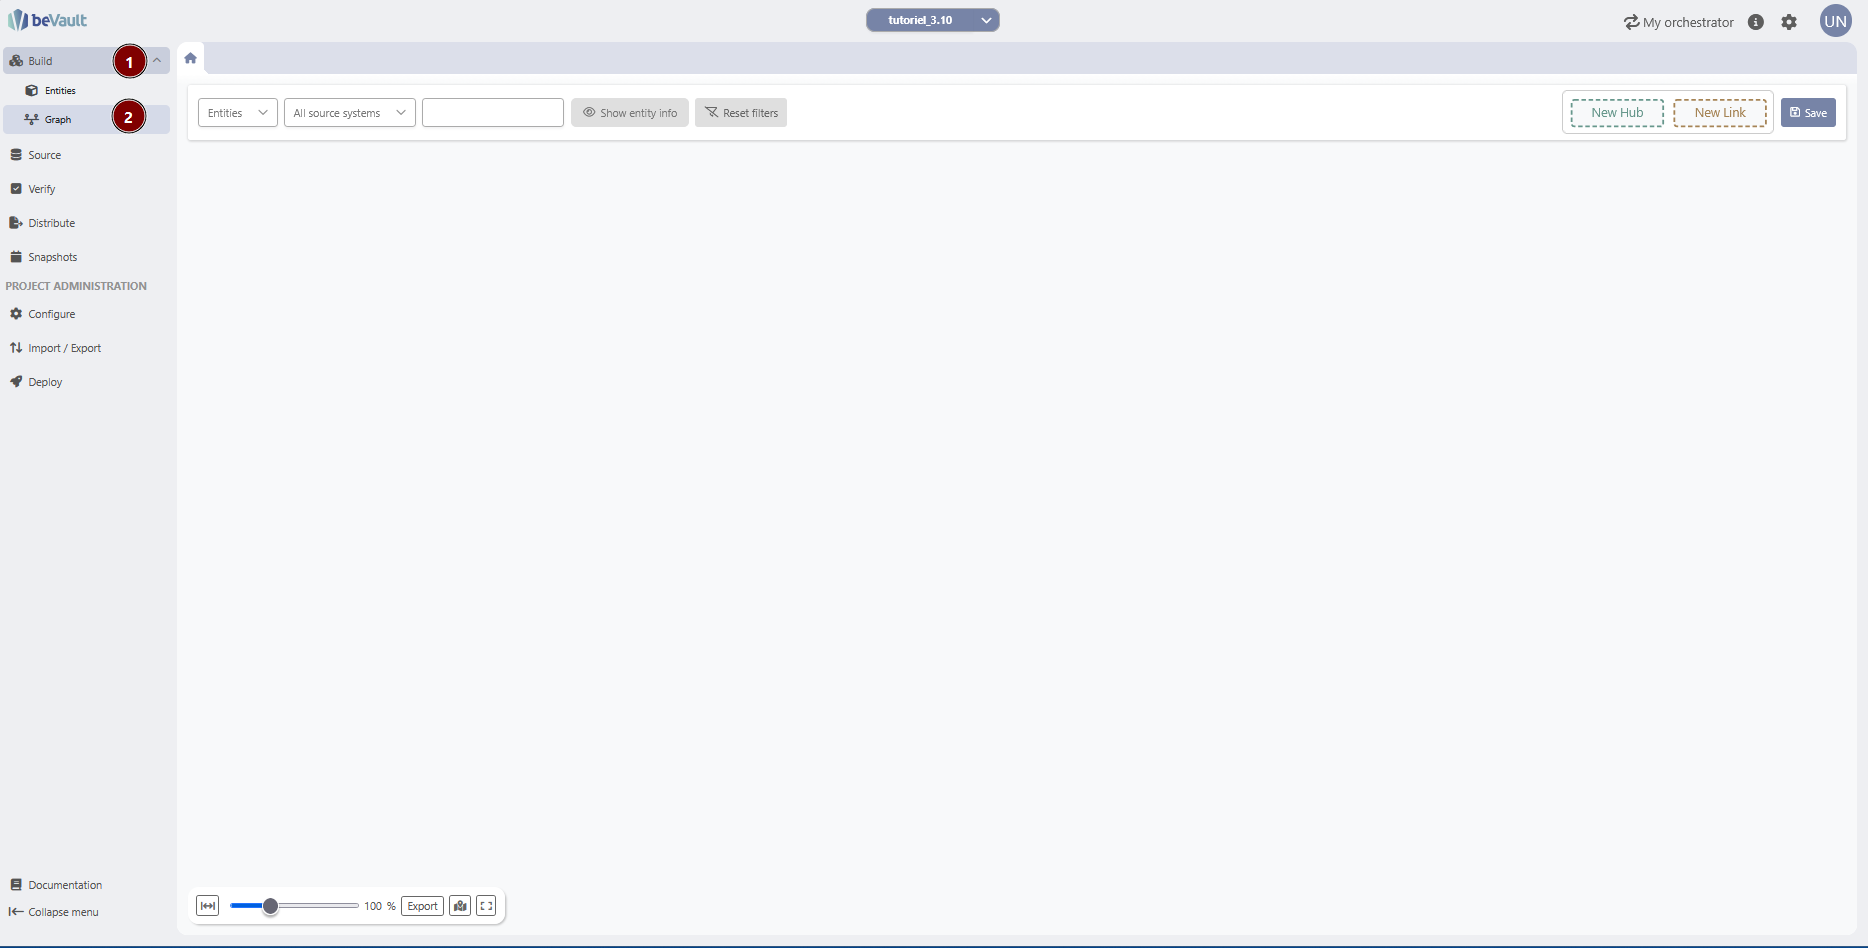
Navigate to the “Graph Editor” submodule in the “Build” module.
Create hub
Let's create the first two hubs, employee and shop, together.
-
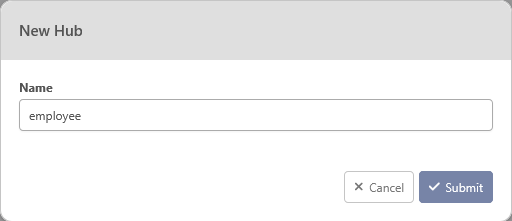
Click & hold on the ”New hub” button and drop the box on the graph to create a draft hub.
-
Set the name of the hub
-
Click on submit to create a draft hub.
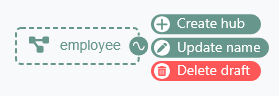
The hub is now in a draft state and needs to be fully created.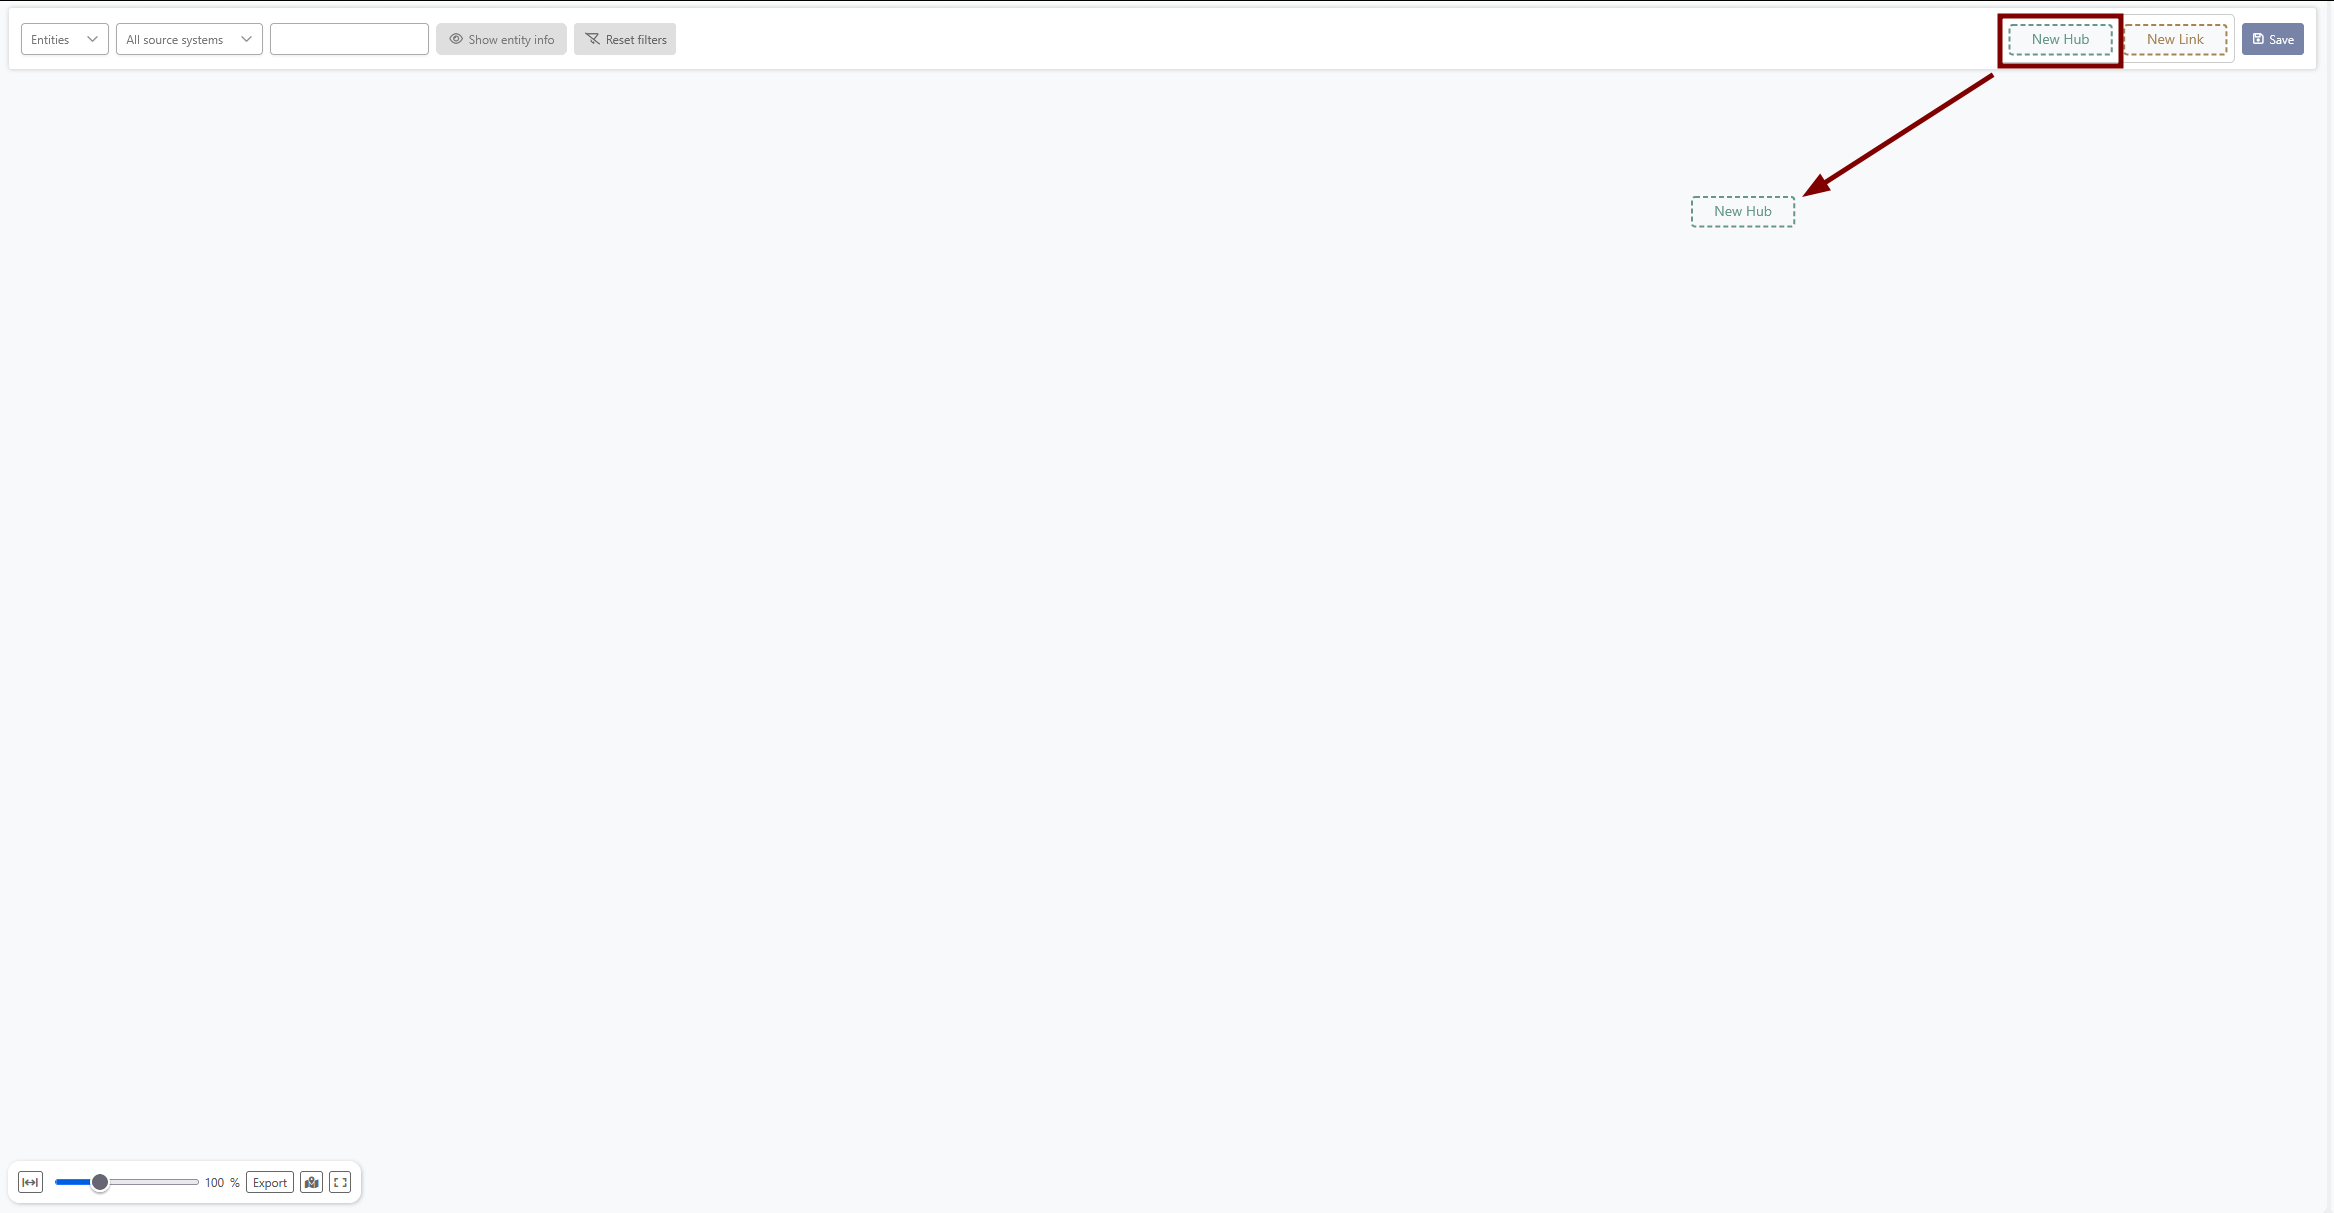
-
-
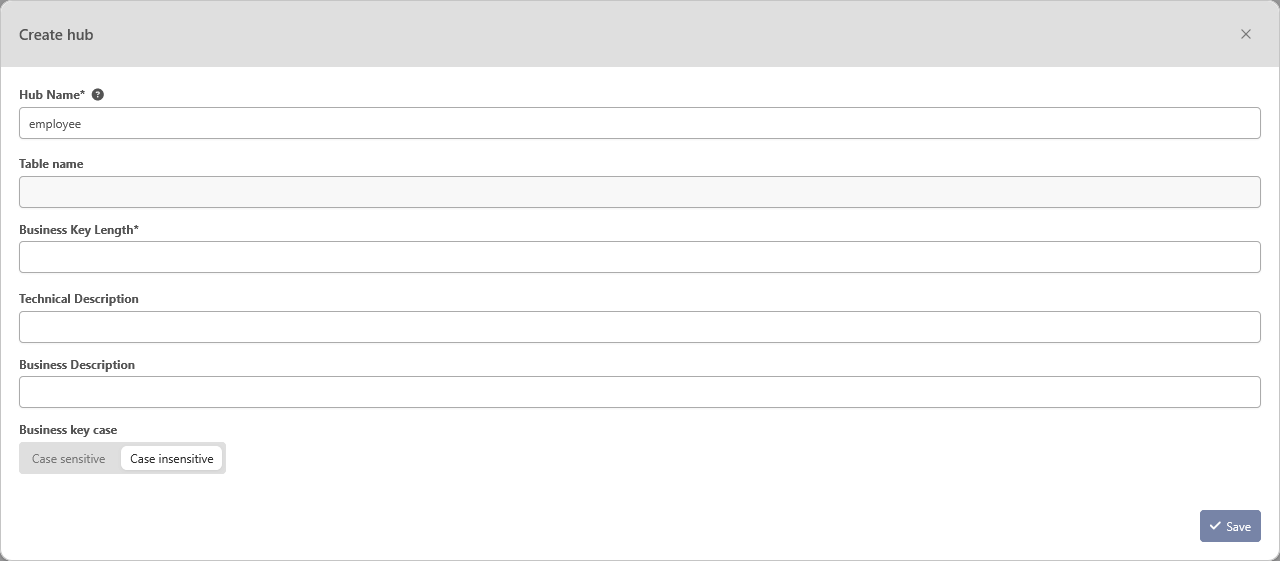
Click on the draft of the hub and then “Create hub”. It will open a modal
-
Set the length for the business key. You can enter 255
-
Set the business key case sensitivity to ‘case insensitive’
-
Click on Save
-
-
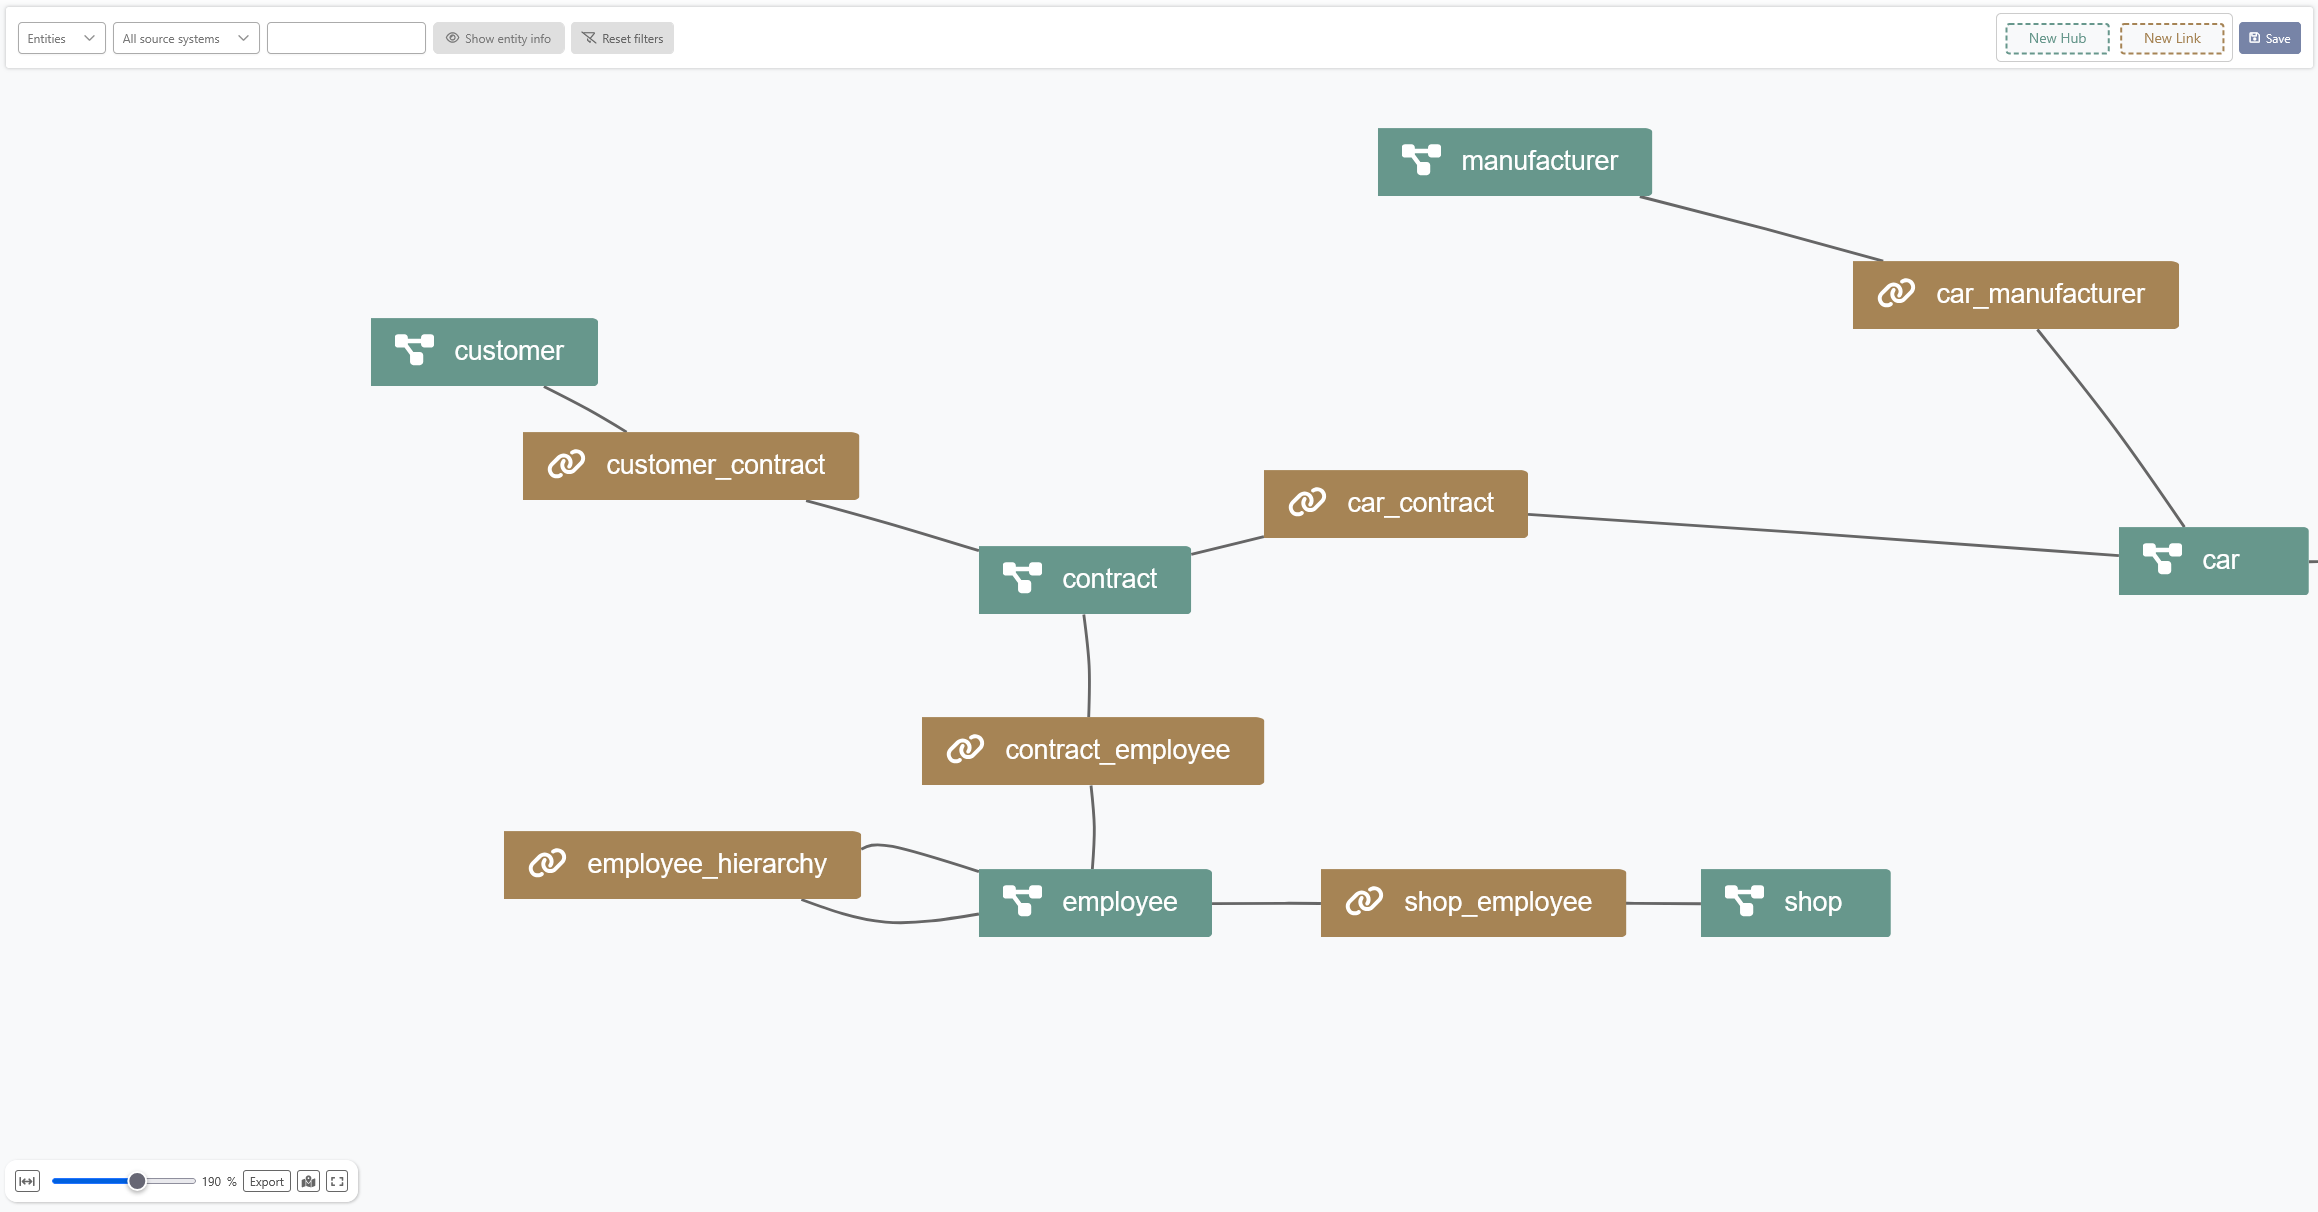
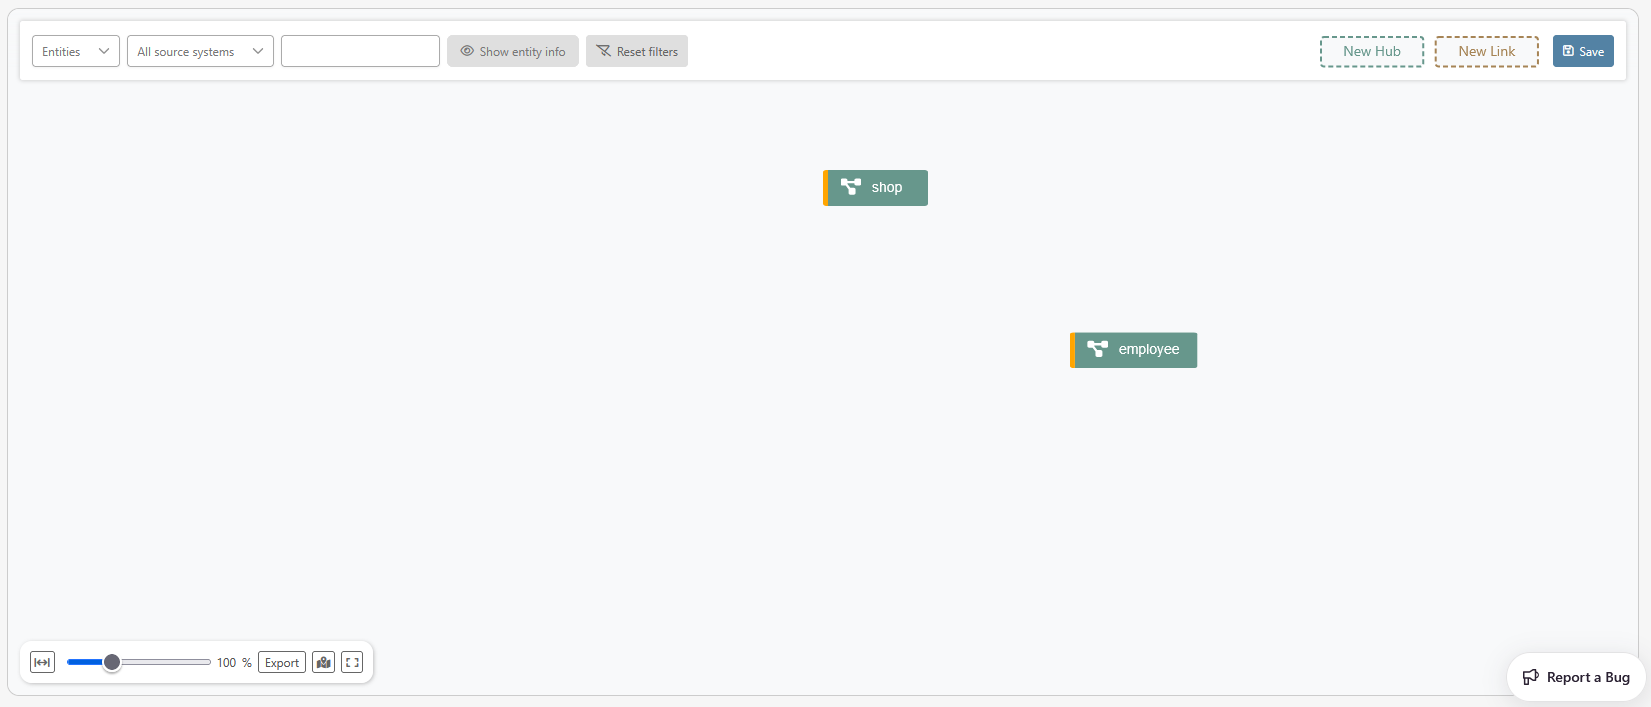
Repeat this operation for the second hub. Once created, your graph should look like this.
Create link
Now that both hubs were created, let’s create the Link shop_employee between employee and shop.
-
Click & hold on the ”New Link” button and drop the box on the graph to create a draft link.
-
Set the name of the link
-
Click on submit to create a draft link.
The link is now in a draft state and needs to be fully created.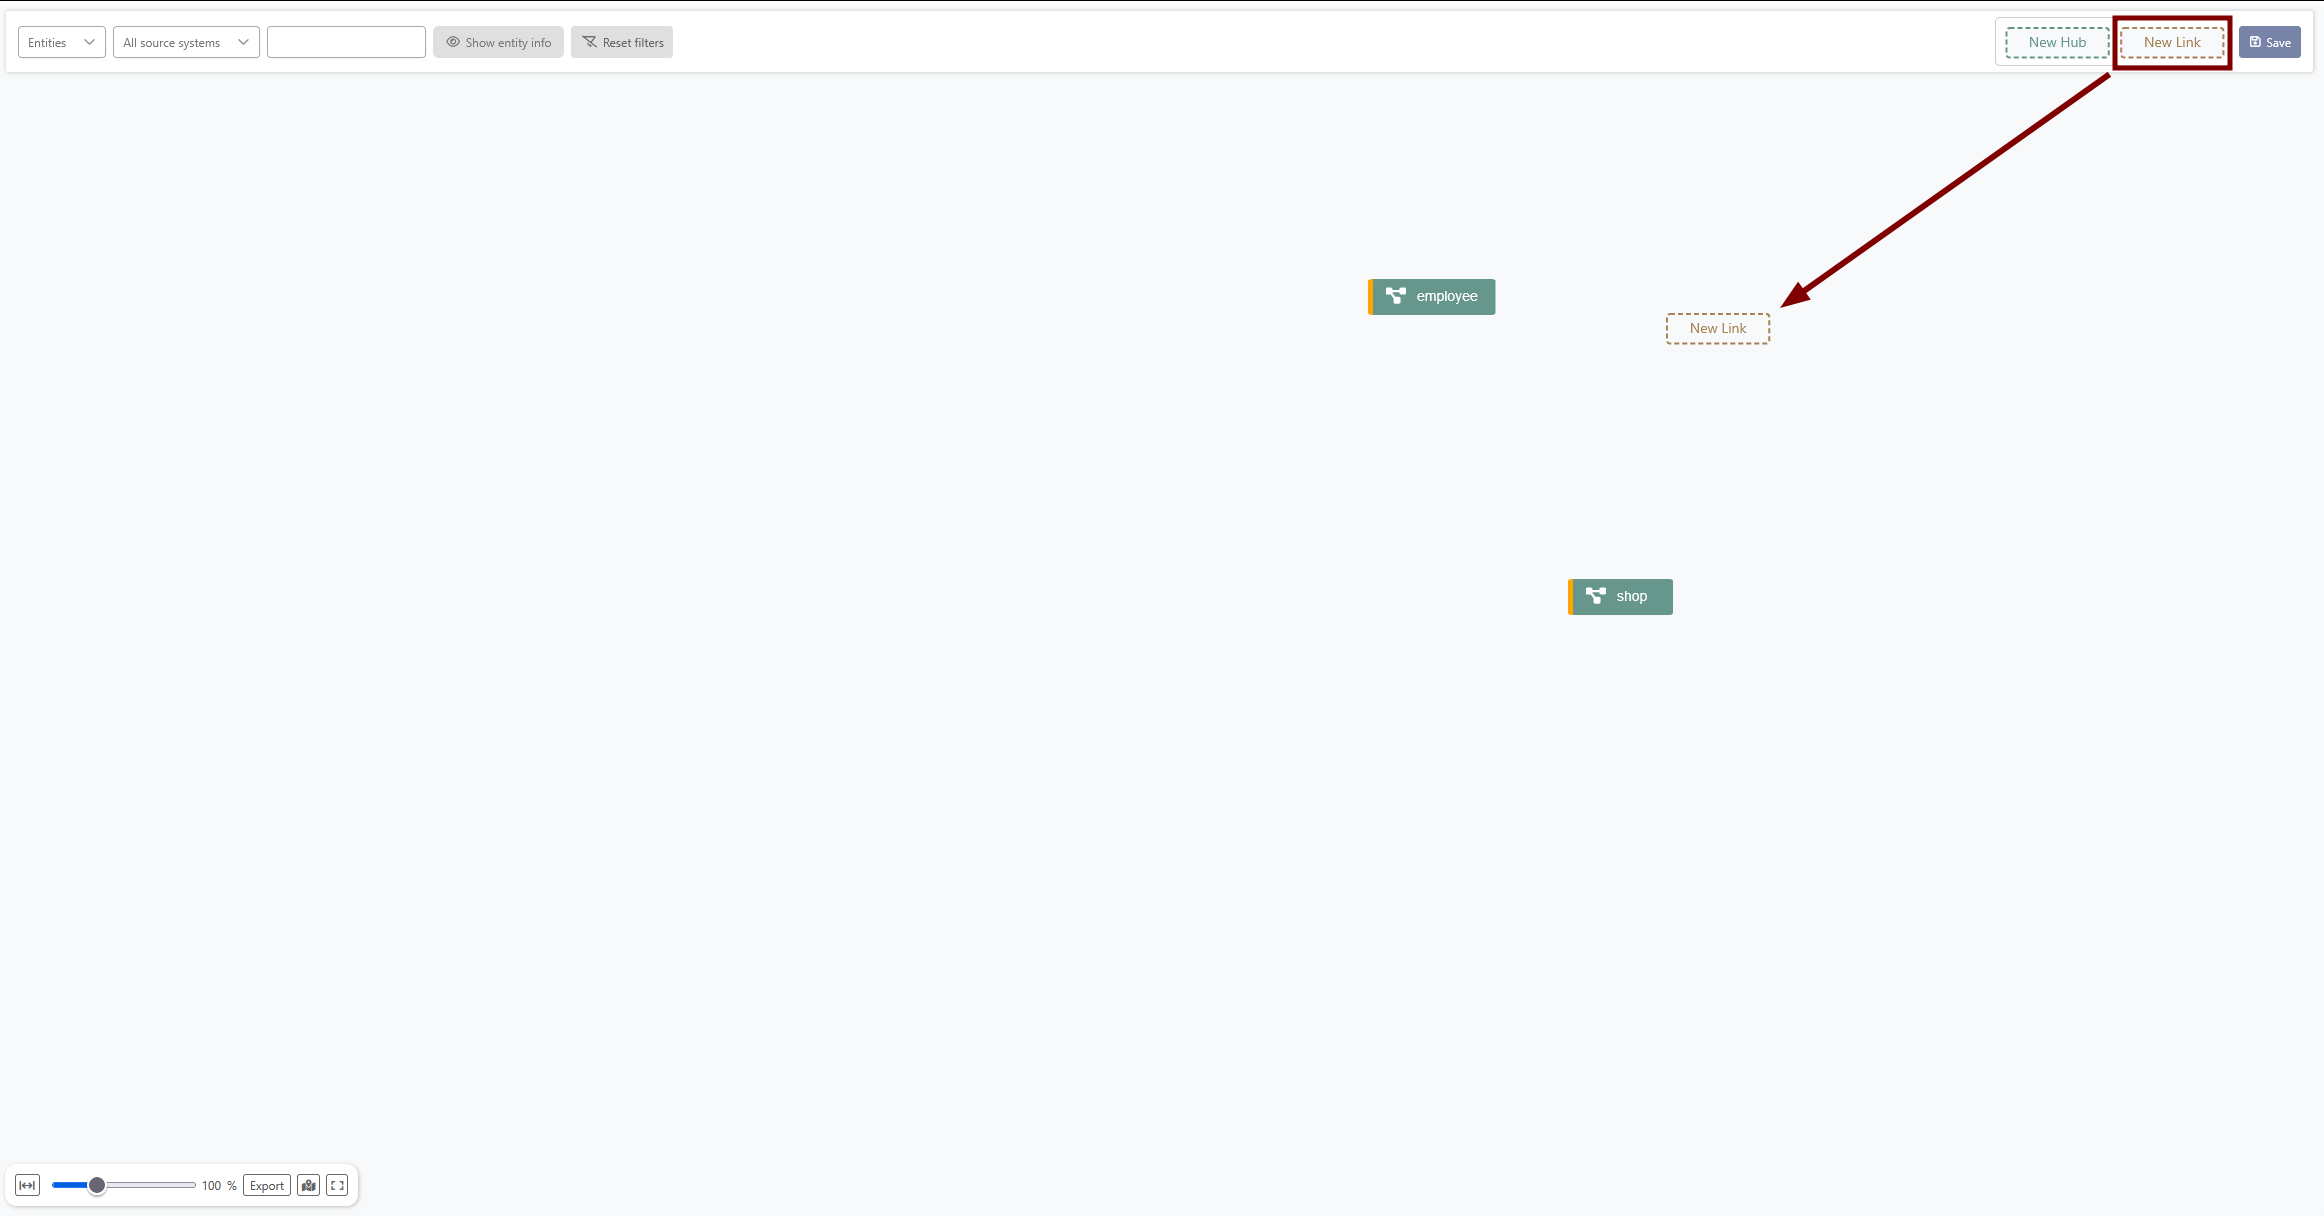
-

-
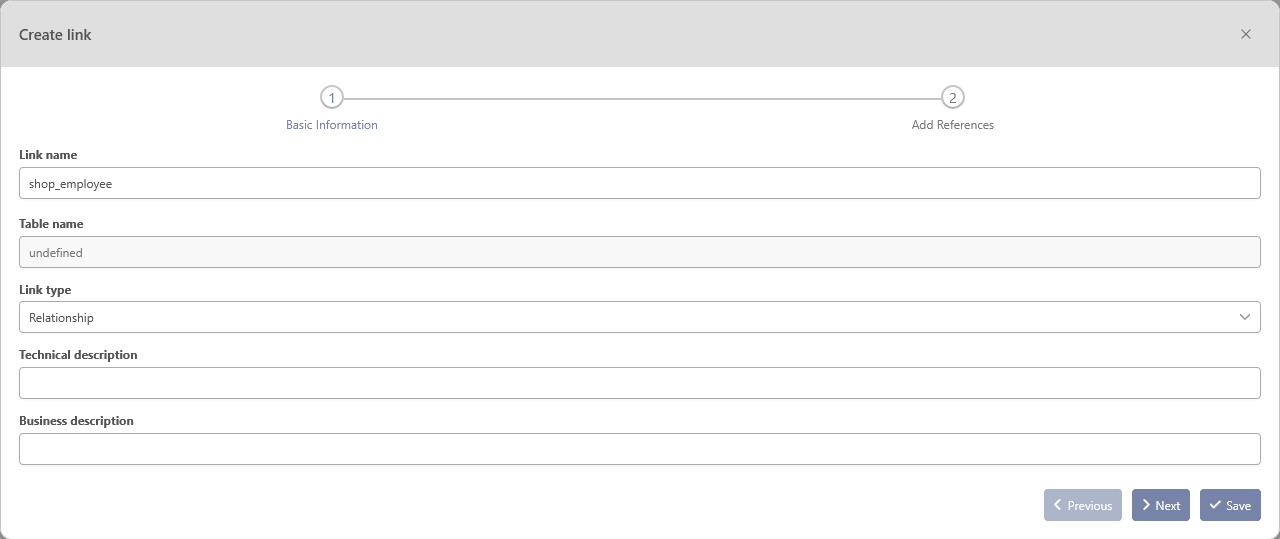
Click on the link and then “Create” to open a two-step modal
-
The first step
-
Leave the name as set for the draft and the type to “Relationship” (more info on types of links here: Graph Editor | Create a link)
-
Click on “Next”
-
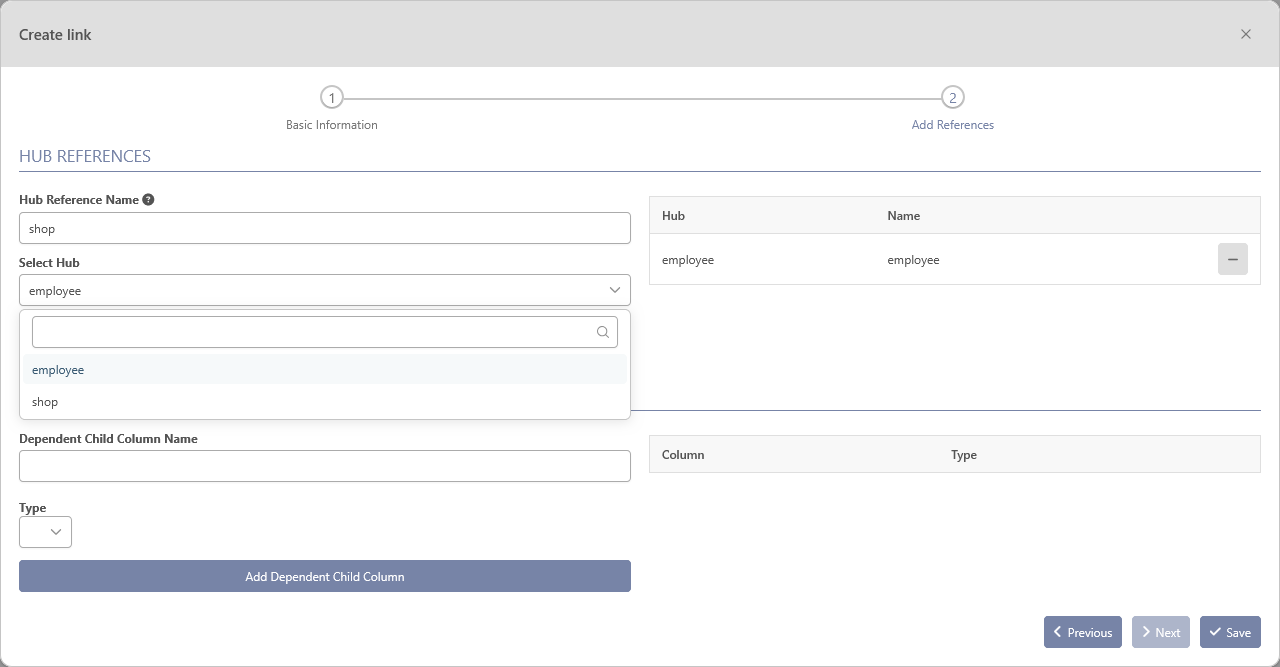
Add your hub references. Select the hub you want to add to the link, set a reference name and click on “Add hub reference”
-
Click on “Save”
-
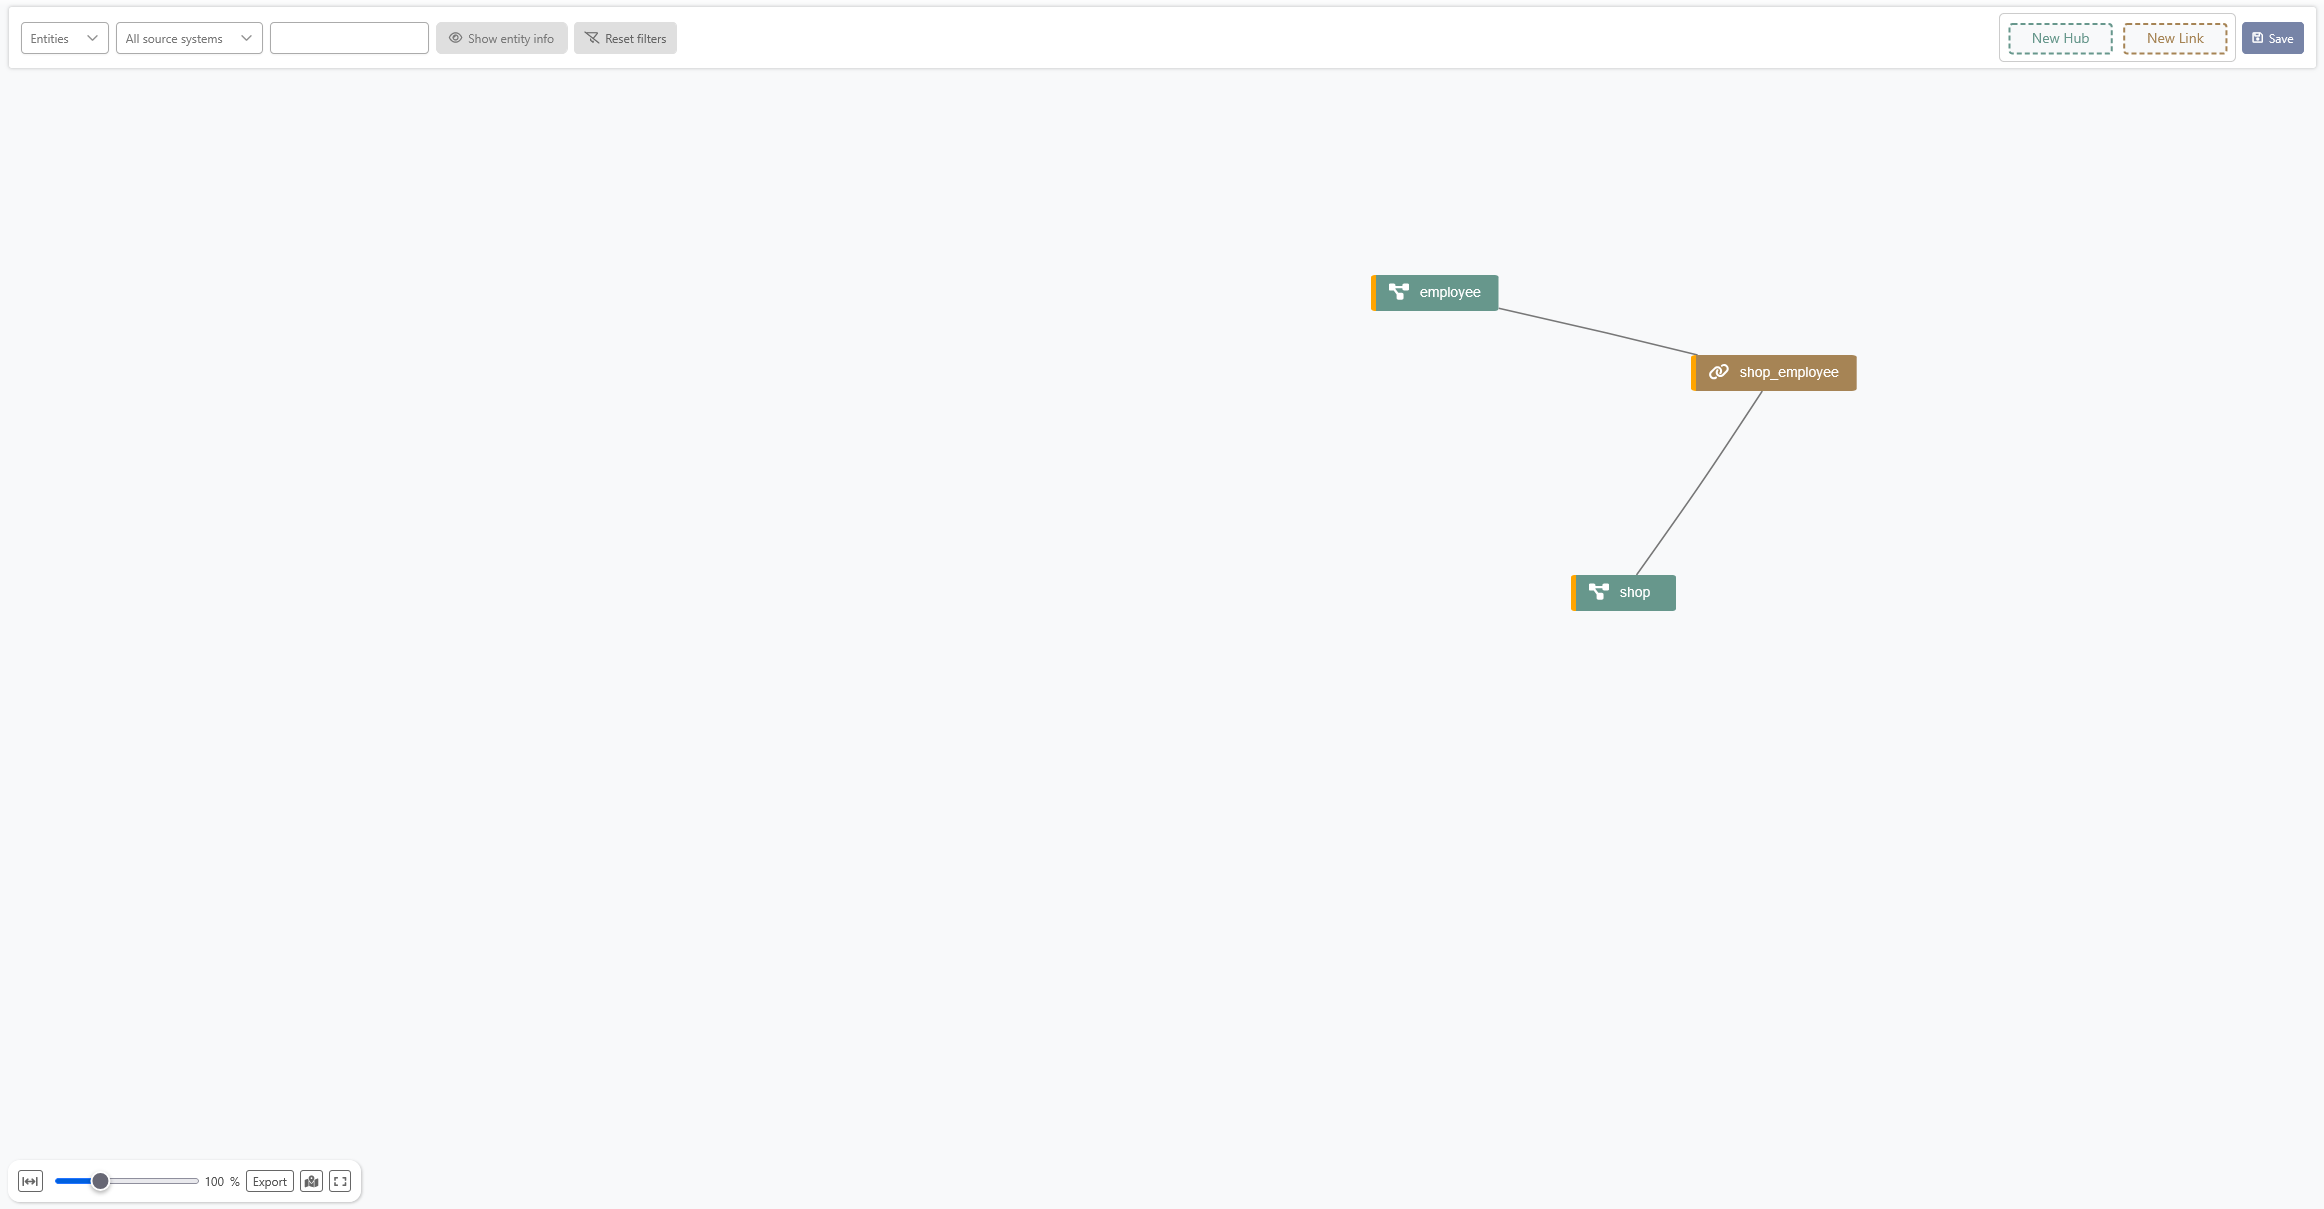
Your model should look like this now :
You can now repeat those steps to create the full data model of this tutorial.
Resolution
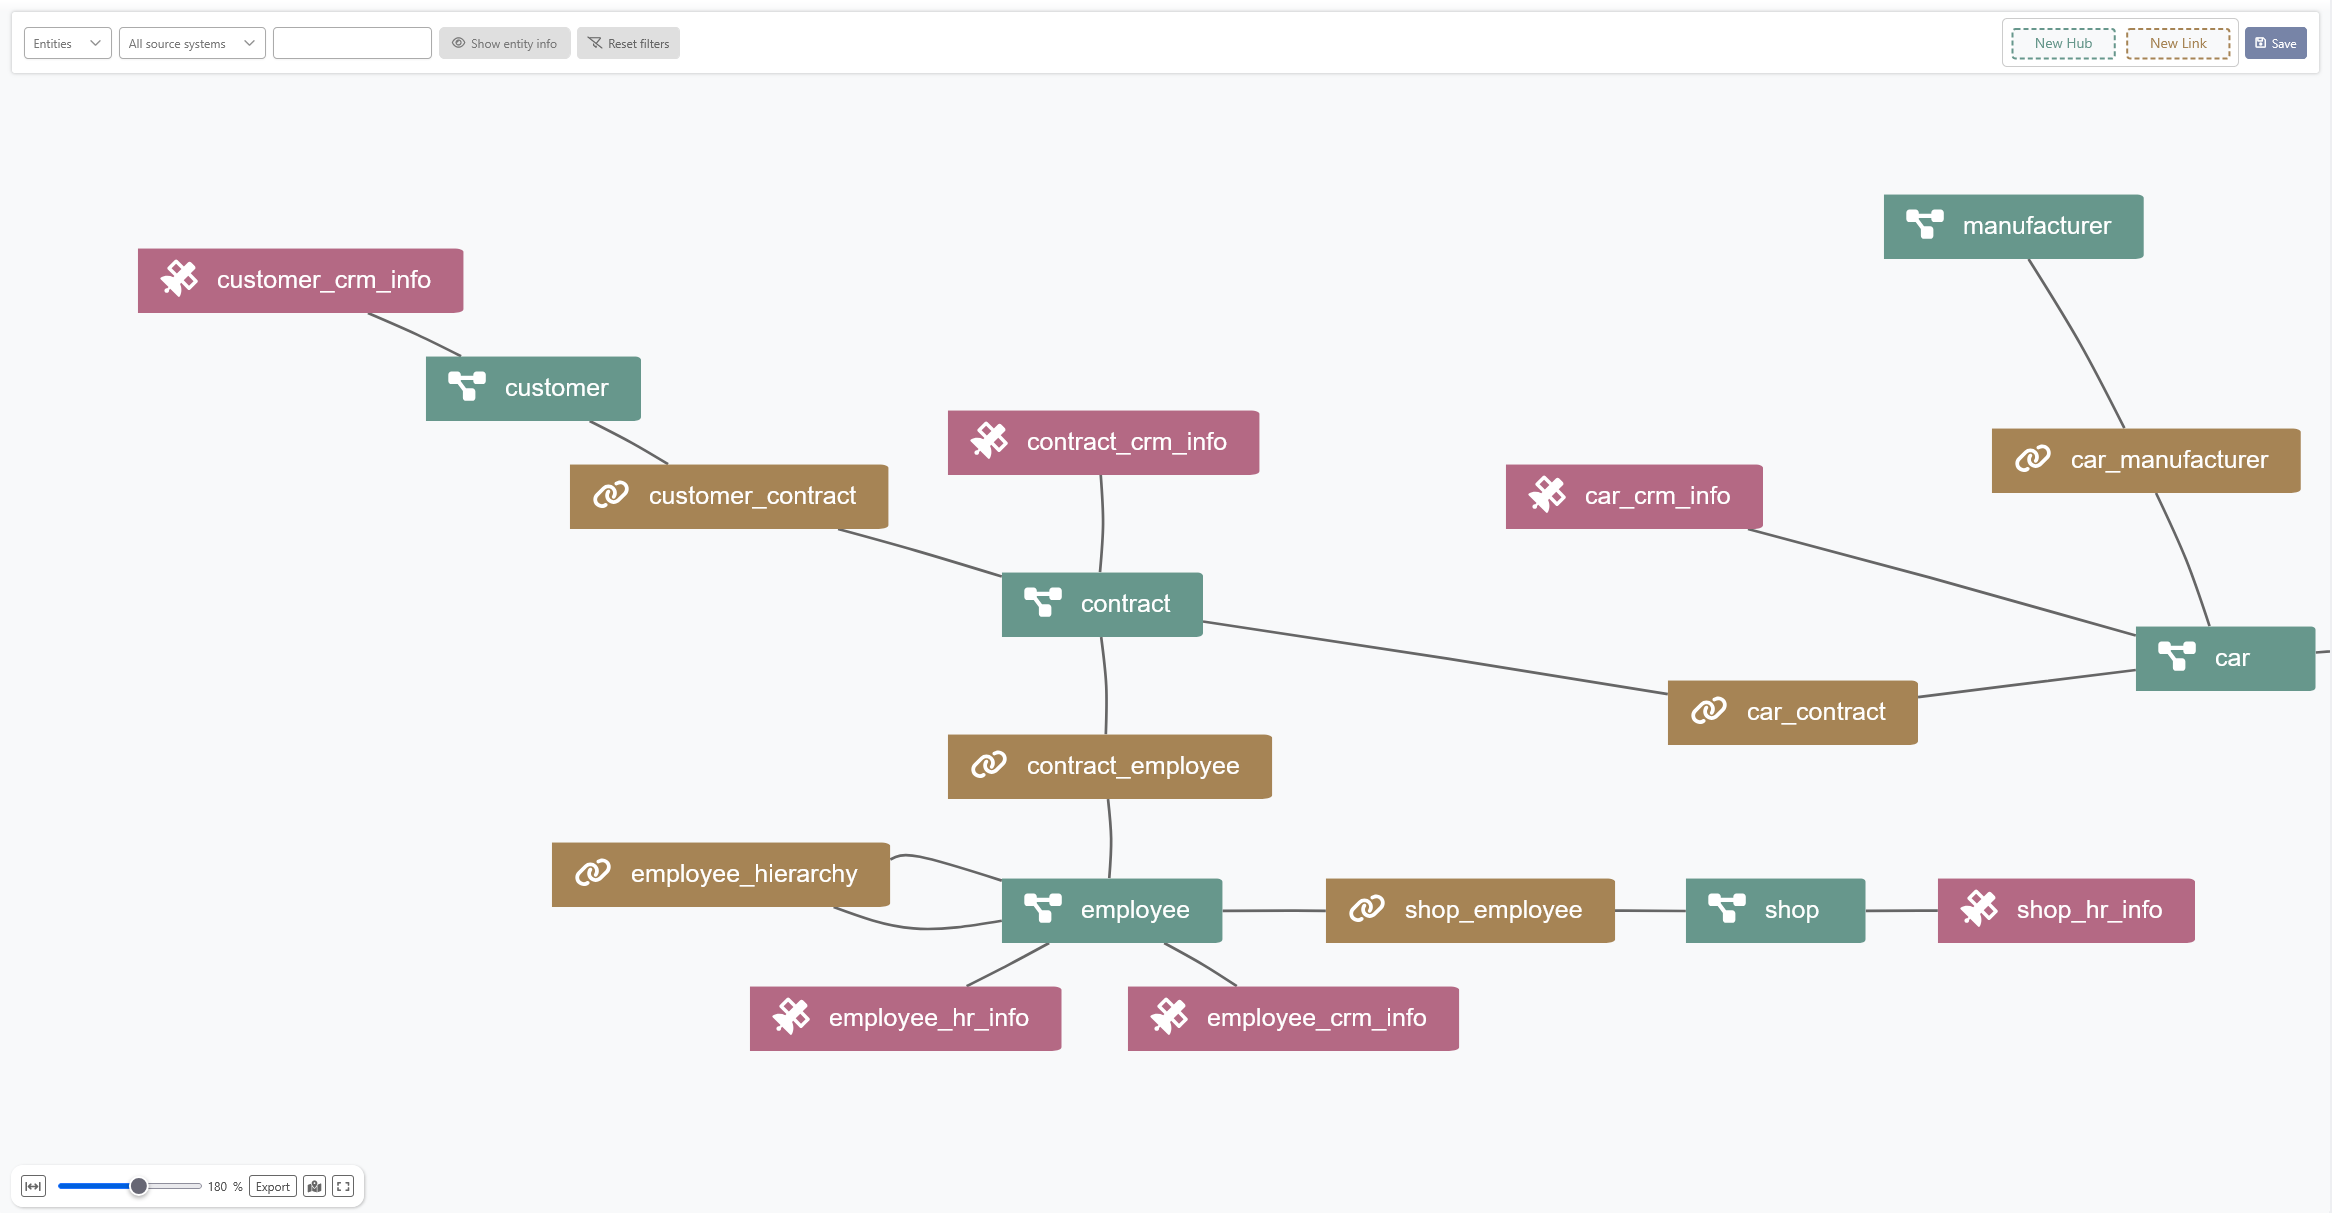
At the end of the process, your data model should look like this: