Ensuring that your data are of good quality is essential to be able to trust and take action based on them. Having the best report in the world is literally useless if the data in it is of poor quality.
In this section, we will see how we can create data quality controls to test the overall data quality of your sources. This way, the data owners will be able to take action and improve the data quality to have better insight.
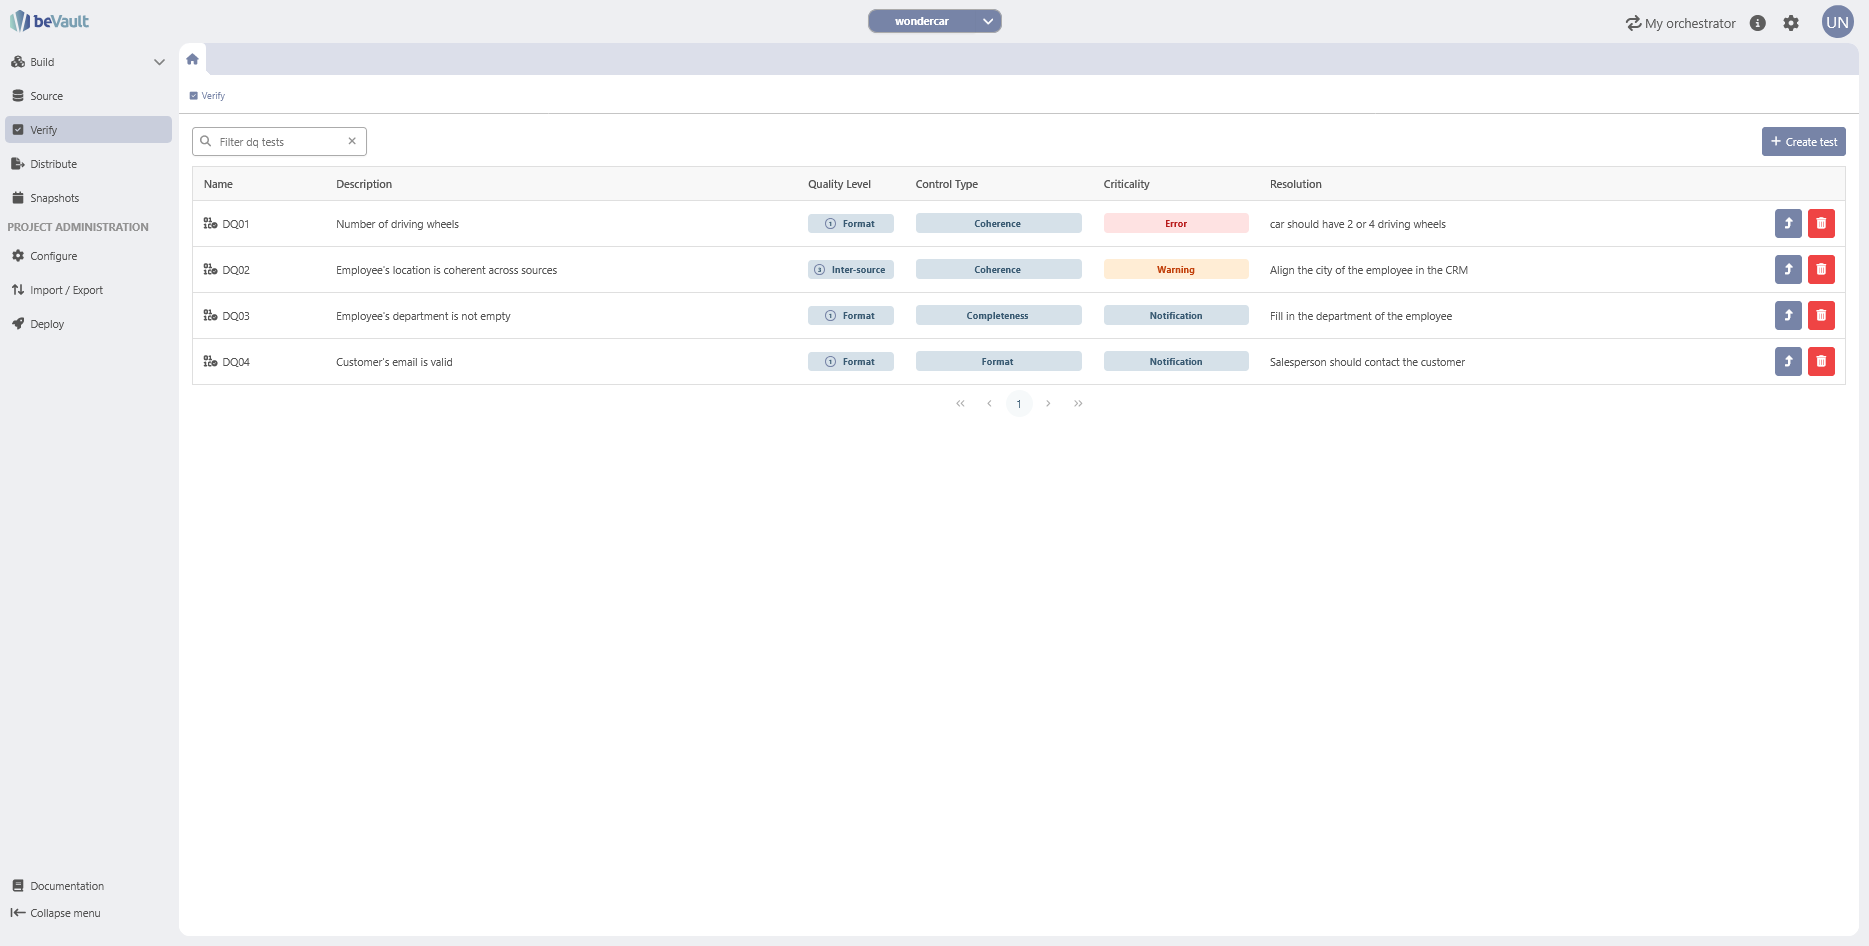
Let’s create a simple data quality test about the number of driving wheels on the cars. For some reason, some cars in the data set provided in the tutorial have 5 driving wheels, which is impossible. To test this information, follow those steps:
-
Navigate to “Verify”
-
Click on the button “Create test” in the upper-right corner. A multistep modal will appear.
-
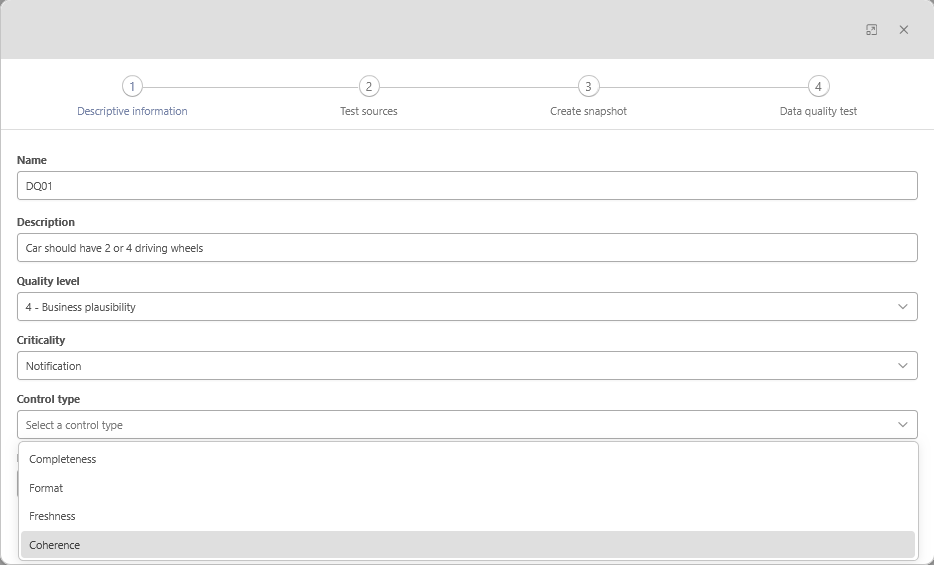
Fill in the descriptive information of the test (more information about the required fields here: Data Quality | Descriptive information)
-
The name is required
-
In this case, the type of test is a business plausibility since it is not coherent to have a car with 5 driving wheels
-
You can choose the criticality that you want
-
The resolution is a descriptive message of the data owner to help him to fix the problem
-
-
Click on “Next”
-
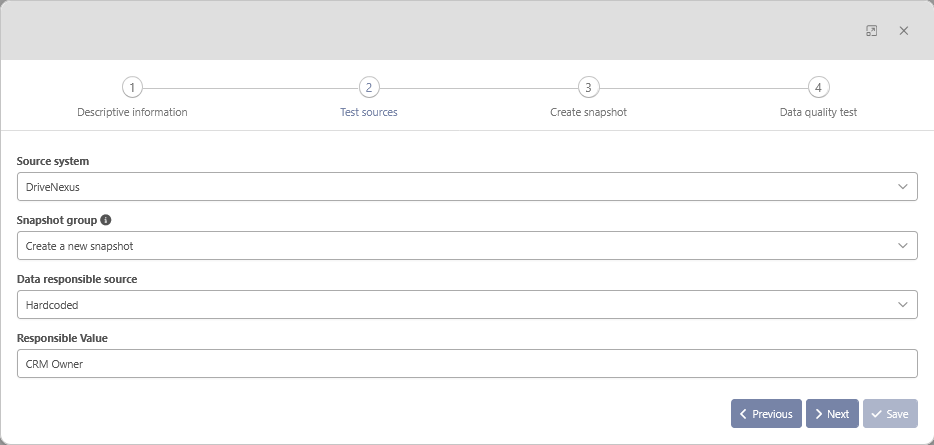
Fill in the source information for your test
-
Select “CRM” for the source system
-
Leave “Create new snapshot” for the snapshot group. If you already have a snapshot, you can select it and skip the next step of the modal.
-
Chose “Hardcoded” for the data responsible source
-
set the value that you want for the responsible
-
click on “Next”
-
-
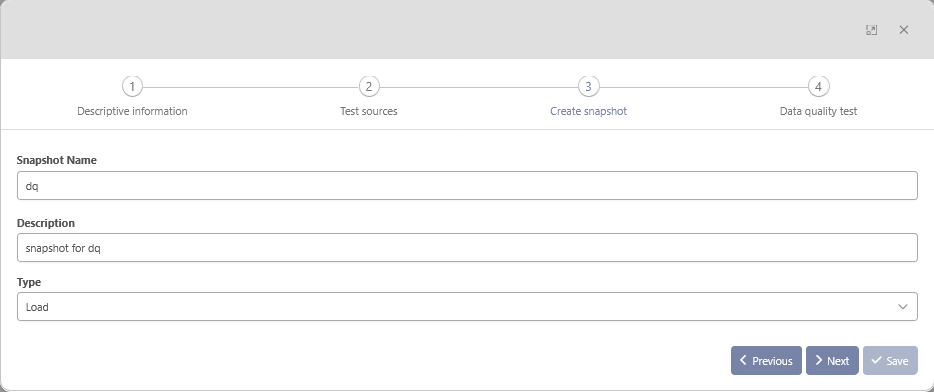
Create the new snapshot (more information here: Snapshots). We will create a snapshot of type “Load”.
-
Set “dq” for the name. It will be used afterward in the state machine autogenerated for the test.
-
Set the description that you want
-
Select “Load”
-
Click on Next
-
-
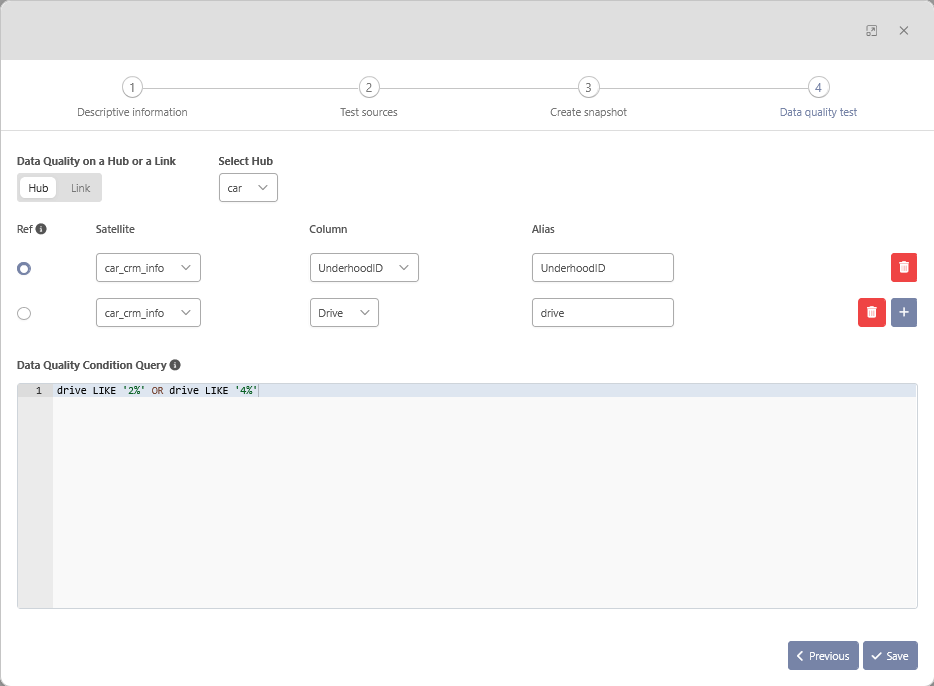
we can now create the test itself
-
Select the hub “car”
-
Select the satellite “car_crm_info” and the column “UnderhoohId”.
-
Check “Ref” for that column. This column will be used as descriptive information about the car that is being tested.
-
-
Click on the ➕ icon on the right
-
Select the satellite “car_crm_info”, the column “UnderhoohId”, and change the alias for “drive”.
-
-
Write the following code in the “Data Quality Condition Query”
SQLdrive LIKE '2%' OR drive LIKE '4%' -
Click on “Save”
The data quality test is now created! We just need to create a new version and deploy it to create the data model in the database and generate all the workflows required to load the data in it. This will be covered in the next section.
After the deployment and the execution of the test (see steps 8 and 9), the list of the data quality controls and their results will be found respectively in the table im.dim_dq_controls and fact_dq_results! (more information on Data Quality | Output)