The Entity submodule is a feature in beVault that provides an overview of the entities within your data model. These entities can be Hubs, Links, and Satellites. This module allows users to have a comprehensive understanding of their data model structure and makes creating and managing these entities straightforward. This submodule is accessible in the “Build” module.
List of entities
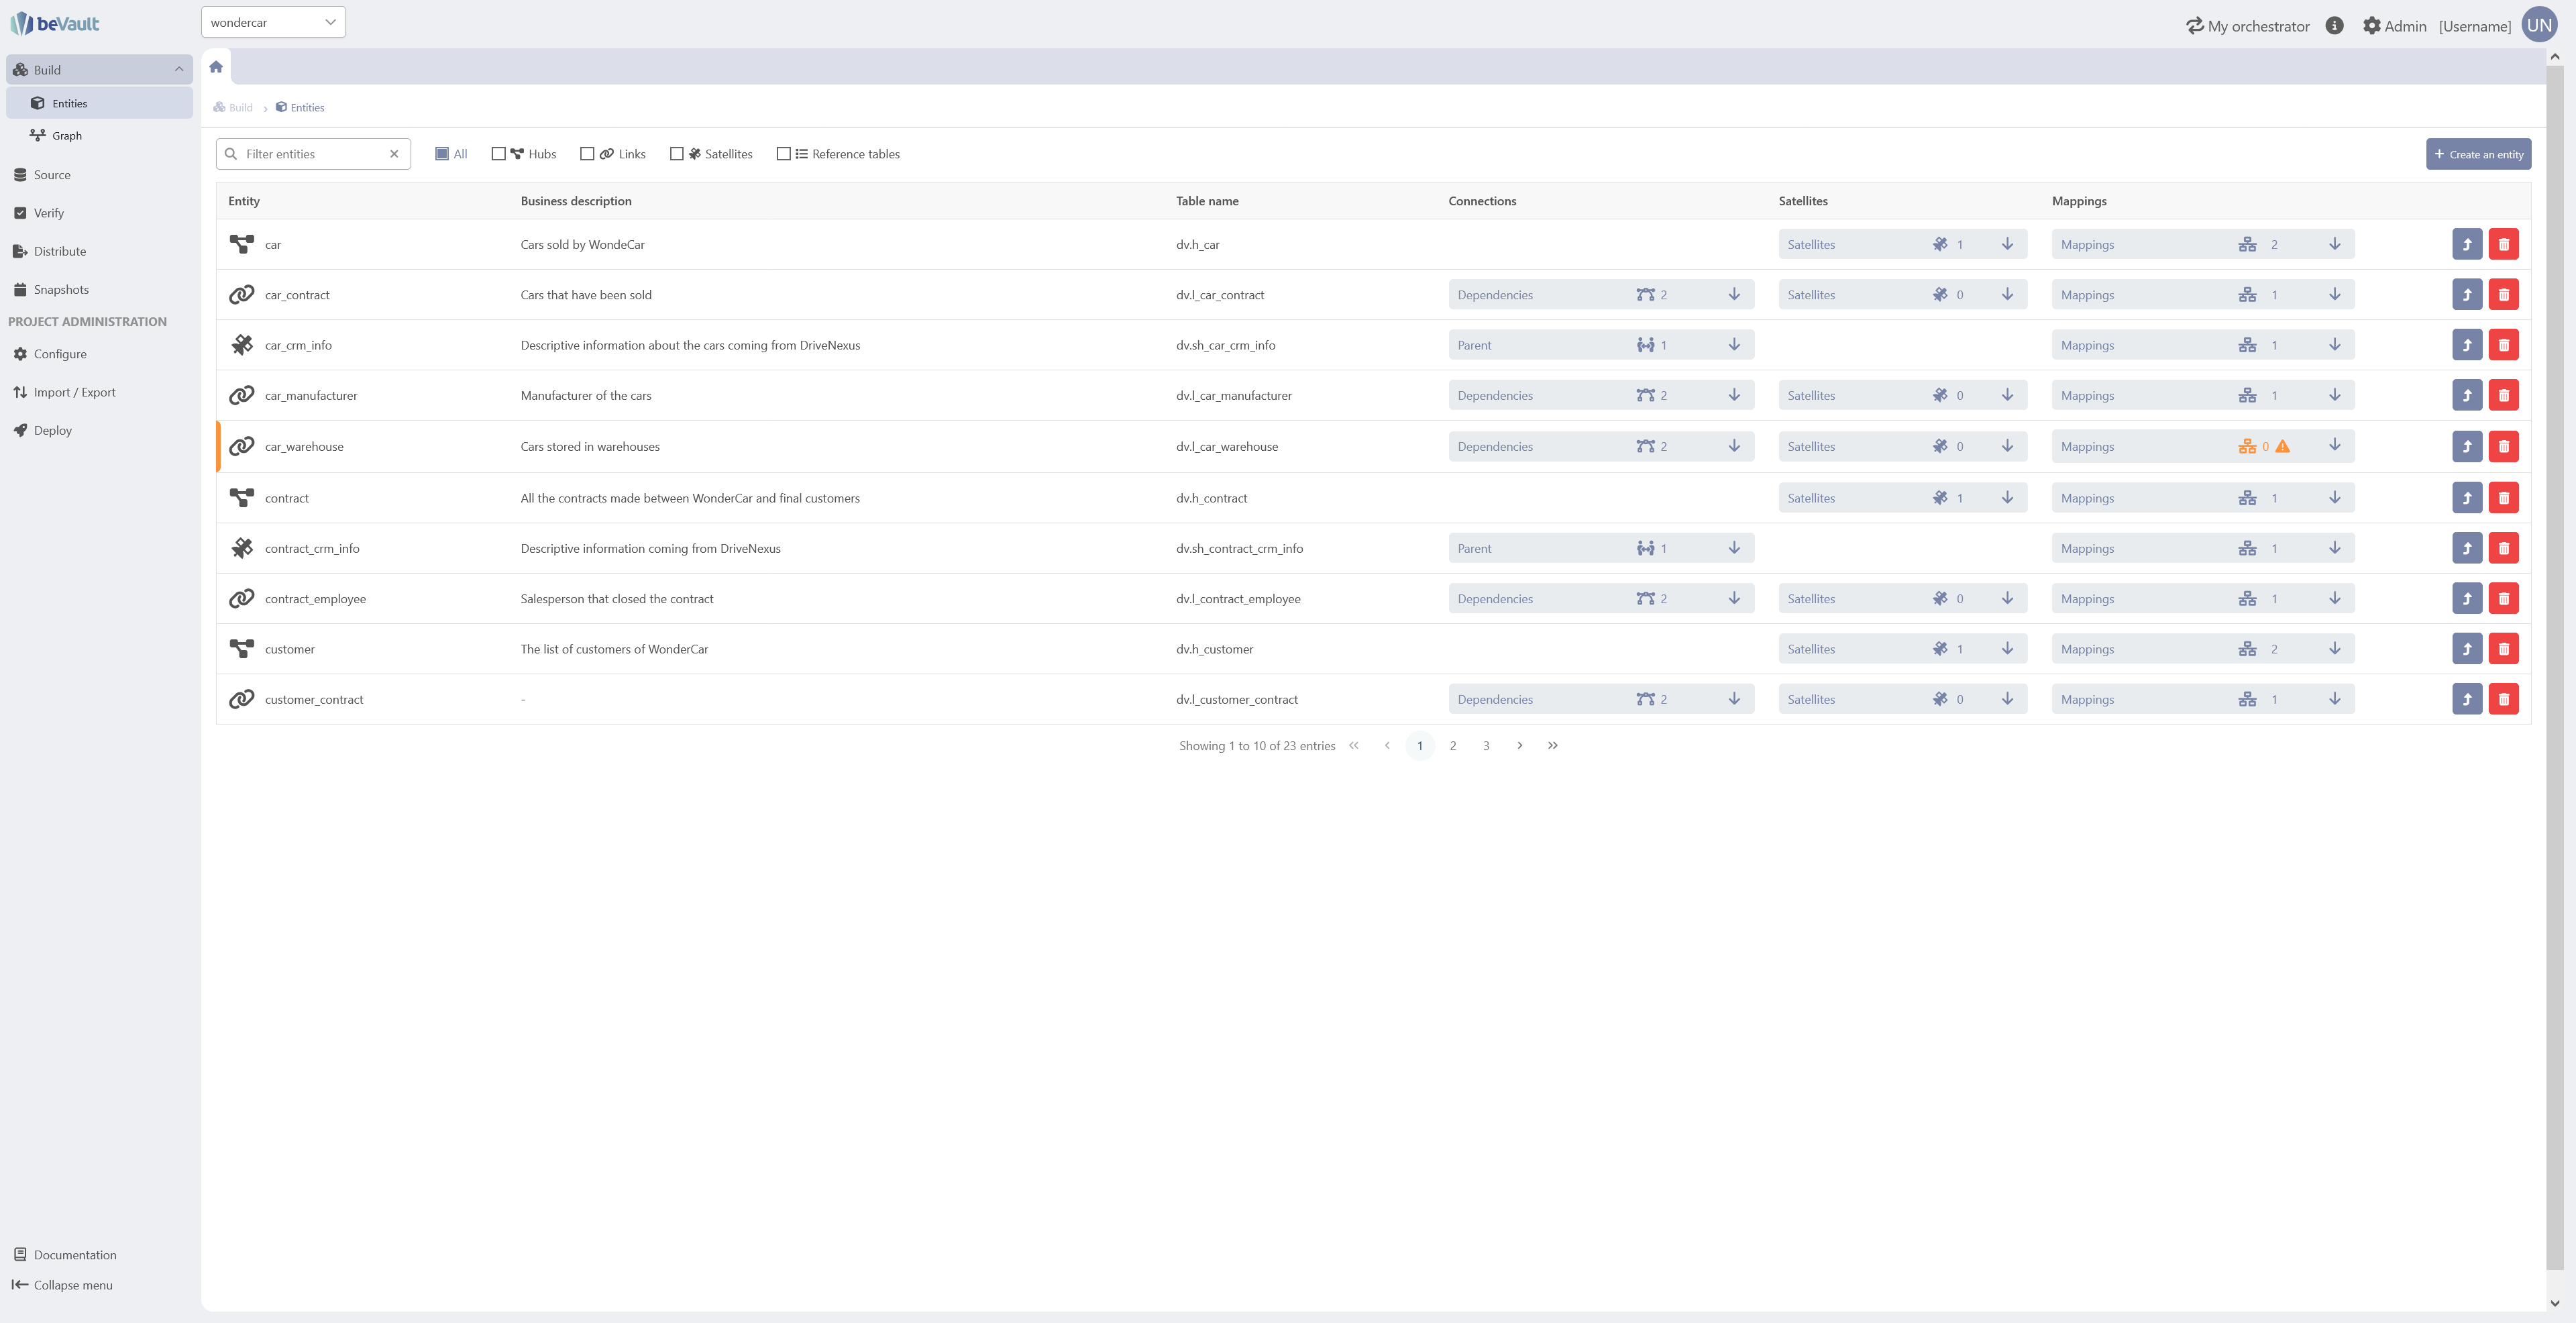
When you arrive at the submodule, you will see the list of entities of your data model. It contains hubs, links, and satellites. This list provides you with a quick overview of the entities as well as useful shortcuts to be able to access detailed information efficiently.
Content of the list view
The list displays a quick summary of the entities and provides some shortcuts to detailed information about them.
-
Entity: type of the entity represented by its icon as well as its name.
-
Business description: A brief description of the entity.
-
Table name: The name of the entity's table in the database.
-
Connections: Parent connections for the satellite and hub references for a link.
-
For the links, you can expand the column by clicking on the “Dependencies” button. It will display the hub references and the dependent children who constitute the link.
You can open the dynamic tab of the hub by clicking on the “Open in a new tab” button.
-
For the satellites, you can expand the column by clicking on the “Parent” button. It will display the parent of the link. You can open the dynamic tab of the parent hub or link by clicking on the “Open in a new tab” button.

-
-
Satellites: Displays the number of satellites attached to the entity. This column can be expanded by clicking on the “Satellites” button to display the list of satellites and allows you to open their dynamic tab with the button “Open in a new tab”.

-
Mappings: Displays the number of mappings attached to that entity in the module “Source” This column can be expanded to see the full list of mapping of the entity.
It allows you to see the source system, the data package, and the id of the mapping. You can also open the staging table (CFR https://dfakto.atlassian.net/l/cp/8AFtUK7o) of the mapping by clicking on the “Open in a new tab” button.
This column is only available for users having the Read permission on the module Source

Navigating the list view
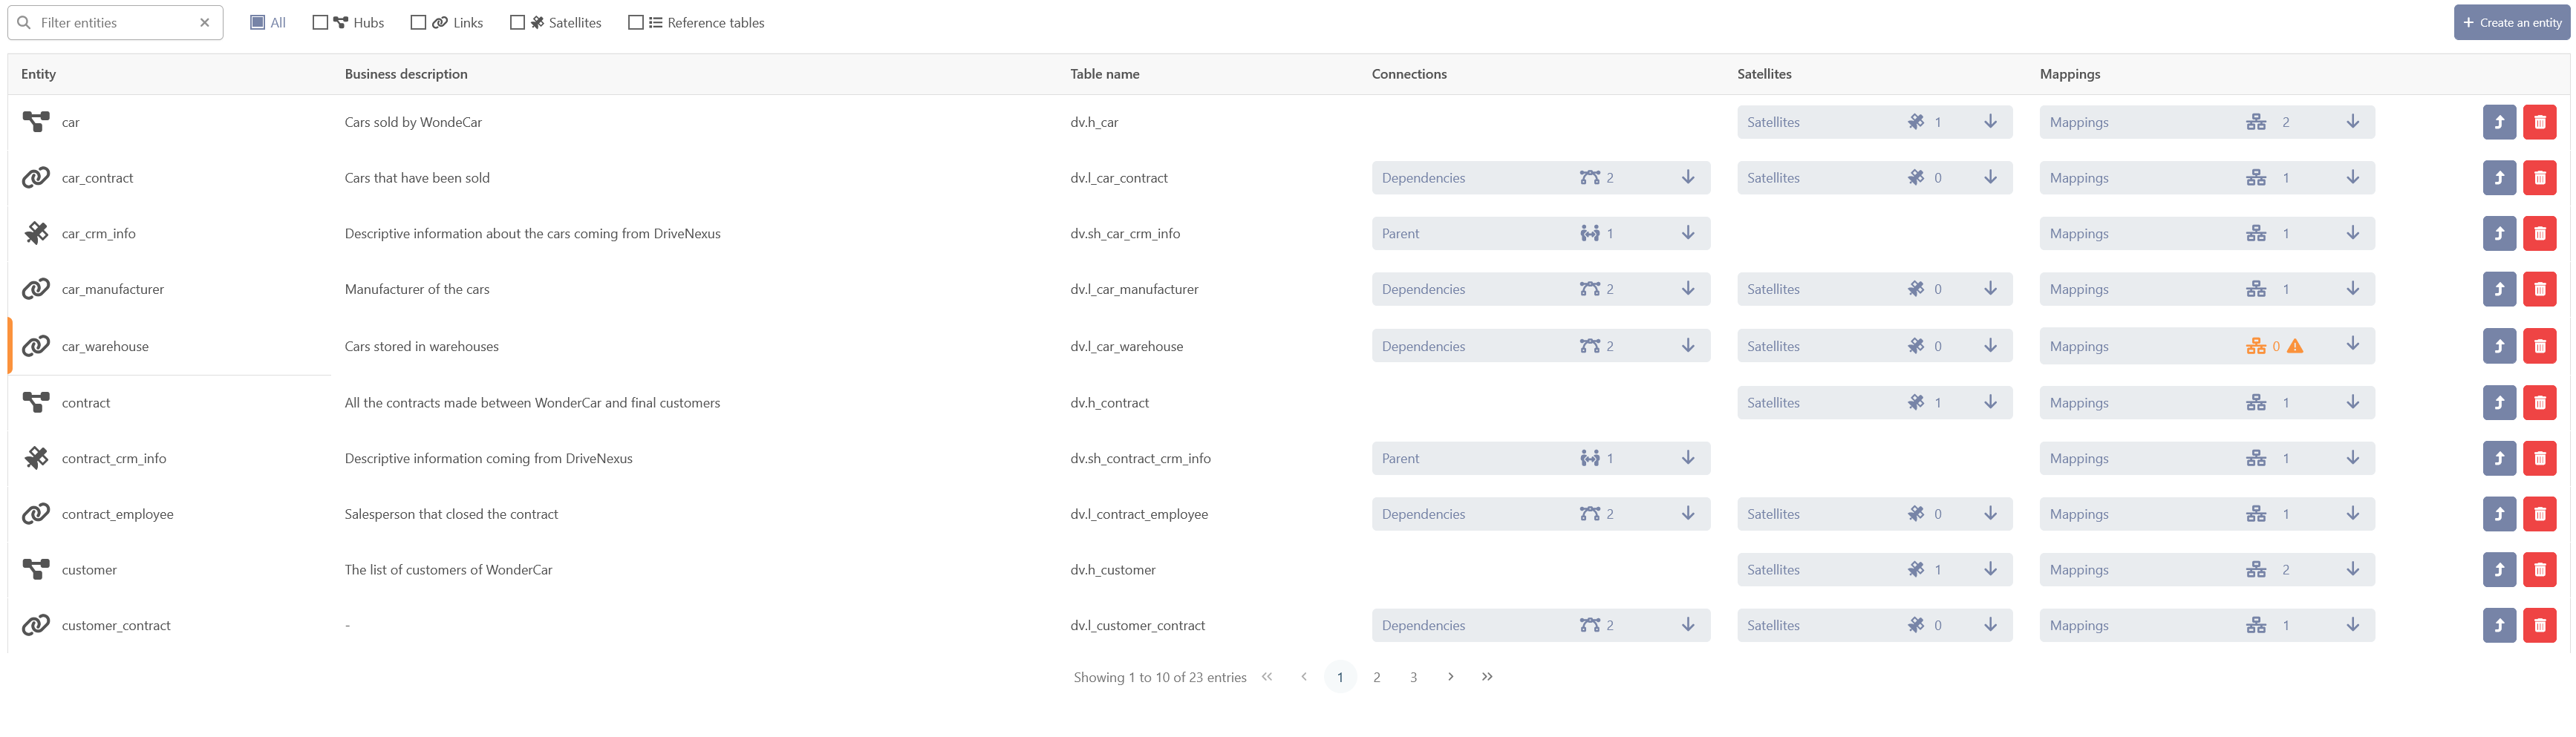
The list of entities provides various filtering options that allow you to swiftly locate entities of interest. This section explains how to use these filters effectively.

Searching for an Entity by Name
Utilize the dedicated search bar to quickly find an entity by its name. Here are the steps:
-
Locate the search bar in the upper-left corner of the Entity submodule.
-
Enter the name of the entity you are searching for.
-
Click on the search button, the list will dynamically update to display entities that match your input.
Filtering by Entity Type
In addition to searching, you can also filter the view based on the type of entity. This feature allows you to selectively display Hubs, Links, and Satellites, enhancing your ability to focus on specific entity types. Follow these steps:
-
Next to the search bar, find the 'Entity Type' filter checkboxes.
-
You can select either 'All' to display all entity types, or select specific types that you wish to view.
-
Upon selection, the list will instantly update to show your chosen entity types.
By using these features, you can ensure that you're working with the exact data entities that align with your current needs, boosting productivity and efficiency within the Entity submodule.
Detect potential errors
Entities that are not mapped to a source system will generate a warning directly in the entity list because that means that they are not currently being used. This is represented by the small orange indicator on the left side of the row and the

Create a new entity
Creating a new hub or link is possible either directly from the graph in the dedicated “Graph editor” submodule or in this one. The creation of satellites is done in the “Source” module, since they are always attached to a source system.
Create a hub
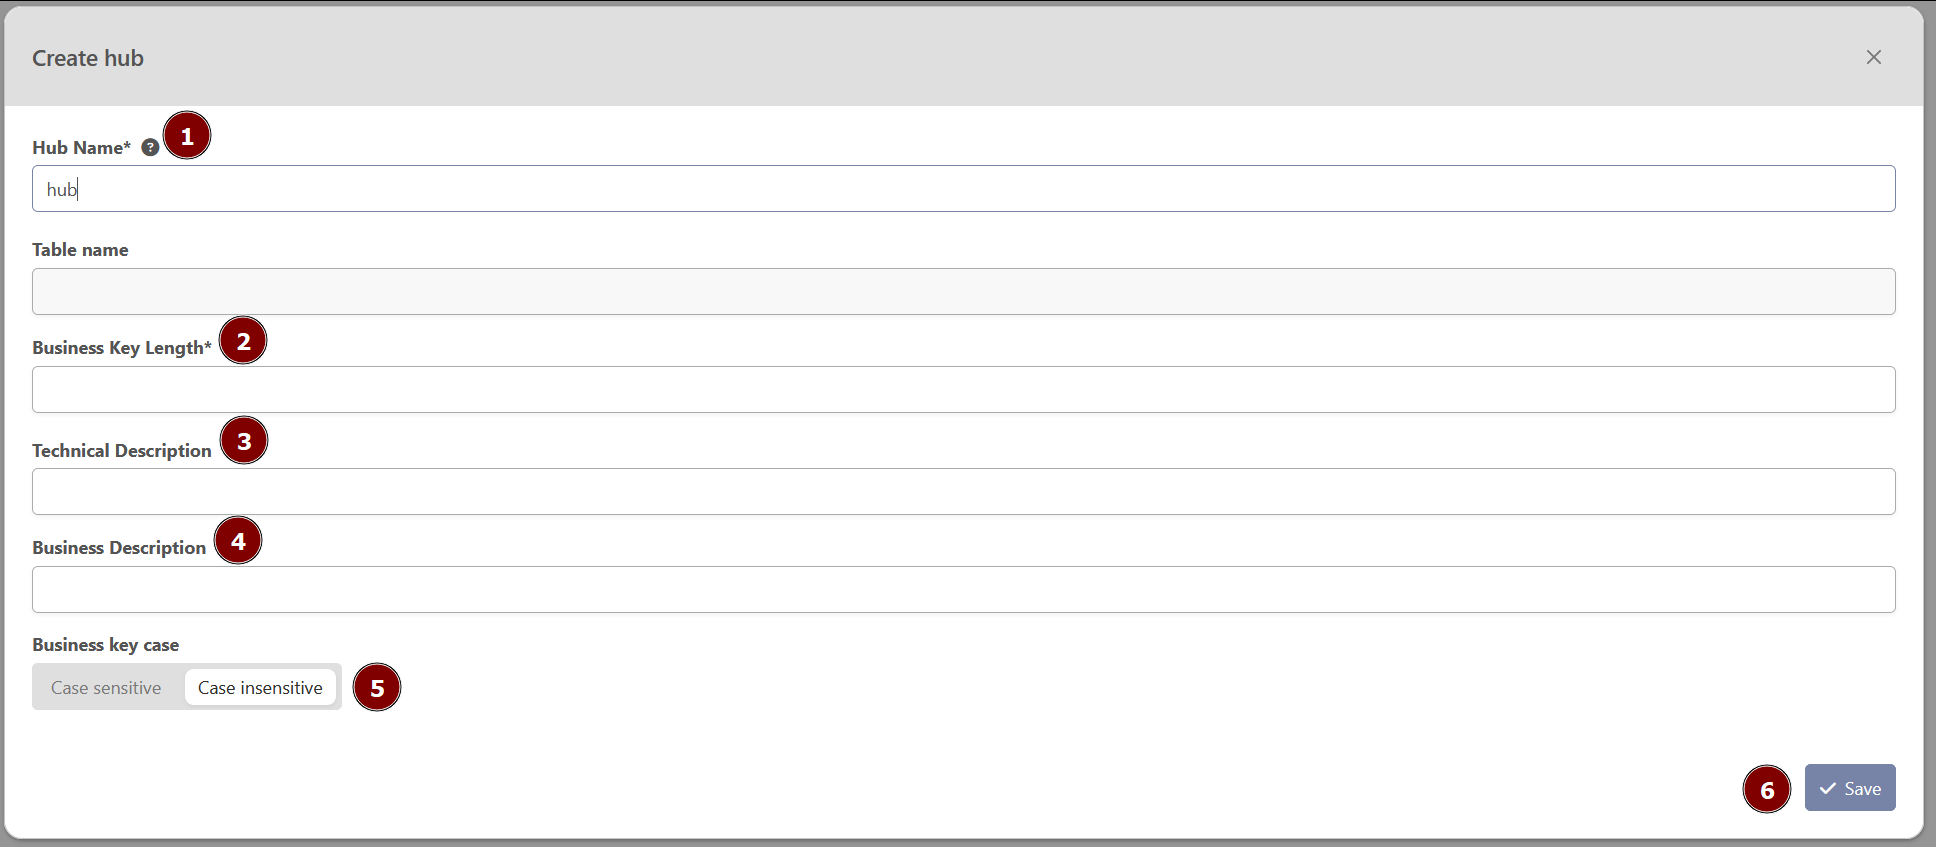
To create a new hub, click on “Create an entity” in the upper-right corner of the submodule and then on “Create a hub”. This will open the hub creation modal.
-
Hub Name (mandatory): The name of the hub. It is pre-filled with the name of the draft node but the users can edit it
-
Business Key Length (mandatory): In beVault, the business keys are always of type varchar (or equivalent depending on the database it is deployed on). This is the length of the column in the database
-
Technical Description: A description for the technical users
-
Business Description: a description for the business users
-
Business key case: Choose whether the business key is case sensitive or not (the colour blue defines the chosen option)
-
Save: this button saves the entity and closes the modal
Create a link
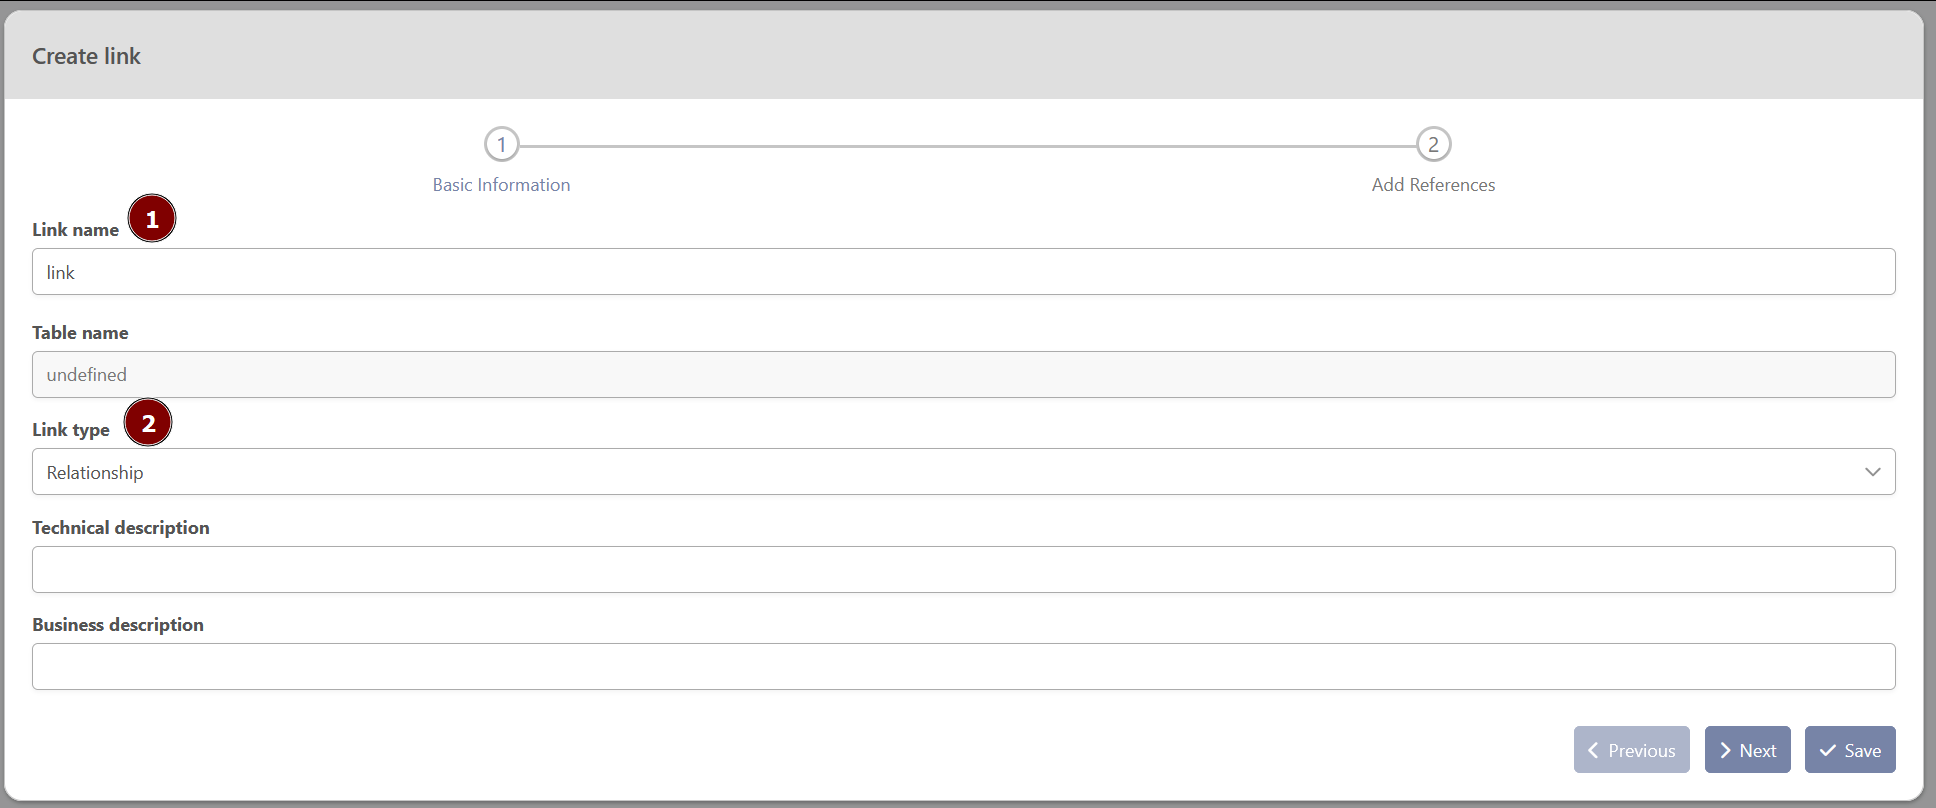
To create a new link, click on “Create an entity” in the upper-right corner of the submodule and then on “Create a link”. This will open the link creation modal.
The link creation consists of a two-step modal with descriptive information about the link and its dependencies.
-
“Basic Information”
-
Link Name (mandatory): The name of the link. It is pre-filled with the name of the draft node but the users can edit it
-
Link Type (mandatory): The type of the link
-
Relationship: This type of link describes a basic relationships between two (or more) hubs. (e.g. the manufacturer of a car)
-
Same as: This type of link is mostly used to map two business keys of a same hub that represent the same business object.
-
Transactional (Non-historized): This type of link represent a relationship that will never change over time. Most of the time, it has a timestamp dependent child. (e.g. an accounting line)
-
Hierarchy: This type of link, as its name suggests, represent a hierarchy on the same hub. (e.g. A manager - employee relationship with only one hub “employee”)
-
-
-
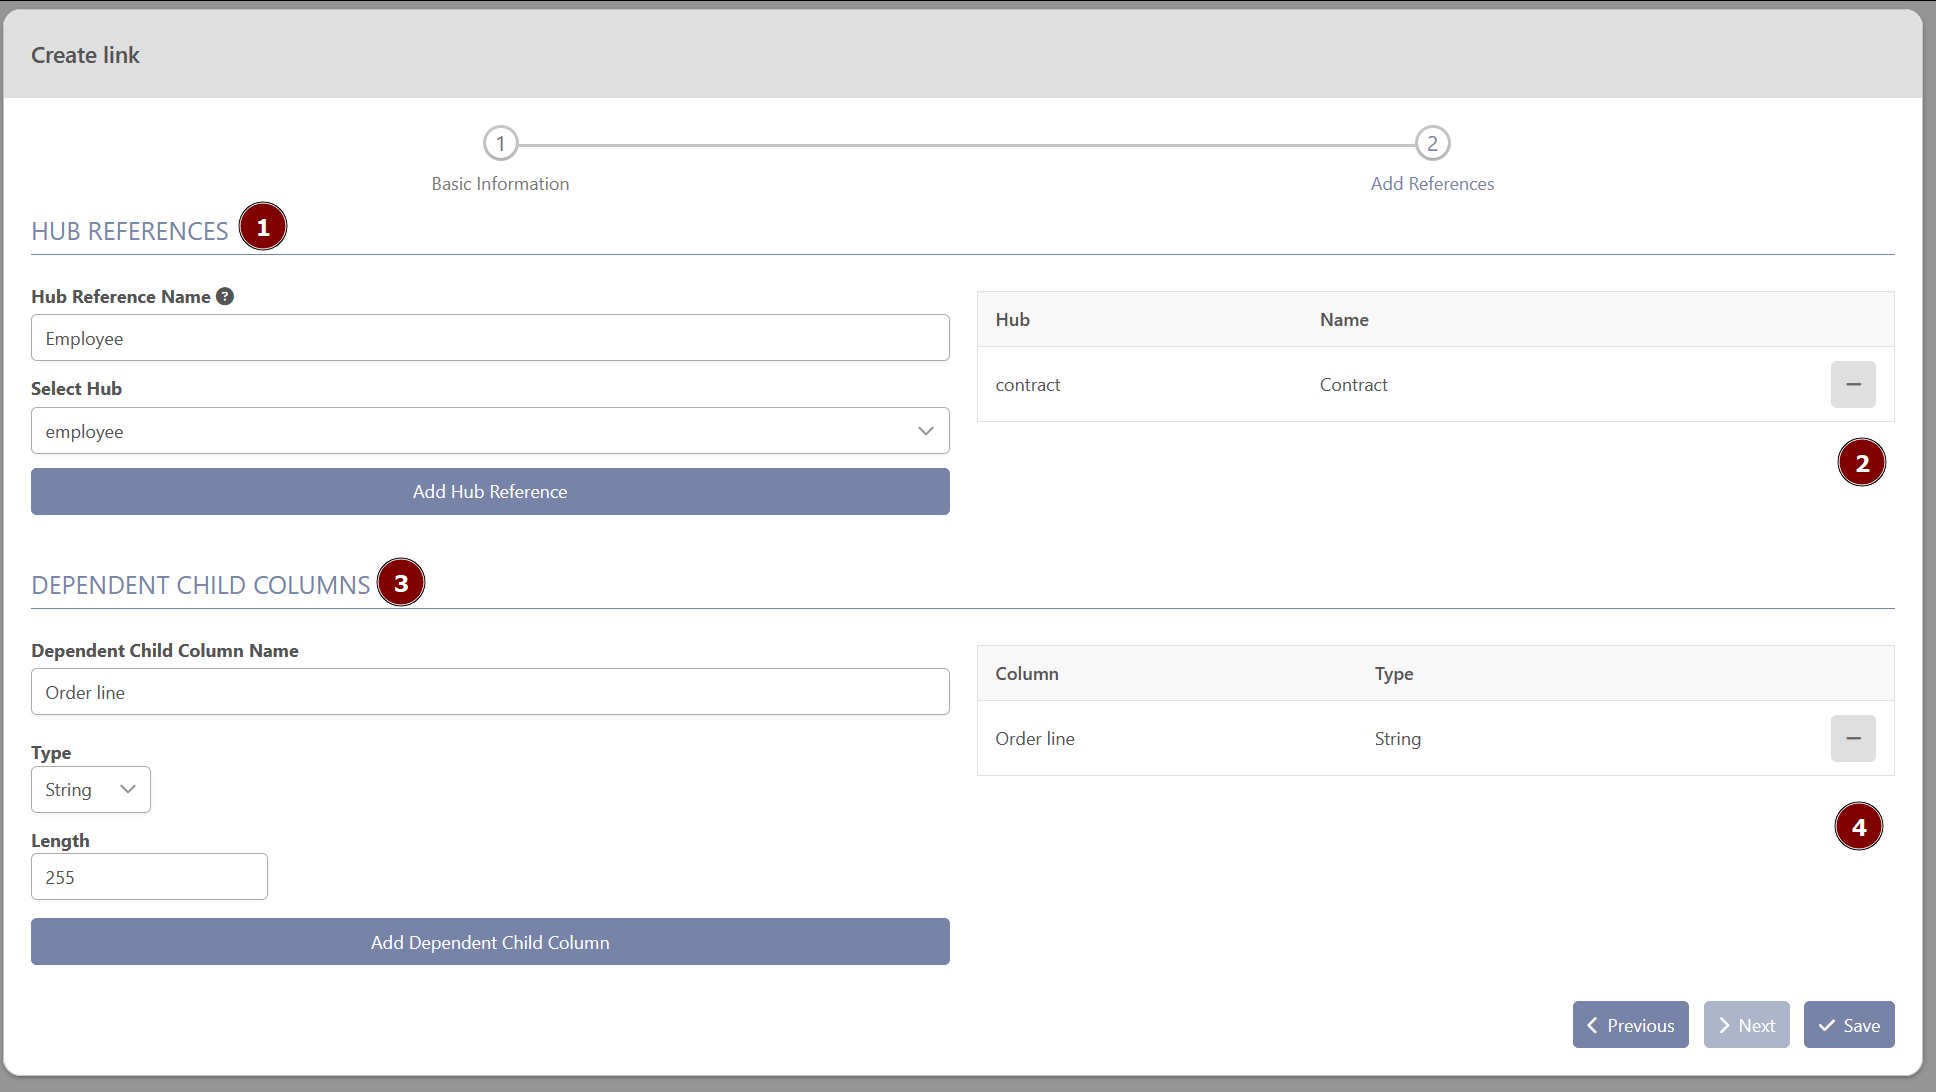
“Add References”
-
The hub references are pre-filled with the attached hubs when using the “Edge mode” feature
-
The users can add a new reference by filling in its name and selecting a hub
-
The users can remove a hub reference by clicking on the “-” button in the list of hub references
-
The users can add some dependent children by filling in its name and type
-
Additional information (lenght, scale and precision, …) may be required depending on the type selected
-
-
The users can remove a dependent child by clicking on the “-” button
-