Prerequisites
This procedure assumes an existing Microsoft Entra ID tenant to which you have at least the right to register a new application (Application Administrator role for example).
Regarding DNS records for Metavault and States in this document, we will use respectivelymodeler.bevault.yourdomain.com & orchestrator.bevault.yourdomain.com
Step-by-step procedure
-
Sign in to the Microsoft Entra ID admin center
-
Browse to Identity > Applications > App registrations and select New registration
-
Enter a display Name for your application and in the Redirect URI section, select the Single-page application (SPA) option and enter the public domain of the metavault (modelling part of beVault)
-
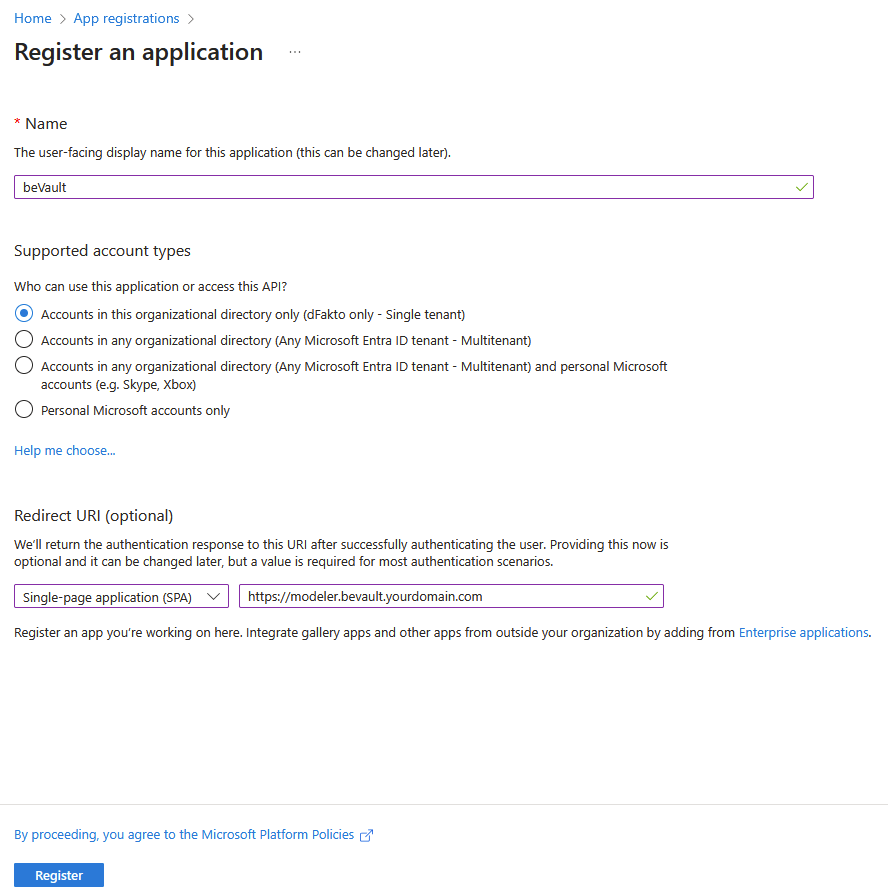
Take note of the Application (client) ID and the Directory (tenant) ID
-
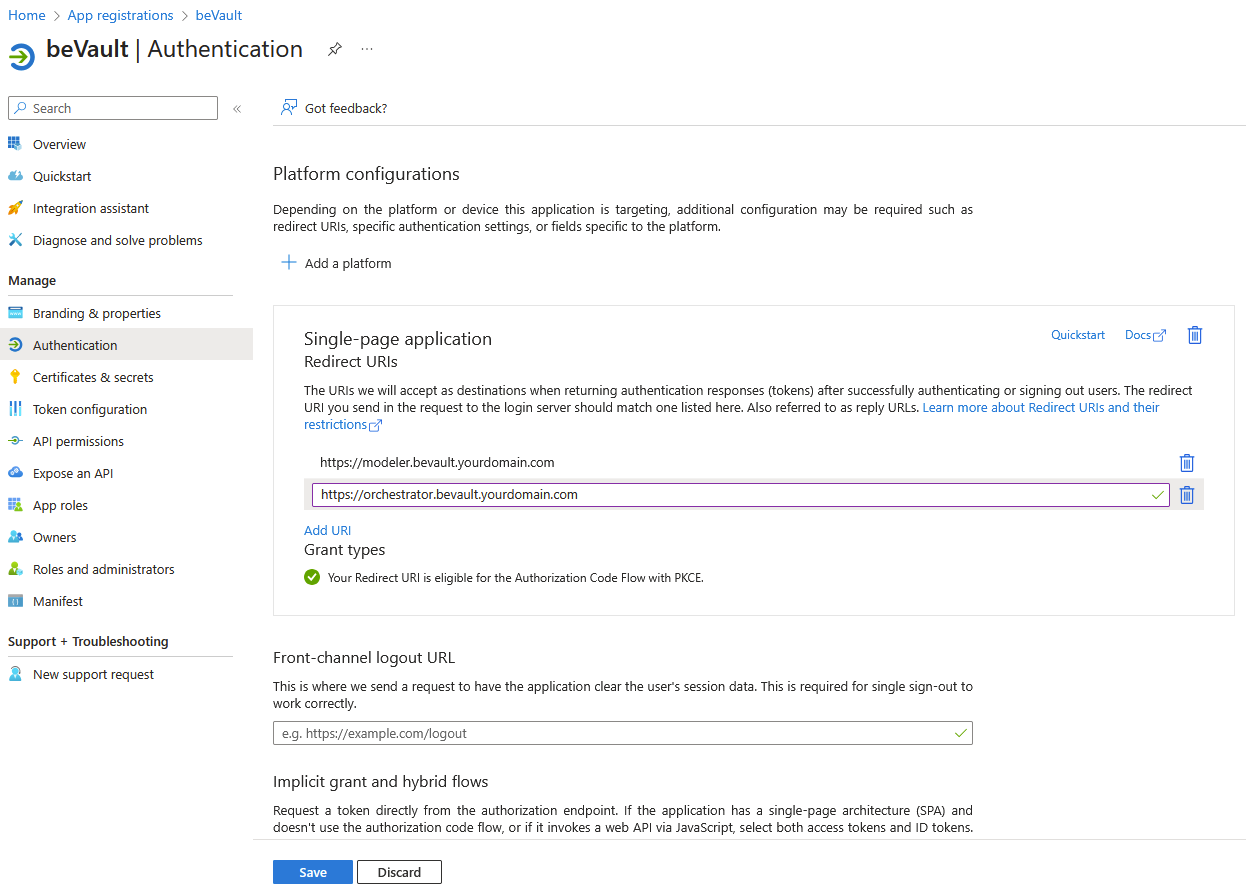
Browse to Authentication > Platform configurations > Single-page application and add the base url of States (orchestration part of beVault)
-
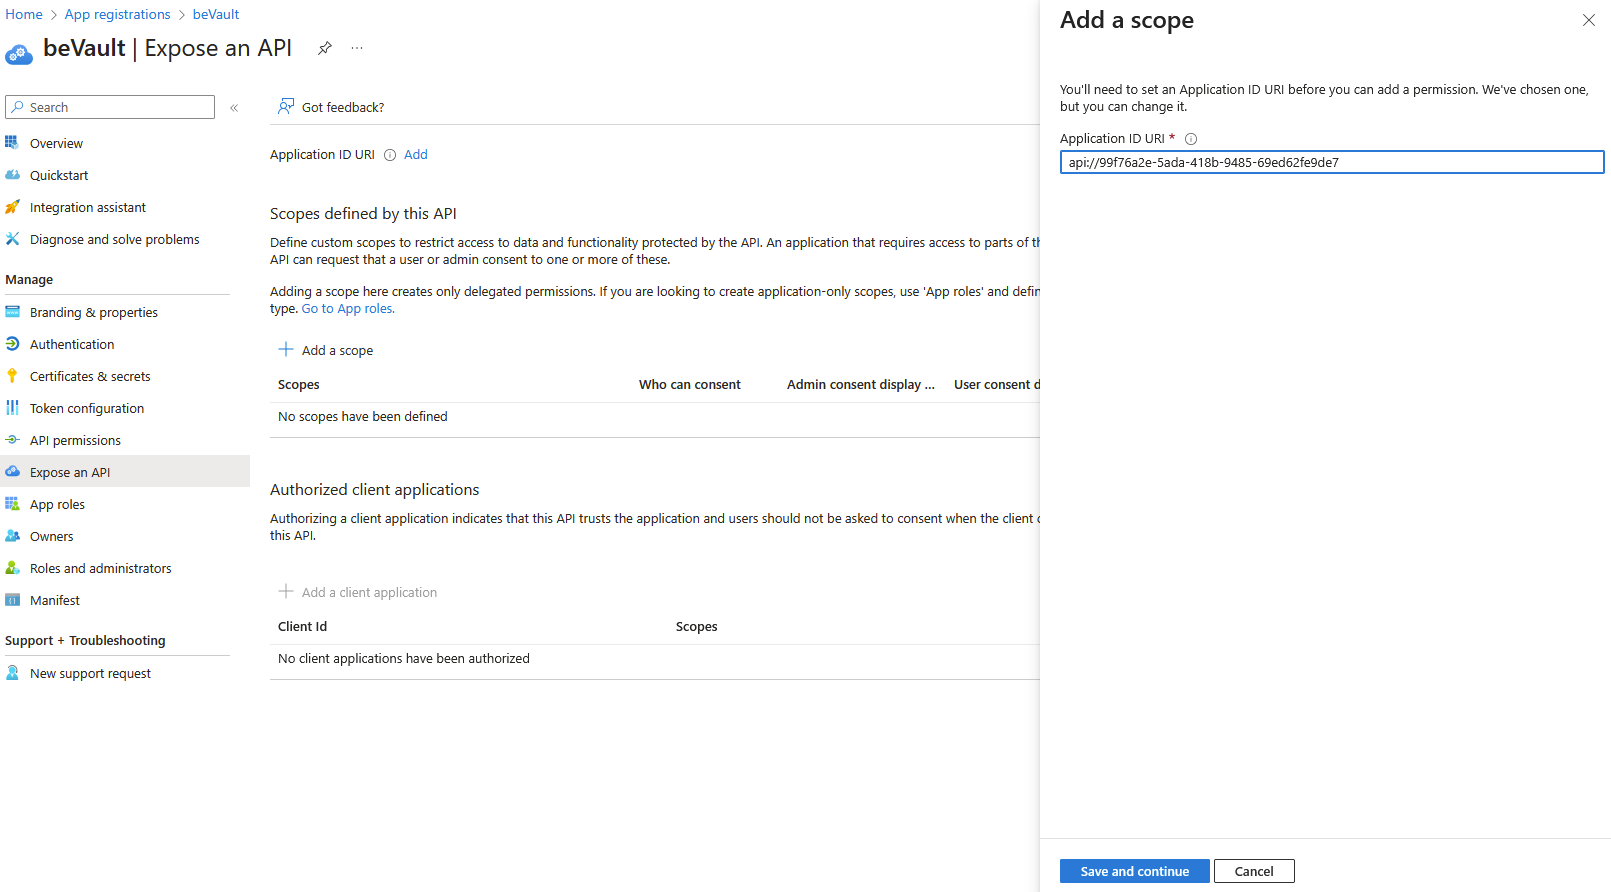
Browse to Expose an API > Scopes defined by this API, create a new scope and let the default Application ID URI
-
Complete the scope form
-
Scope name→ api -
Who can consent ?→ Admins and users -
Admin consent display name→ Access beVault -
Admin consent description→ Allow access to beVault application -
User consent display name→ Access beVault -
User consent description→ Allow access to beVault application -
State→ Enabled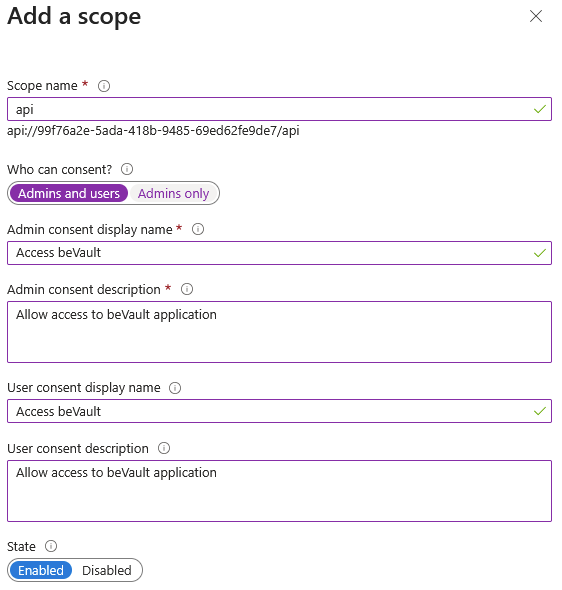
-
-
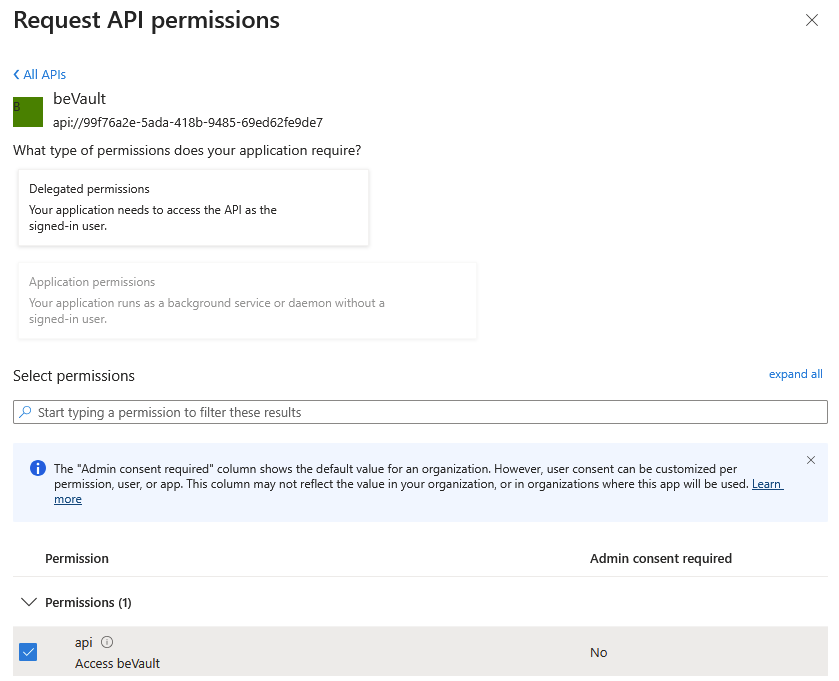
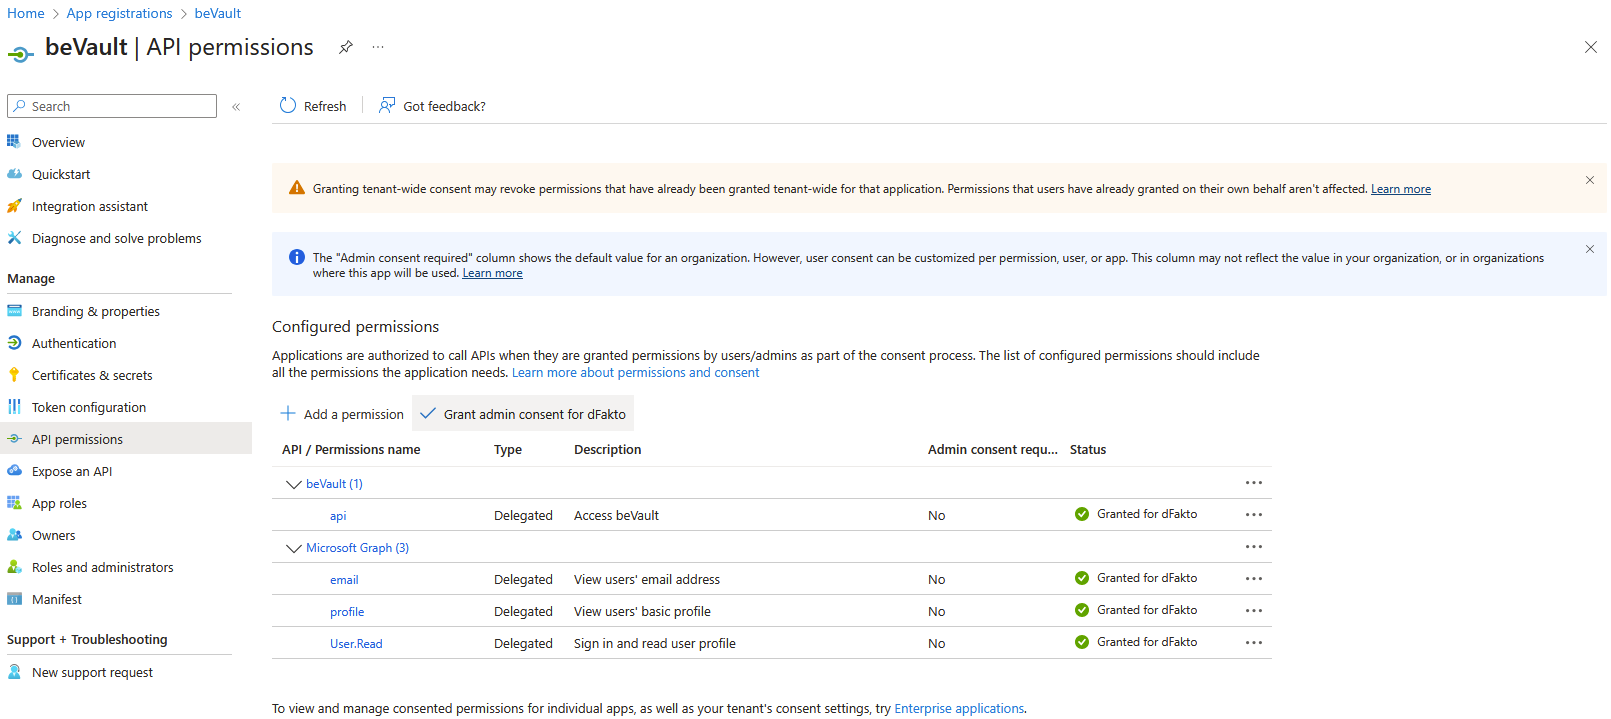
Browse to API permissions > Configured permissions, add a new permission, search for the application name you just created and select it
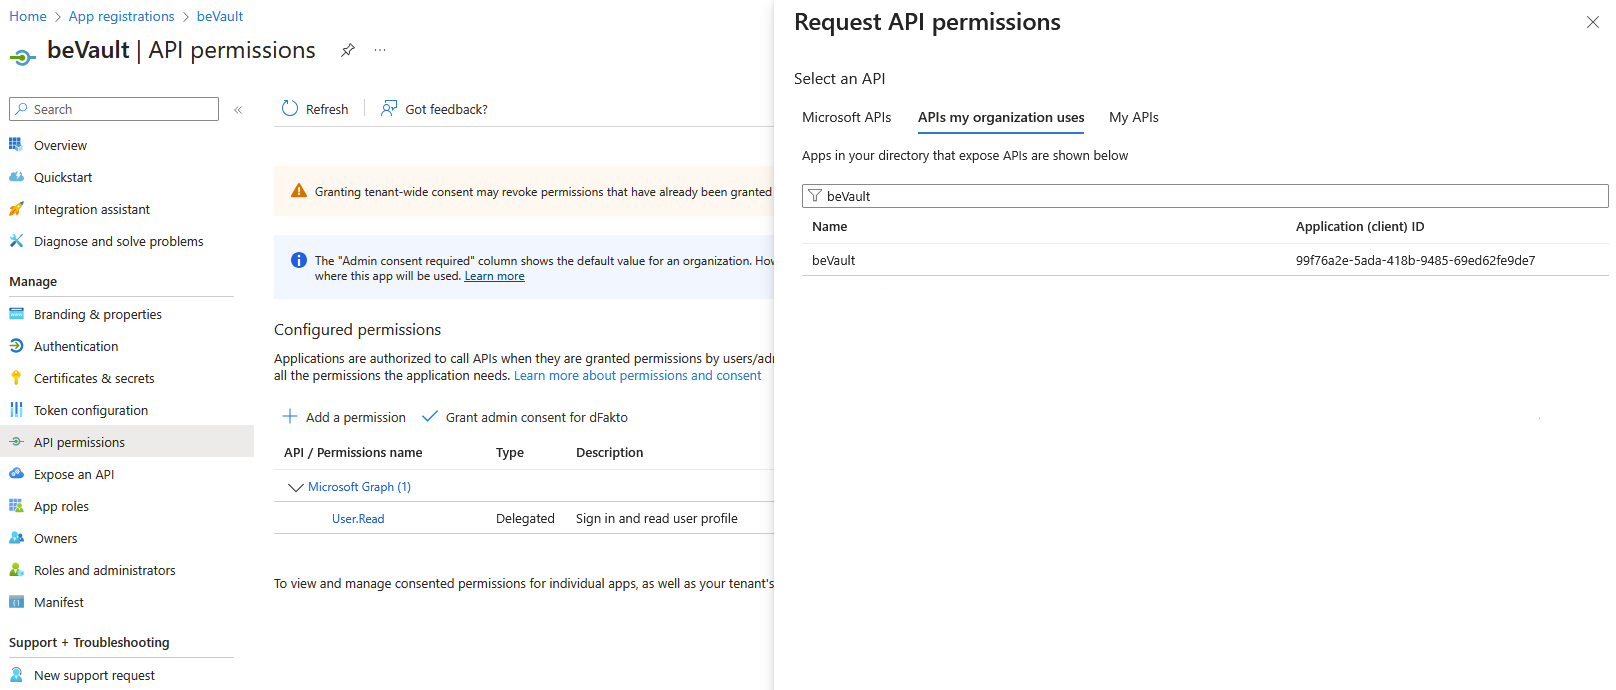
-
In the permissions section, ensure to check the api checkbox
-
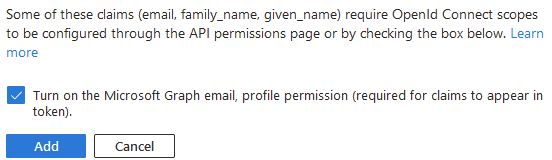
Browse to Token configuration > Optional claims and add an optional claim. Select Access as Token type and enabled email, family_name and given_name claims
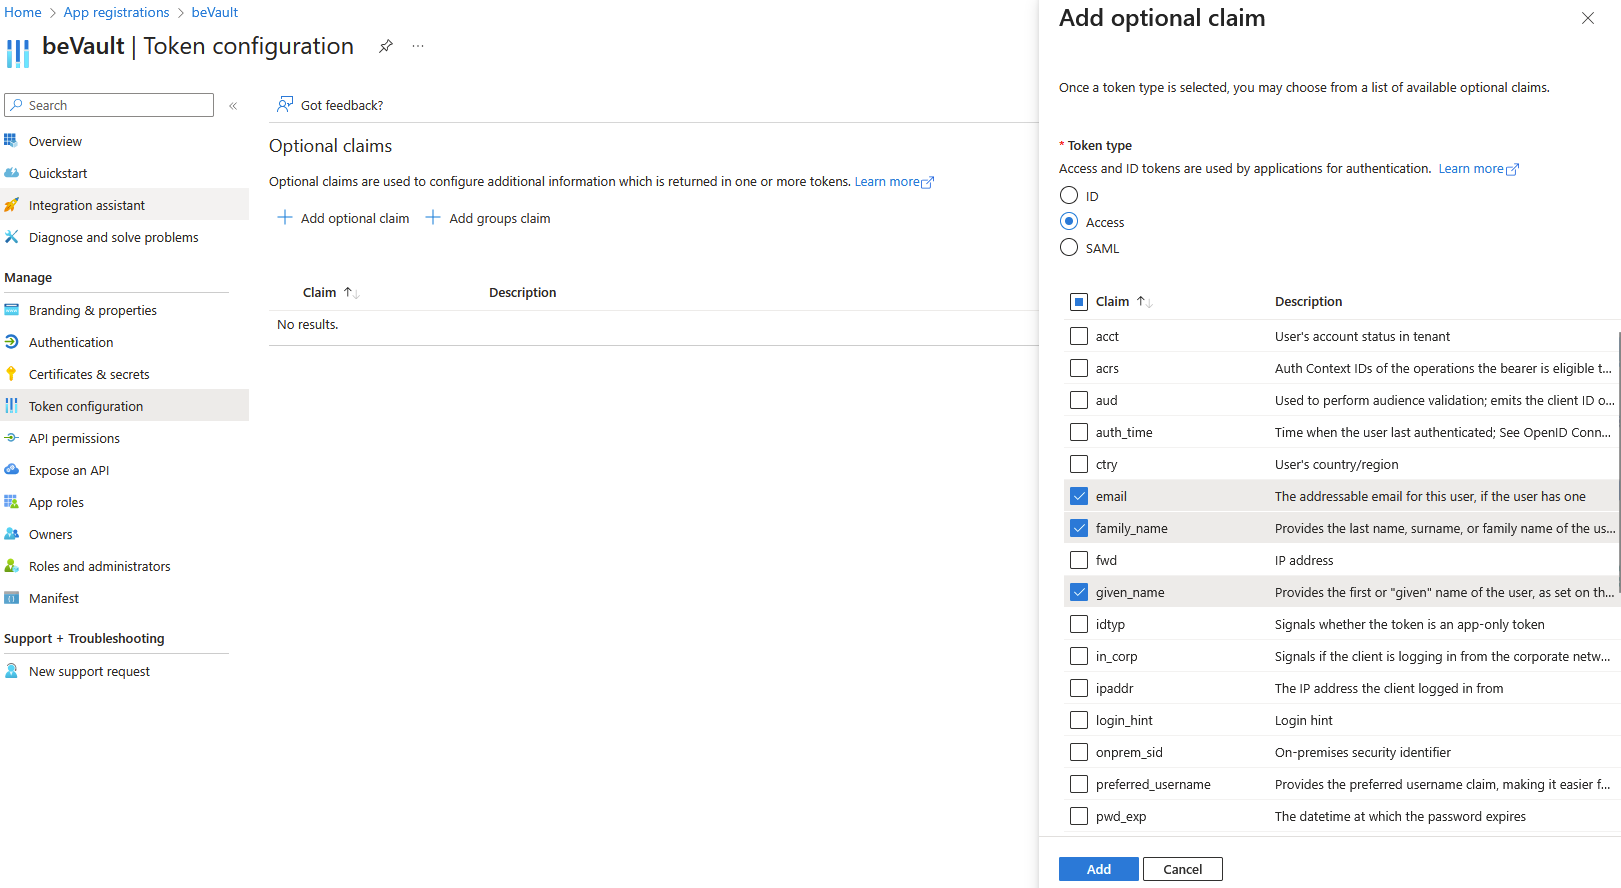
-
Accept to turn on the additional permissions proposed in the popup
-
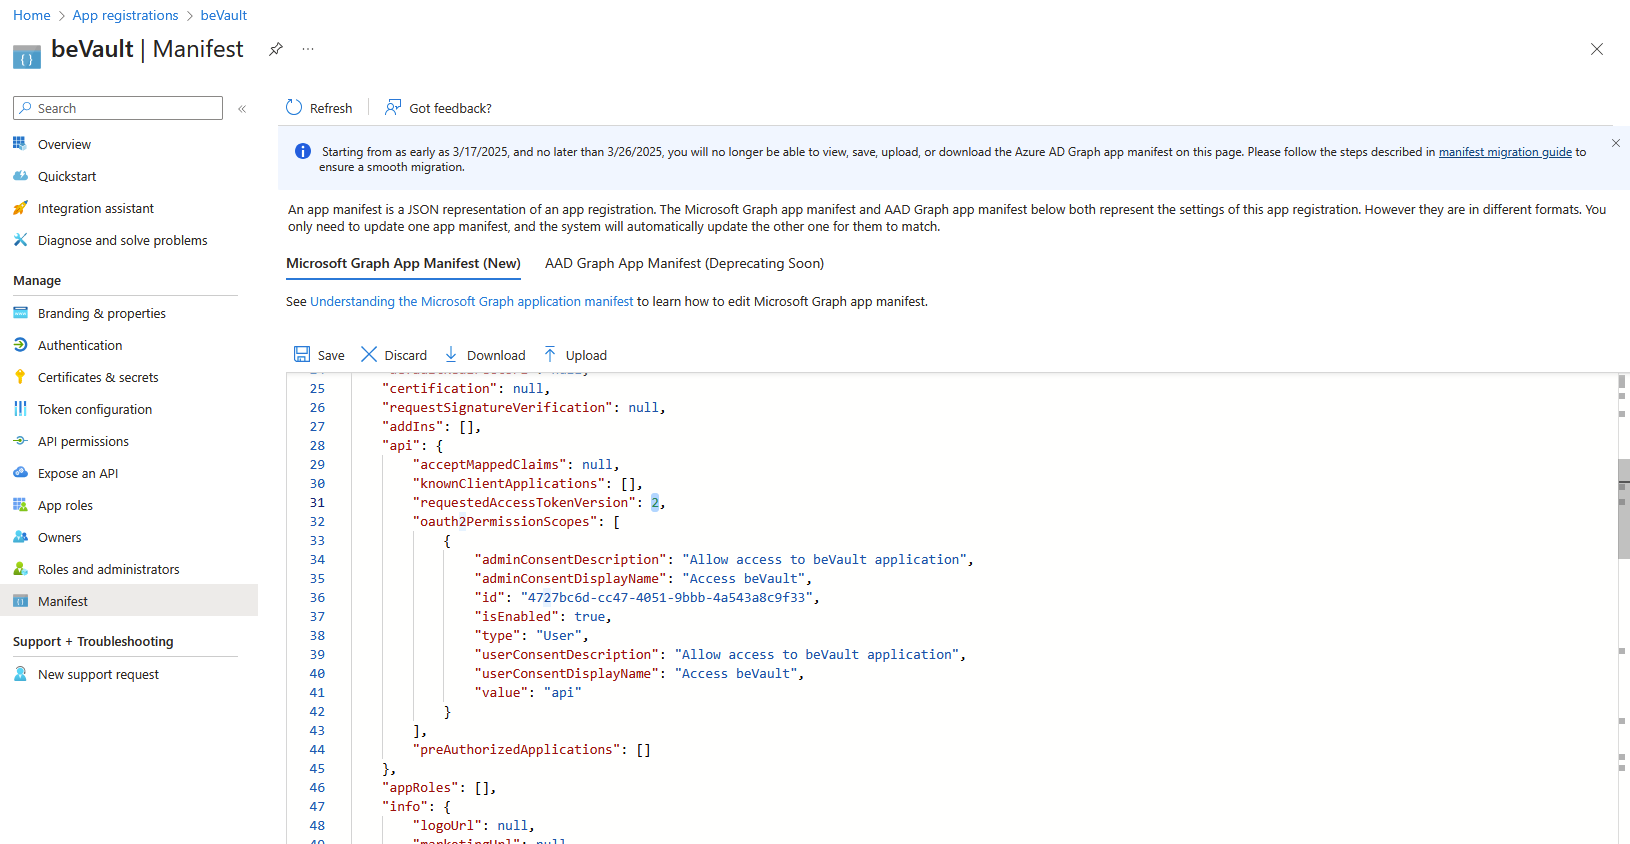
Browse to Manifest (Microsoft Graph App Manifest (New)) and change the value for requestedAccessTokenVersion to 2 (instead of null) in api attribute then click on Save button
-
Optional: If you want to grant consent for all users to the application, browse to API permissions > Configured permissions and click on the Grant admin consent for dFakto button
-
Adapt metavault and states components configuration, see Metavault Configuration | Authentication& States Configuration | Authentication (see step 4 of this procedure for <Directory (tenant) ID> & <Application (client) ID>)
-
Authority→ https://login.microsoftonline.com/<Directory (tenant) ID>/v2.0 -
ClientId→ <Application (client) ID> -
Audience→ <Application (client) ID> -
Scope→ api://<Application (client) ID>/api profile email openid
-
Go further
-
Standard documentation regarding application registration → https://learn.microsoft.com/en-us/entra/identity-platform/quickstart-register-app
-
Limit access to some users or groups to the application → https://learn.microsoft.com/en-us/entra/identity-platform/howto-restrict-your-app-to-a-set-of-users