This submodule allows you to manage the environments on which you will deploy versions of your data warehouse
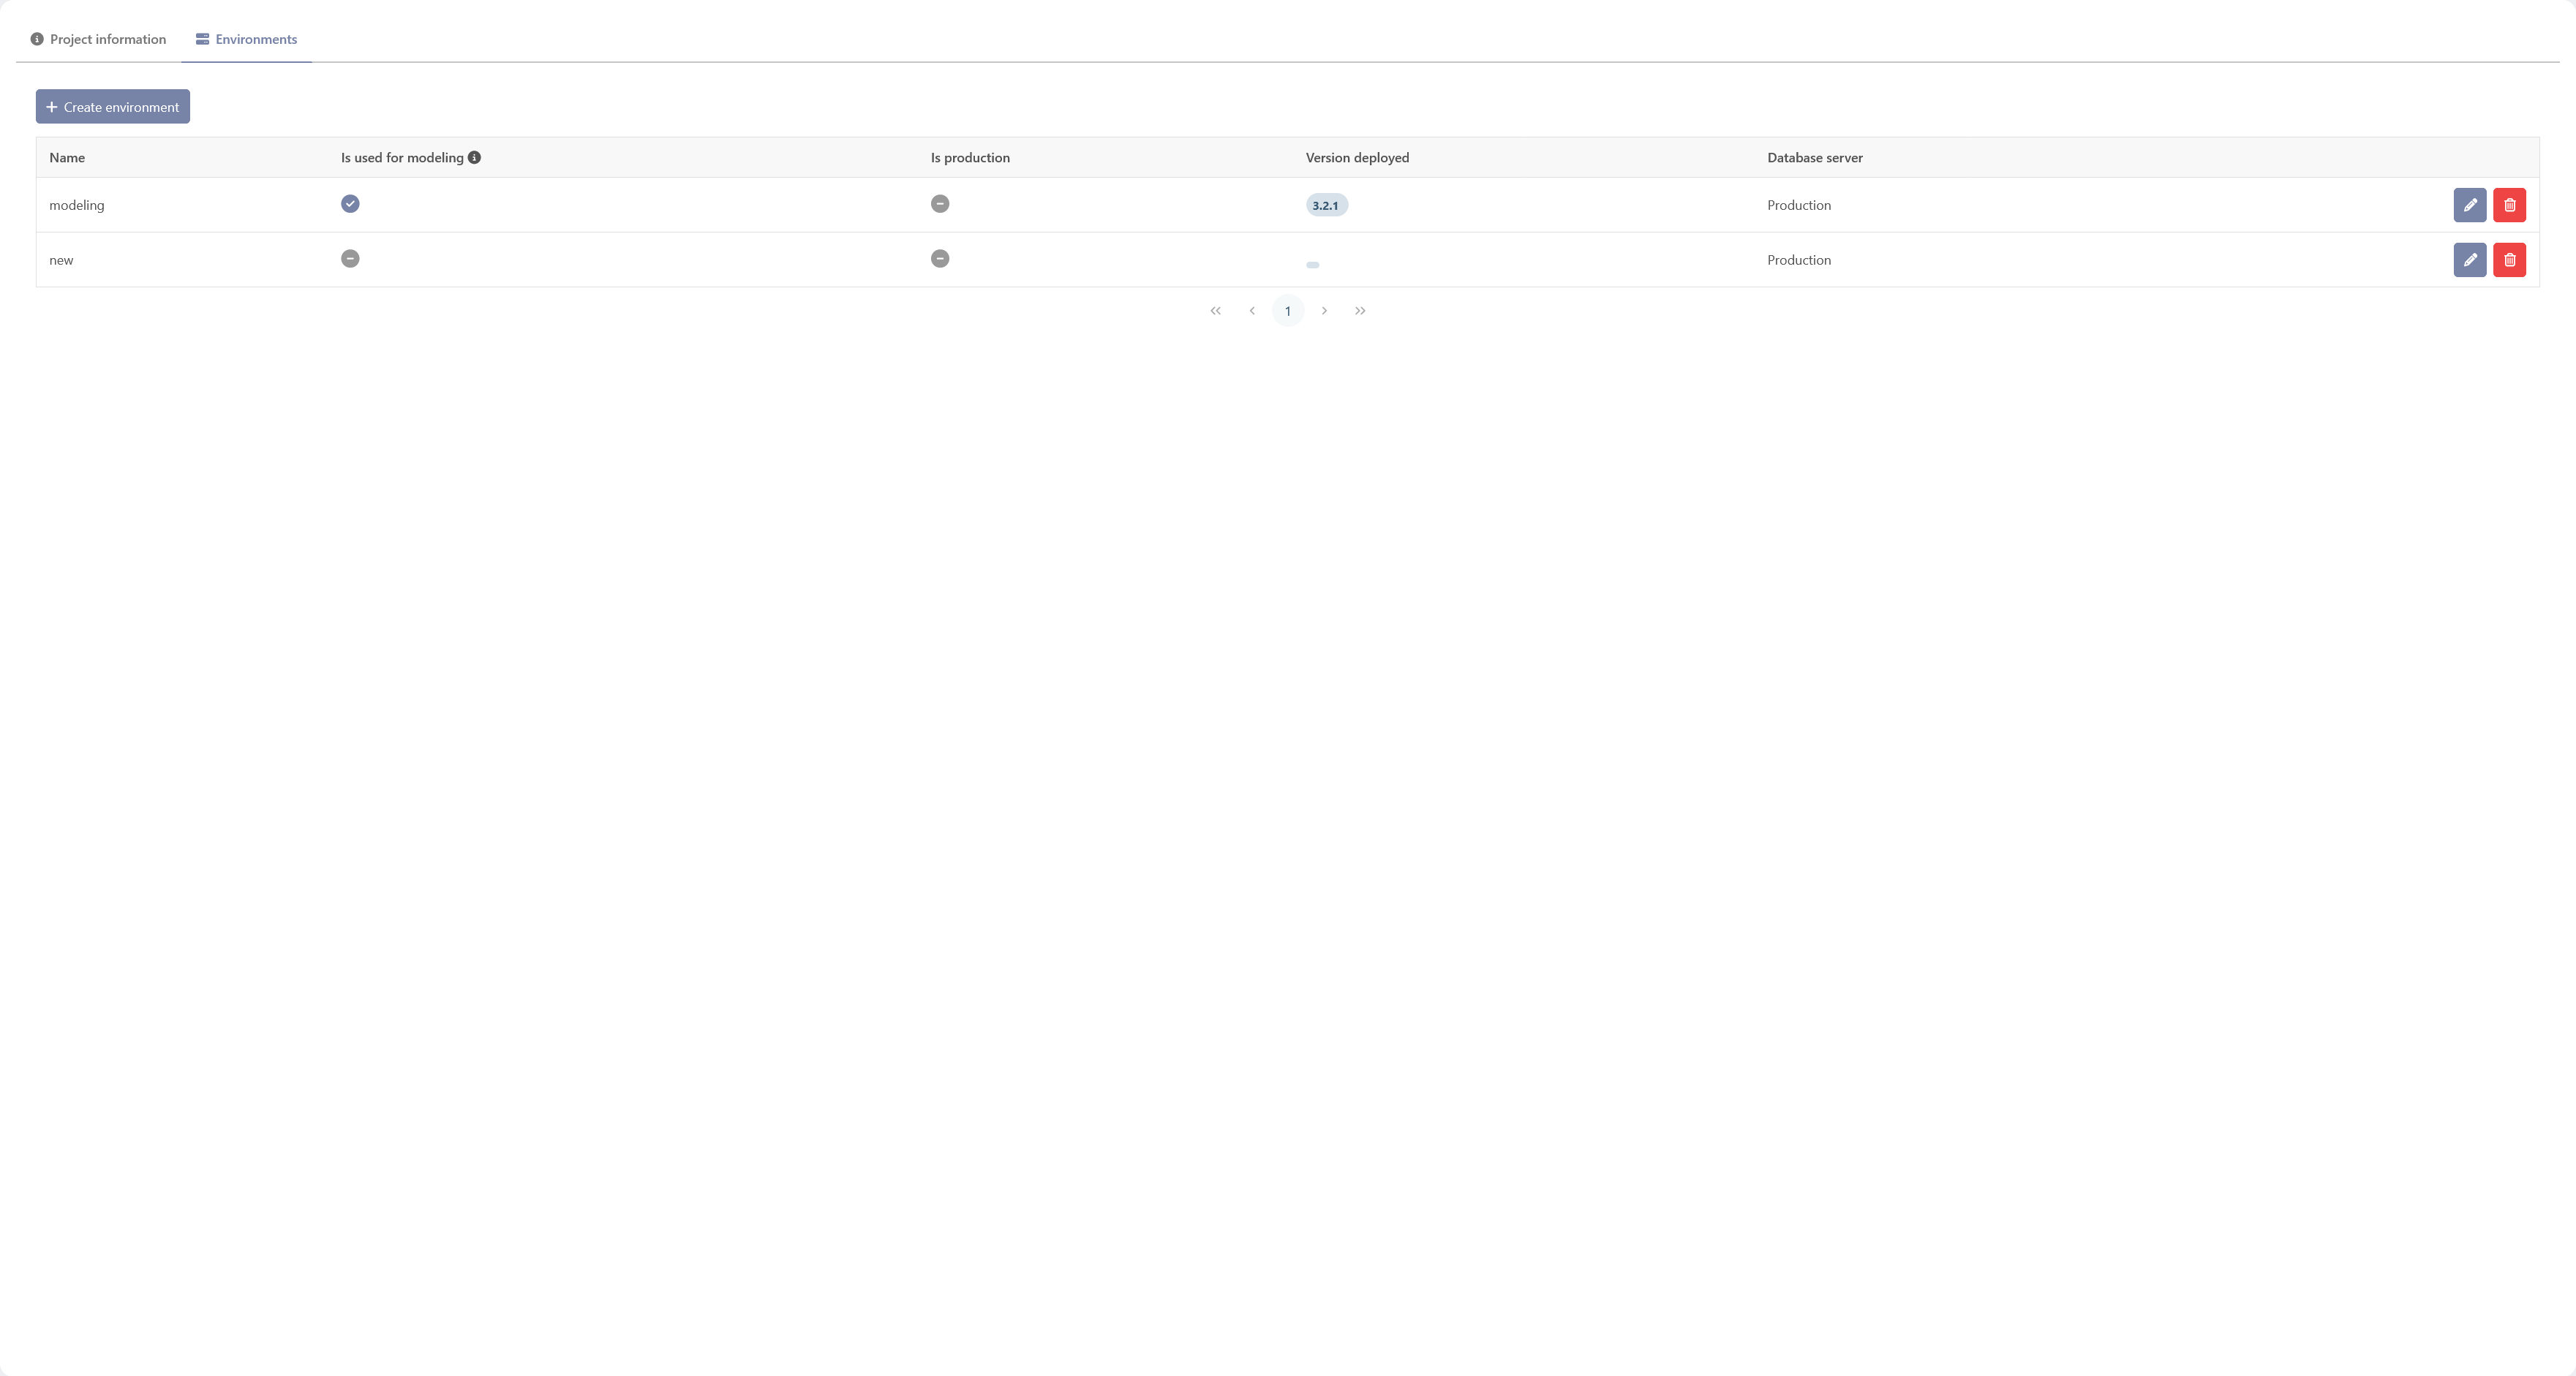
Create an Environment
A user can create an environment by clicking on the “Create Environment” button in the upper-left corner.
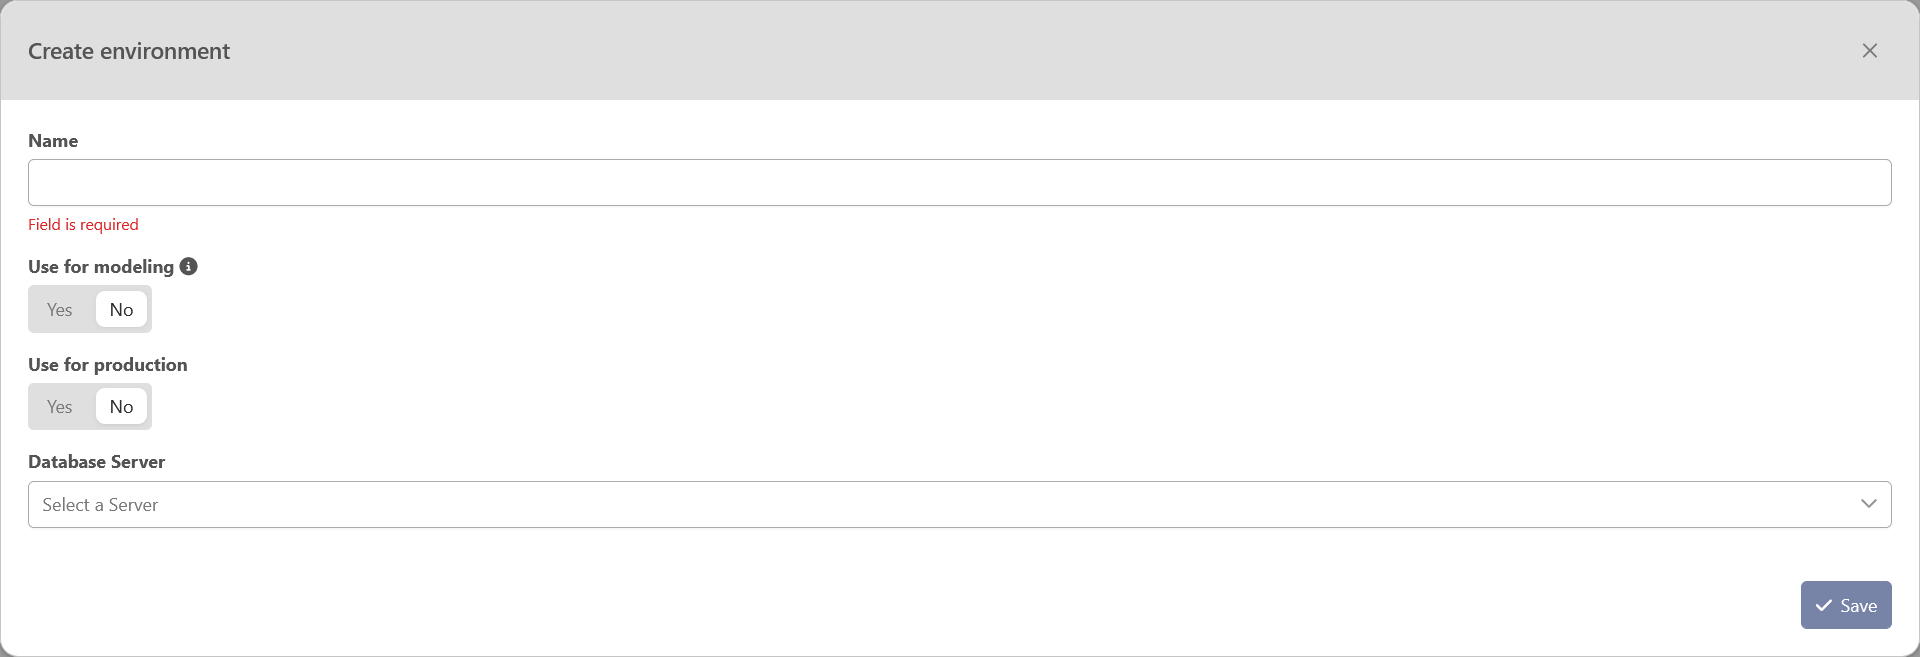
The following pop-up wizard will require the user to fill in some required and additional attributes.
-
Name: mandatory — name of the environment. (must be unique and not empty).
-
Database Server: mandatory — selection of available servers. Available servers are configured during the deployment of the application.
-
Use for Modeling: optionnal — in case you have several environments (and therefore several databases). You can have only one environment that has to be activated at a time, this will allow the user to define which environment will be used while modeling. A modeling environment is used to see and edit the staging tables.
Use the Modeling environment to run and validate model changes against staging tables. While you iterate, its table schema may temporarily differ from your ingestion process.
Each project has one modeling environment.
-
Is Production: optionnal — in case you have several environments (and therefore multiple databases). You can have only one environment that has to be activated at a time, this will allow the user to define which environment will be used in Production.
Edit an Environment
A user can edit an environment by clicking on the “Edit” button in the last column of the table.

The following pop-up wizard will allow the user to edit the environment name and its usage
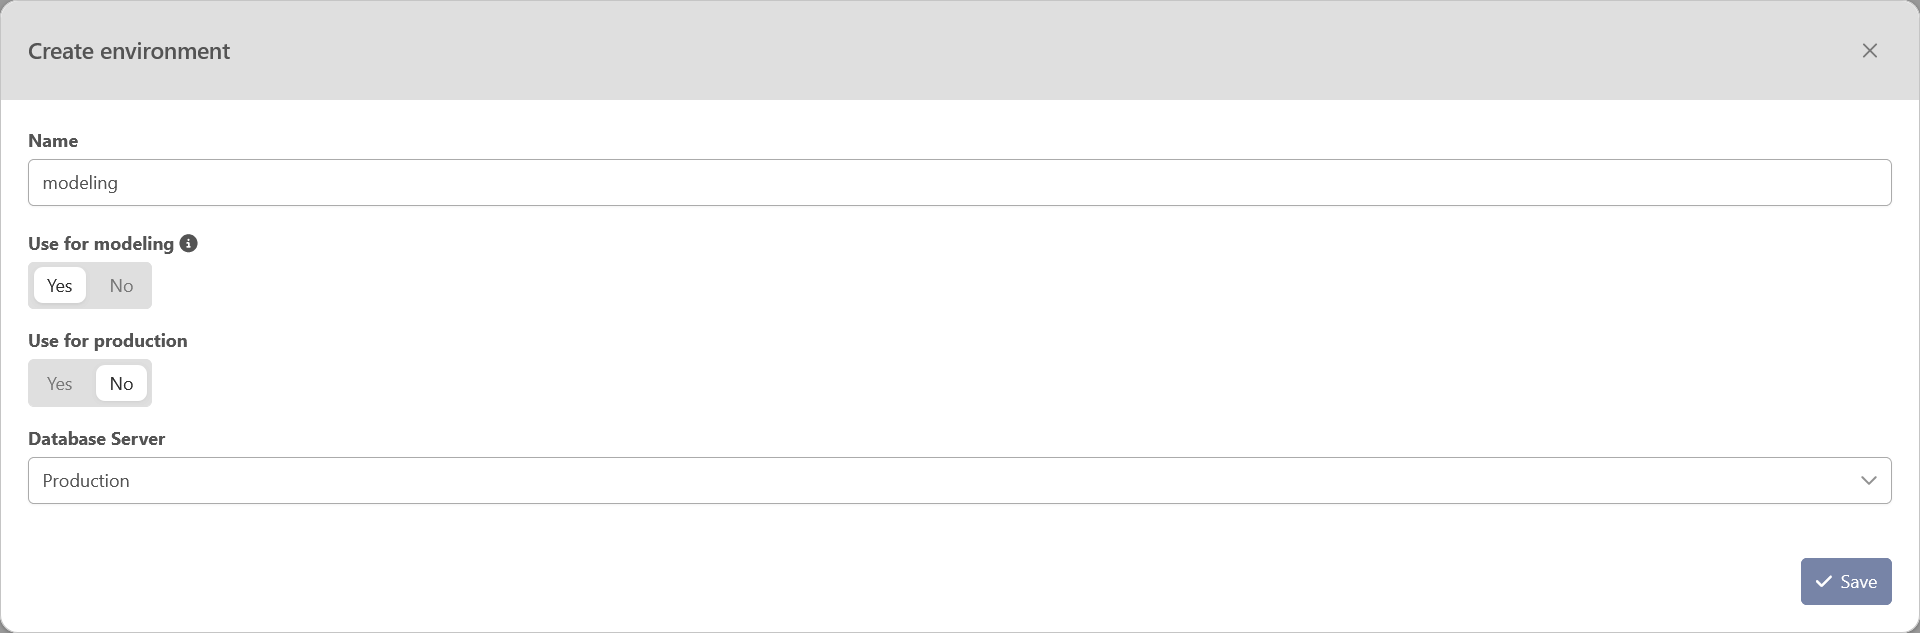
The database server cannot be modified after the environment creation.
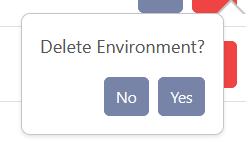
Delete an Environment
A user can delete an environment by clicking on the “Delete” button in the last column of the table.

The following pop-up wizard will require the user to confirm the deletion before deleting it permanently.