The information marts are tables or views containing enriched data where the business rules can be applied. They are used by the end users or applications to take leverage of your data. The use cases are endless, but usually, they will be used for reporting purposes or to feed a new tool with enriched and trustful data.
In this tutorial, we will create a dimension for a simple star schema, which is documented here: Tutorial - 🗄️ IM contract
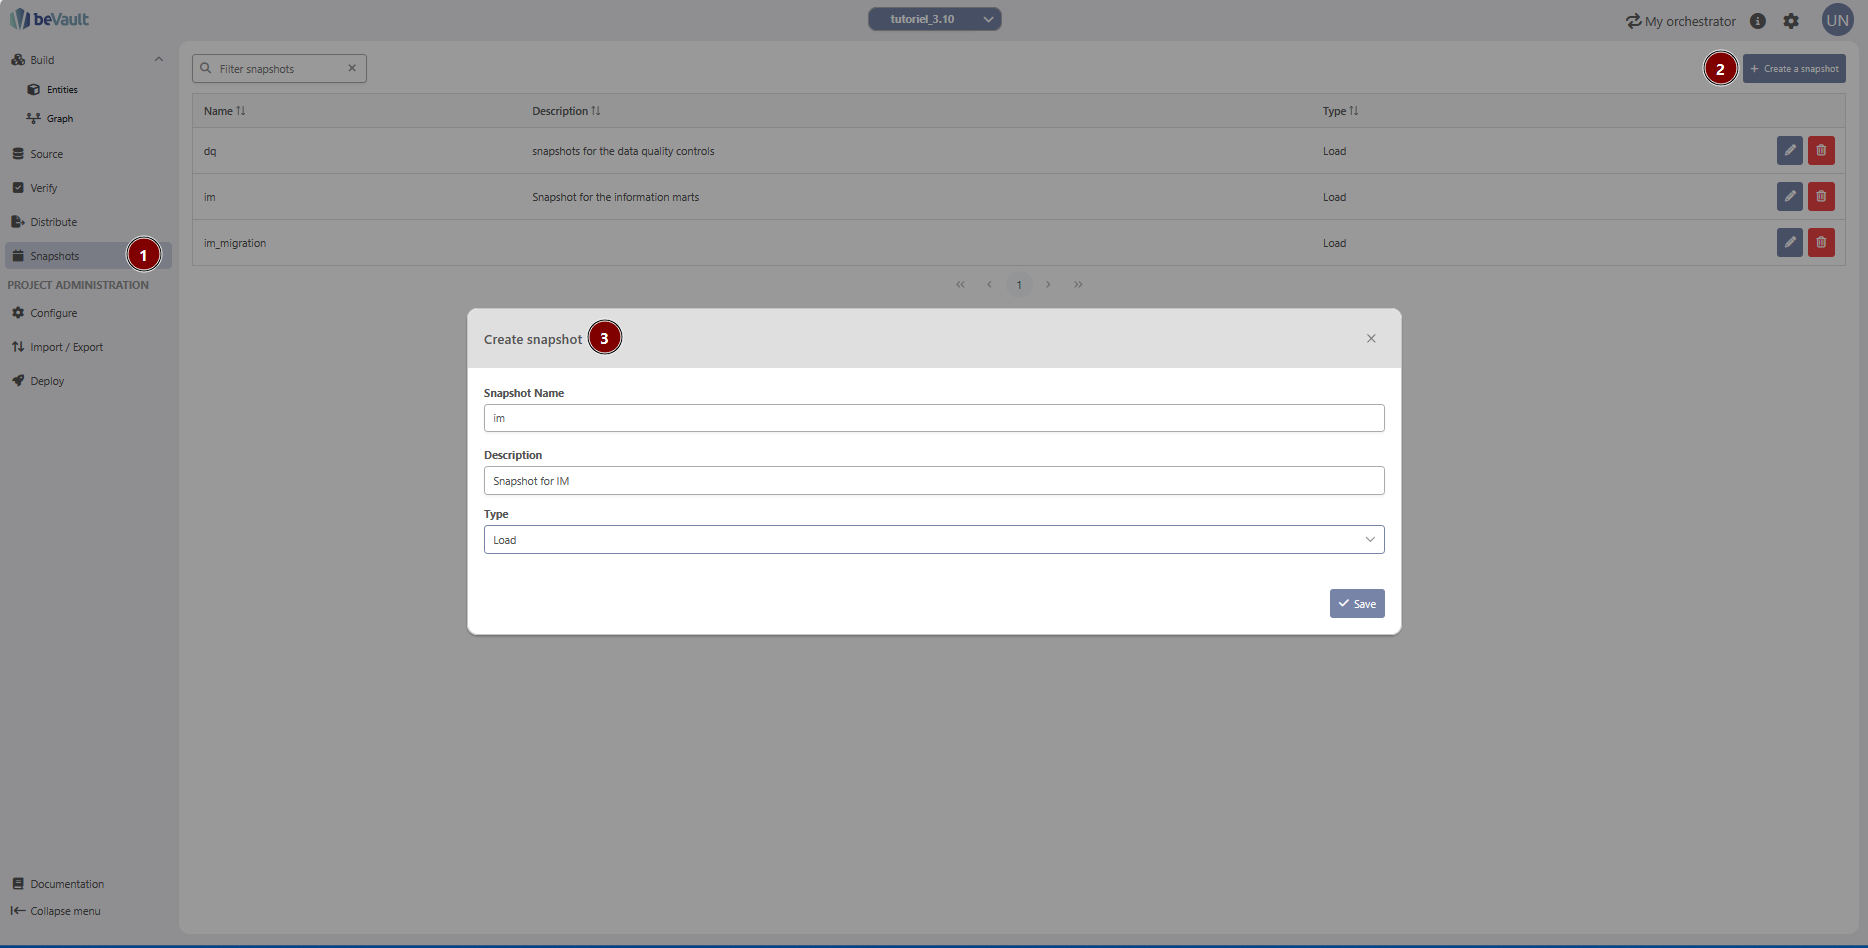
Create a snapshot
-
Create a new snapshot for your information mart. It will contain the different points in time where you want to see your data.
-
Go to the “Snapshots” module
-
Click on “Create Snapshot”
-
Enter a name and select a type of snapshot (in this case “Load”)
-
Click on “Save”
-
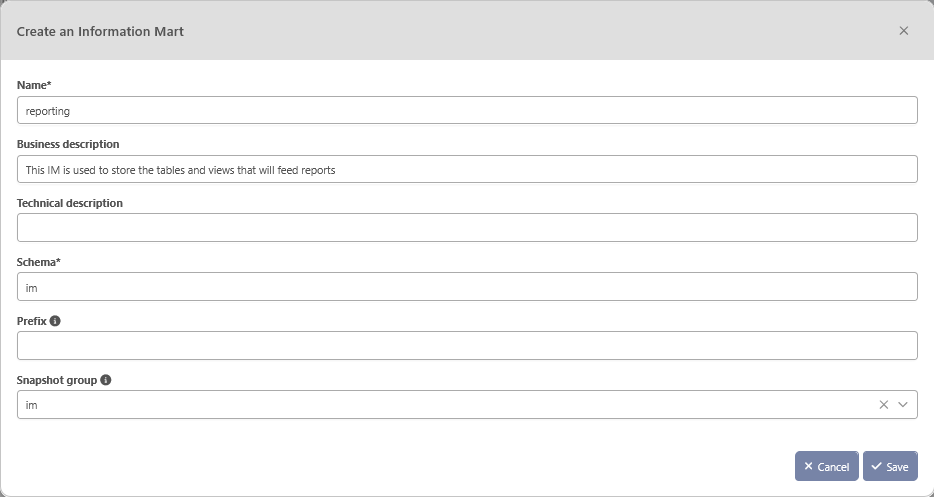
Create an information mart (IM)
To ease the navigation and access rights on the table and views distributed to the potential various sets of end users / products. We advise to create an IM for each set of use cases you are answering. E.g.: an IM covering the reporting based on current data only. an IM covering the results of the data quality controls, etc.
-
Go the Distribute module and let’s create your information mart “Reporting”
-
Click on 'Create an information mart
-
Enter the following information (in the field ‘Snapshot group’, choose the snapshot that you created right before)
-
Click on save. You will see your information mart in the list
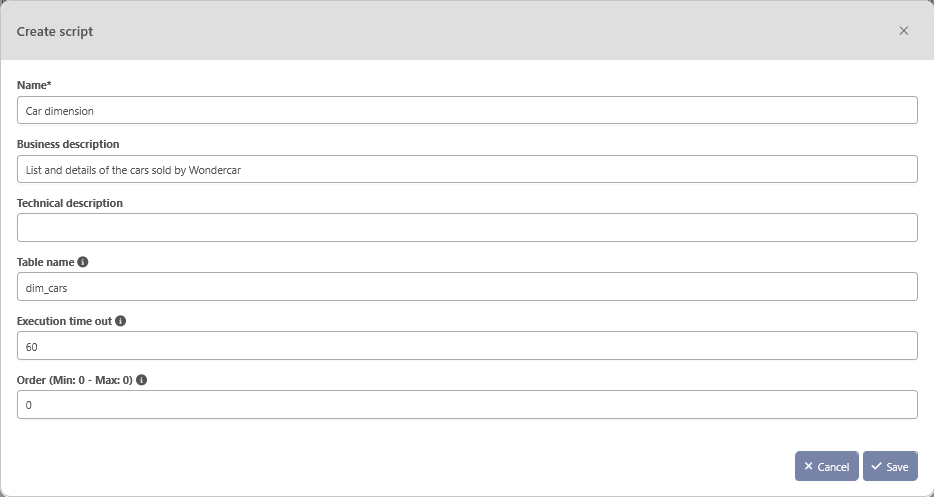
Create a dimension
-
Let's create the car dimension Tutorial - Dimension Car
-
Click on the button ‘Scripts’ in the row of your information mart

-
Click on “Create a new script”
-
A pop-up will appear. Enter the following information
-
-
Click on save. You will see your script in the list below your information mart
-
Click on the button to open the script in a new tab

-
A tab will open. It includes 3 sections
-
Metadata
-
Columns
-
Code
-
-
Go to the third section by clicking on the following symbol in the selection on the left of the tab

-
Enter the following code
SQLDROP VIEW IF EXISTS im.dim_car CASCADE; --Drop the view in case it already exists. This way, you can edit the view in a future version CREATE VIEW im.dim_car AS SELECT hc.bk, info.manufacturer , info.model , info.releasedate , info.unitprice , snap.snapshot_date FROM dv.h_car hc -- for a dimension, start with the hub CROSS JOIN im.ctrl_dq snap -- to get the different points in time --join on the context satellite to get only car present in the source at a specific snapshot date INNER JOIN bv.h_car_crm_effsat eff ON eff.hk = hc.hk AND snap.snapshot_date BETWEEN eff.load_dts AND eff.load_end_dts --Join on your satellite containing the descriptive information at the different snapshot dates INNER JOIN bv.v_sh_car_crm_info info ON info.hk = hc.hk AND snap.snapshot_date BETWEEN info.load_dts AND info.load_end_dts WHERE hc.bk IS NOT NULL -- to avoid having a ghost record in the dimension AND eff.src = 'crm' -- filter the context to get only the car from the CRM source AND snap.name = 'im' -- filter the snapshots to get only the one for your information marts -
Click on “Save”
-
Go to the Version submodule, create a new version, and release it to an environment.
It will make the script available for a worker that can be used in a state machine. -
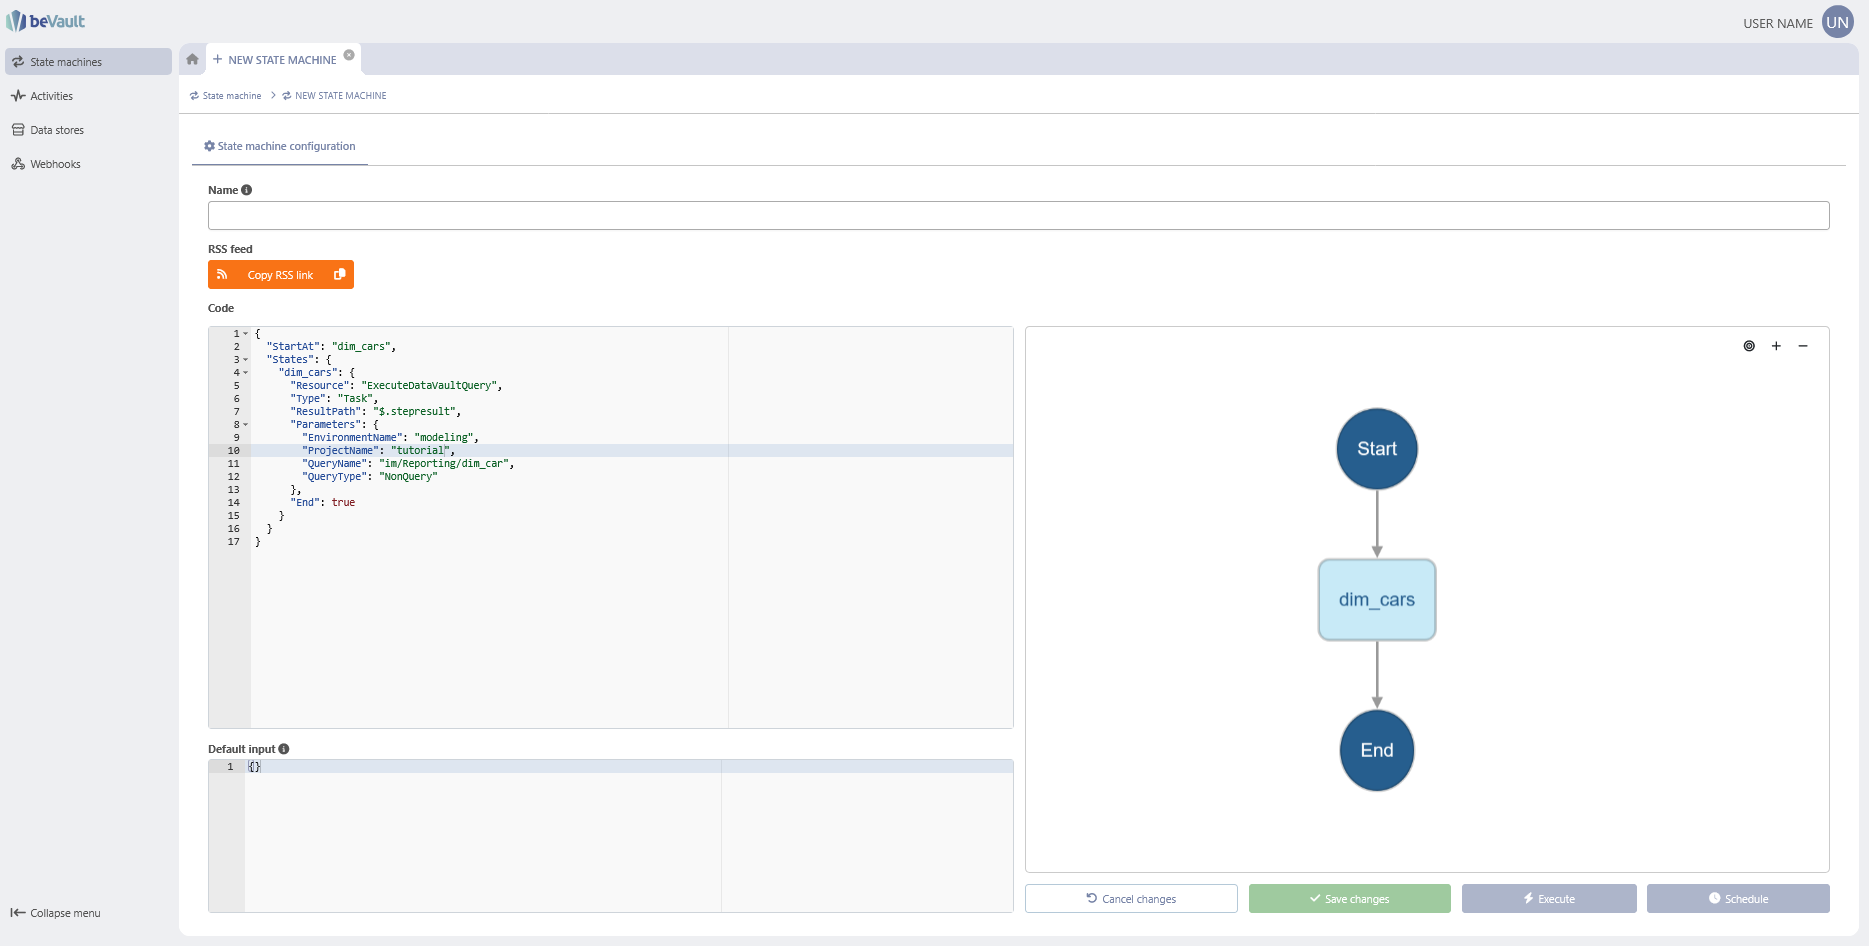
Go to States, then “State Machines”
-
Click on “Create State Machine”
-
Enter the following definition:
{
  "StartAt": "dim_car",
  "TimeoutSeconds": 6000,
  "States": {
    "dim_car": {
      "Type": "Task",
      "Resource": "ExecuteDataVaultQuery",
      "ResultPath": "$.Generated",
      "Parameters": {
        "QueryType": "Nonquery",
        "QueryName": "Reporting/dim_car",
        "EnvironmentName": "modeling",
        "ProjectName": "tutorial"
      },
      "End": true
    }
  }
}
-
Click on save
-
Search your new state machine and execute it
-
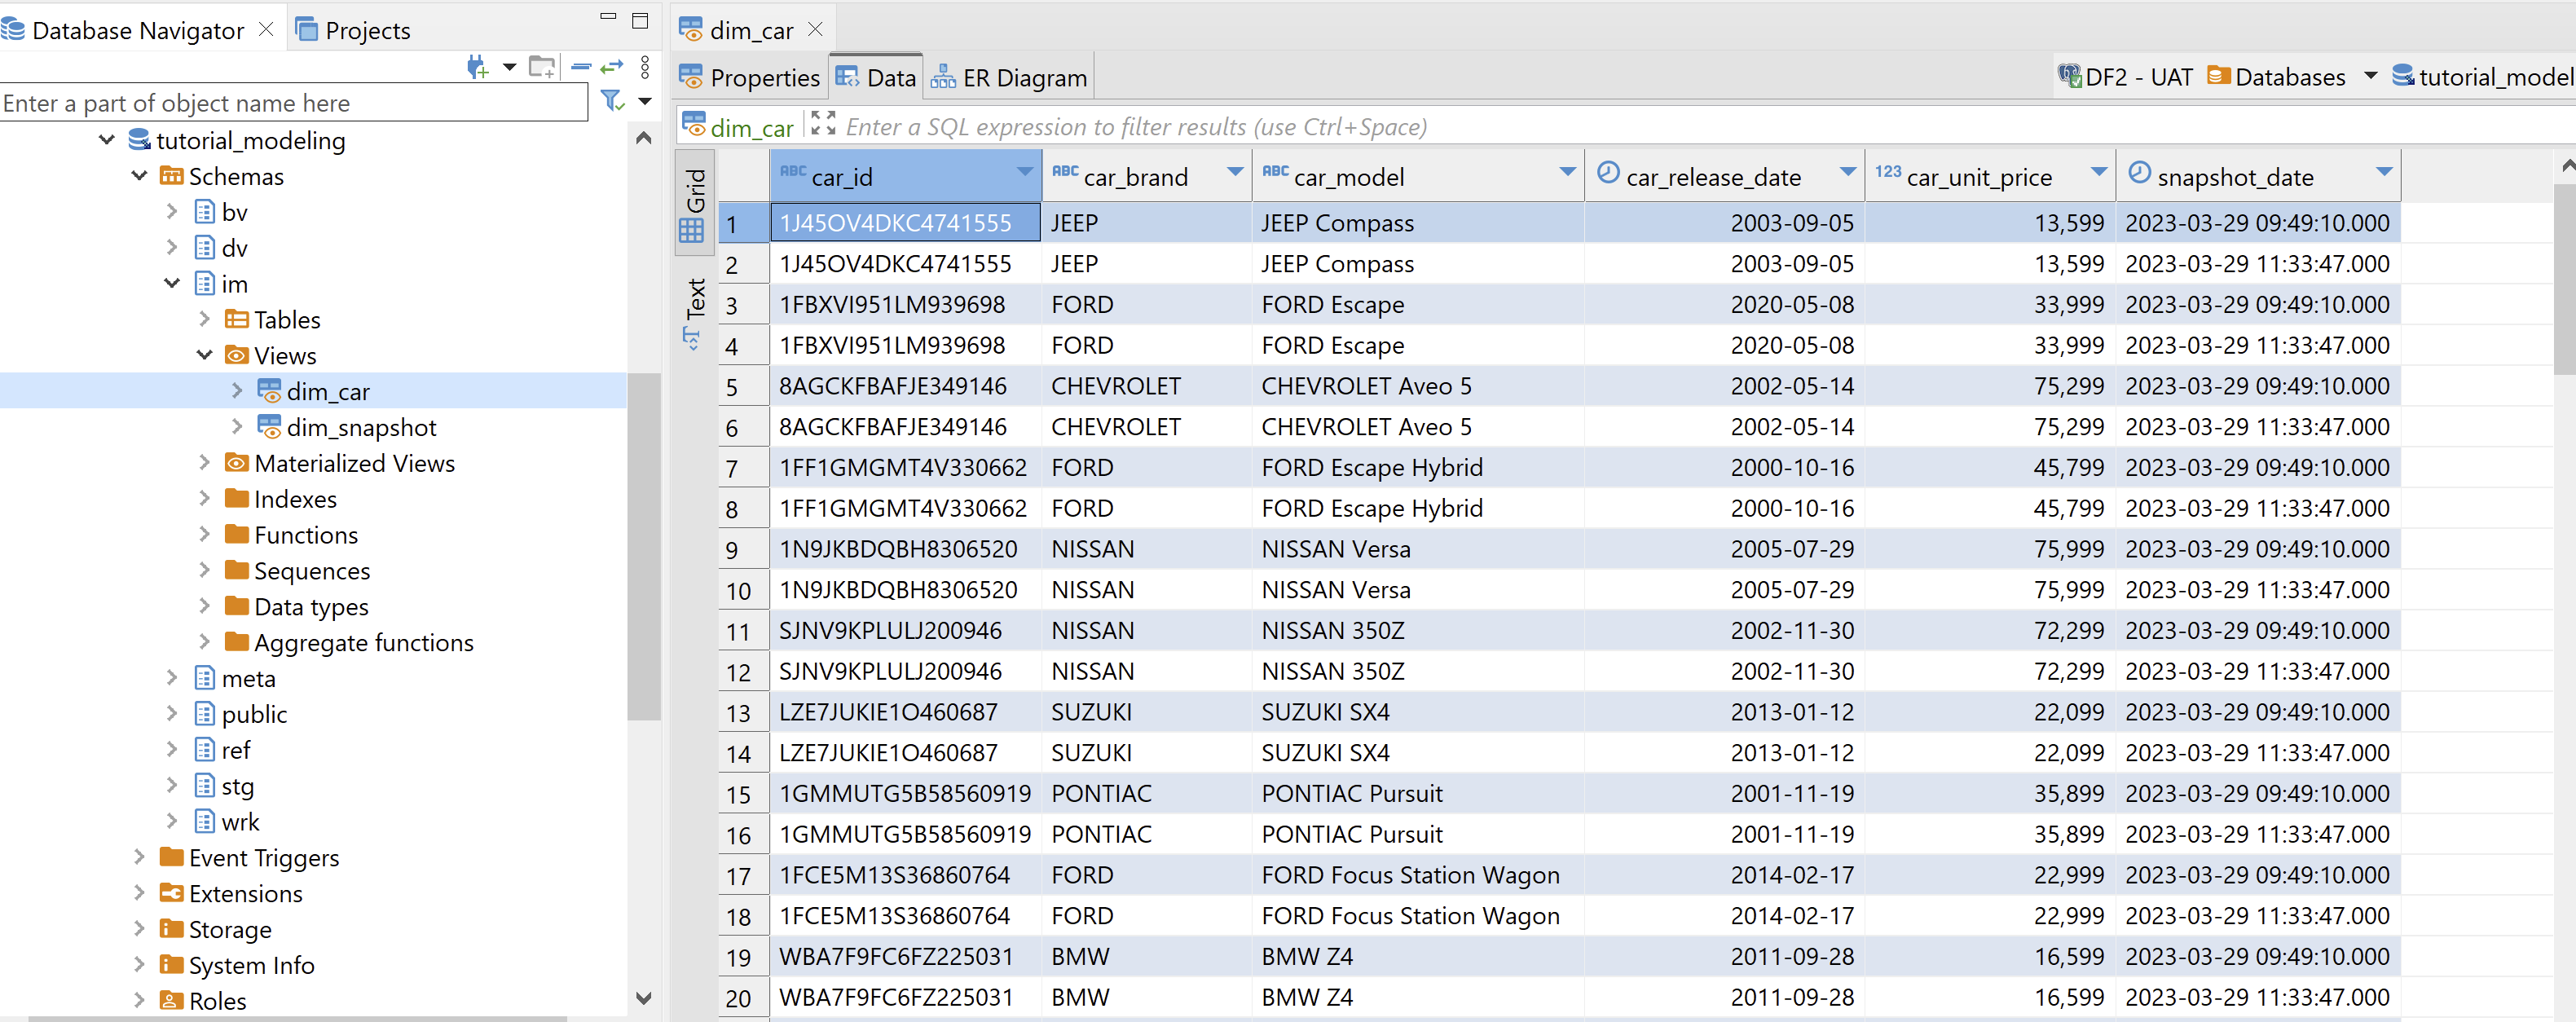
Your dimension is now created and available! If you go back in your database, you will be able to see the new view and the data in it.
That concludes our tutorial! You should have everything in your hand to be able to build a full beVault with the knowledge acquired here. You can still take a look at the user reference guide Reference Guide to know every little detail about each module.
Resolution
State machine:
{
  "StartAt": "im-dim_cars",
  "TimeoutSeconds": 6000,
  "States": {
    "im-dim_cars": {
      "Type": "Task",
      "Resource": "ExecuteDataVaultQuery",
      "ResultPath": null,
      "Parameters": {
        "EnvironmentName": "modeling",
        "ProjectName": "tutorial",
        "QueryType": "Reader",
        "QueryName": "Global/dim_cars",
        "Type": "NonQuery",
        "CommandTimeout": 10
      },
      "Next": "im-dim_customers"
    },
    "im-dim_customers": {
      "Type": "Task",
      "Resource": "ExecuteDataVaultQuery",
      "ResultPath": null,
      "TimeoutSeconds": 10,
      "Parameters": {
        "EnvironmentName": "modeling",
        "ProjectName": "tutorial",
        "QueryType": "Reader",
        "QueryName": "Global/dim_customers",
        "Type": "NonQuery",
        "CommandTimeout": 10
      },
      "Next": "im-dim_contracts"
    },
    "im-dim_contracts": {
      "Type": "Task",
      "Resource": "ExecuteDataVaultQuery",
      "ResultPath": null,
      "TimeoutSeconds": 10,
      "Parameters": {
        "EnvironmentName": "modeling",
        "ProjectName": "tutorial",
        "QueryType": "Reader",
        "QueryName": "Global/dim_contracts",
        "Type": "NonQuery",
        "CommandTimeout": 10
      },
      "Next": "im-fact_contracts_details"
    },
    "im-fact_contracts_details": {
      "Type": "Task",
      "Resource": "ExecuteDataVaultQuery",
      "ResultPath": null,
      "TimeoutSeconds": 10,
      "Parameters": {
        "EnvironmentName": "modeling",
        "ProjectName": "tutorial",
        "QueryType": "Reader",
        "QueryName": "Global/fact_contract_details",
        "Type": "NonQuery",
        "CommandTimeout": 10
      },
      "Next": "im-dim_shops"
    },
    "im-dim_shops": {
      "Type": "Task",
      "Resource": "ExecuteDataVaultQuery",
      "ResultPath": null,
      "TimeoutSeconds": 10,
      "Parameters": {
        "EnvironmentName": "modeling",
        "ProjectName": "tutorial",
        "QueryType": "Reader",
        "QueryName": "Global/dim_shops",
        "Type": "NonQuery",
        "CommandTimeout": 10
      },
      "Next": "im-dim_employees"
    },
    "im-dim_employees": {
      "Type": "Task",
      "Resource": "ExecuteDataVaultQuery",
      "ResultPath": null,
      "TimeoutSeconds": 10,
      "Parameters": {
        "EnvironmentName": "modeling",
        "ProjectName": "tutorial",
        "QueryType": "Reader",
        "QueryName": "Global/dim_employees",
        "Type": "NonQuery",
        "CommandTimeout": 10
      },
      "End": true
    }
  }
}