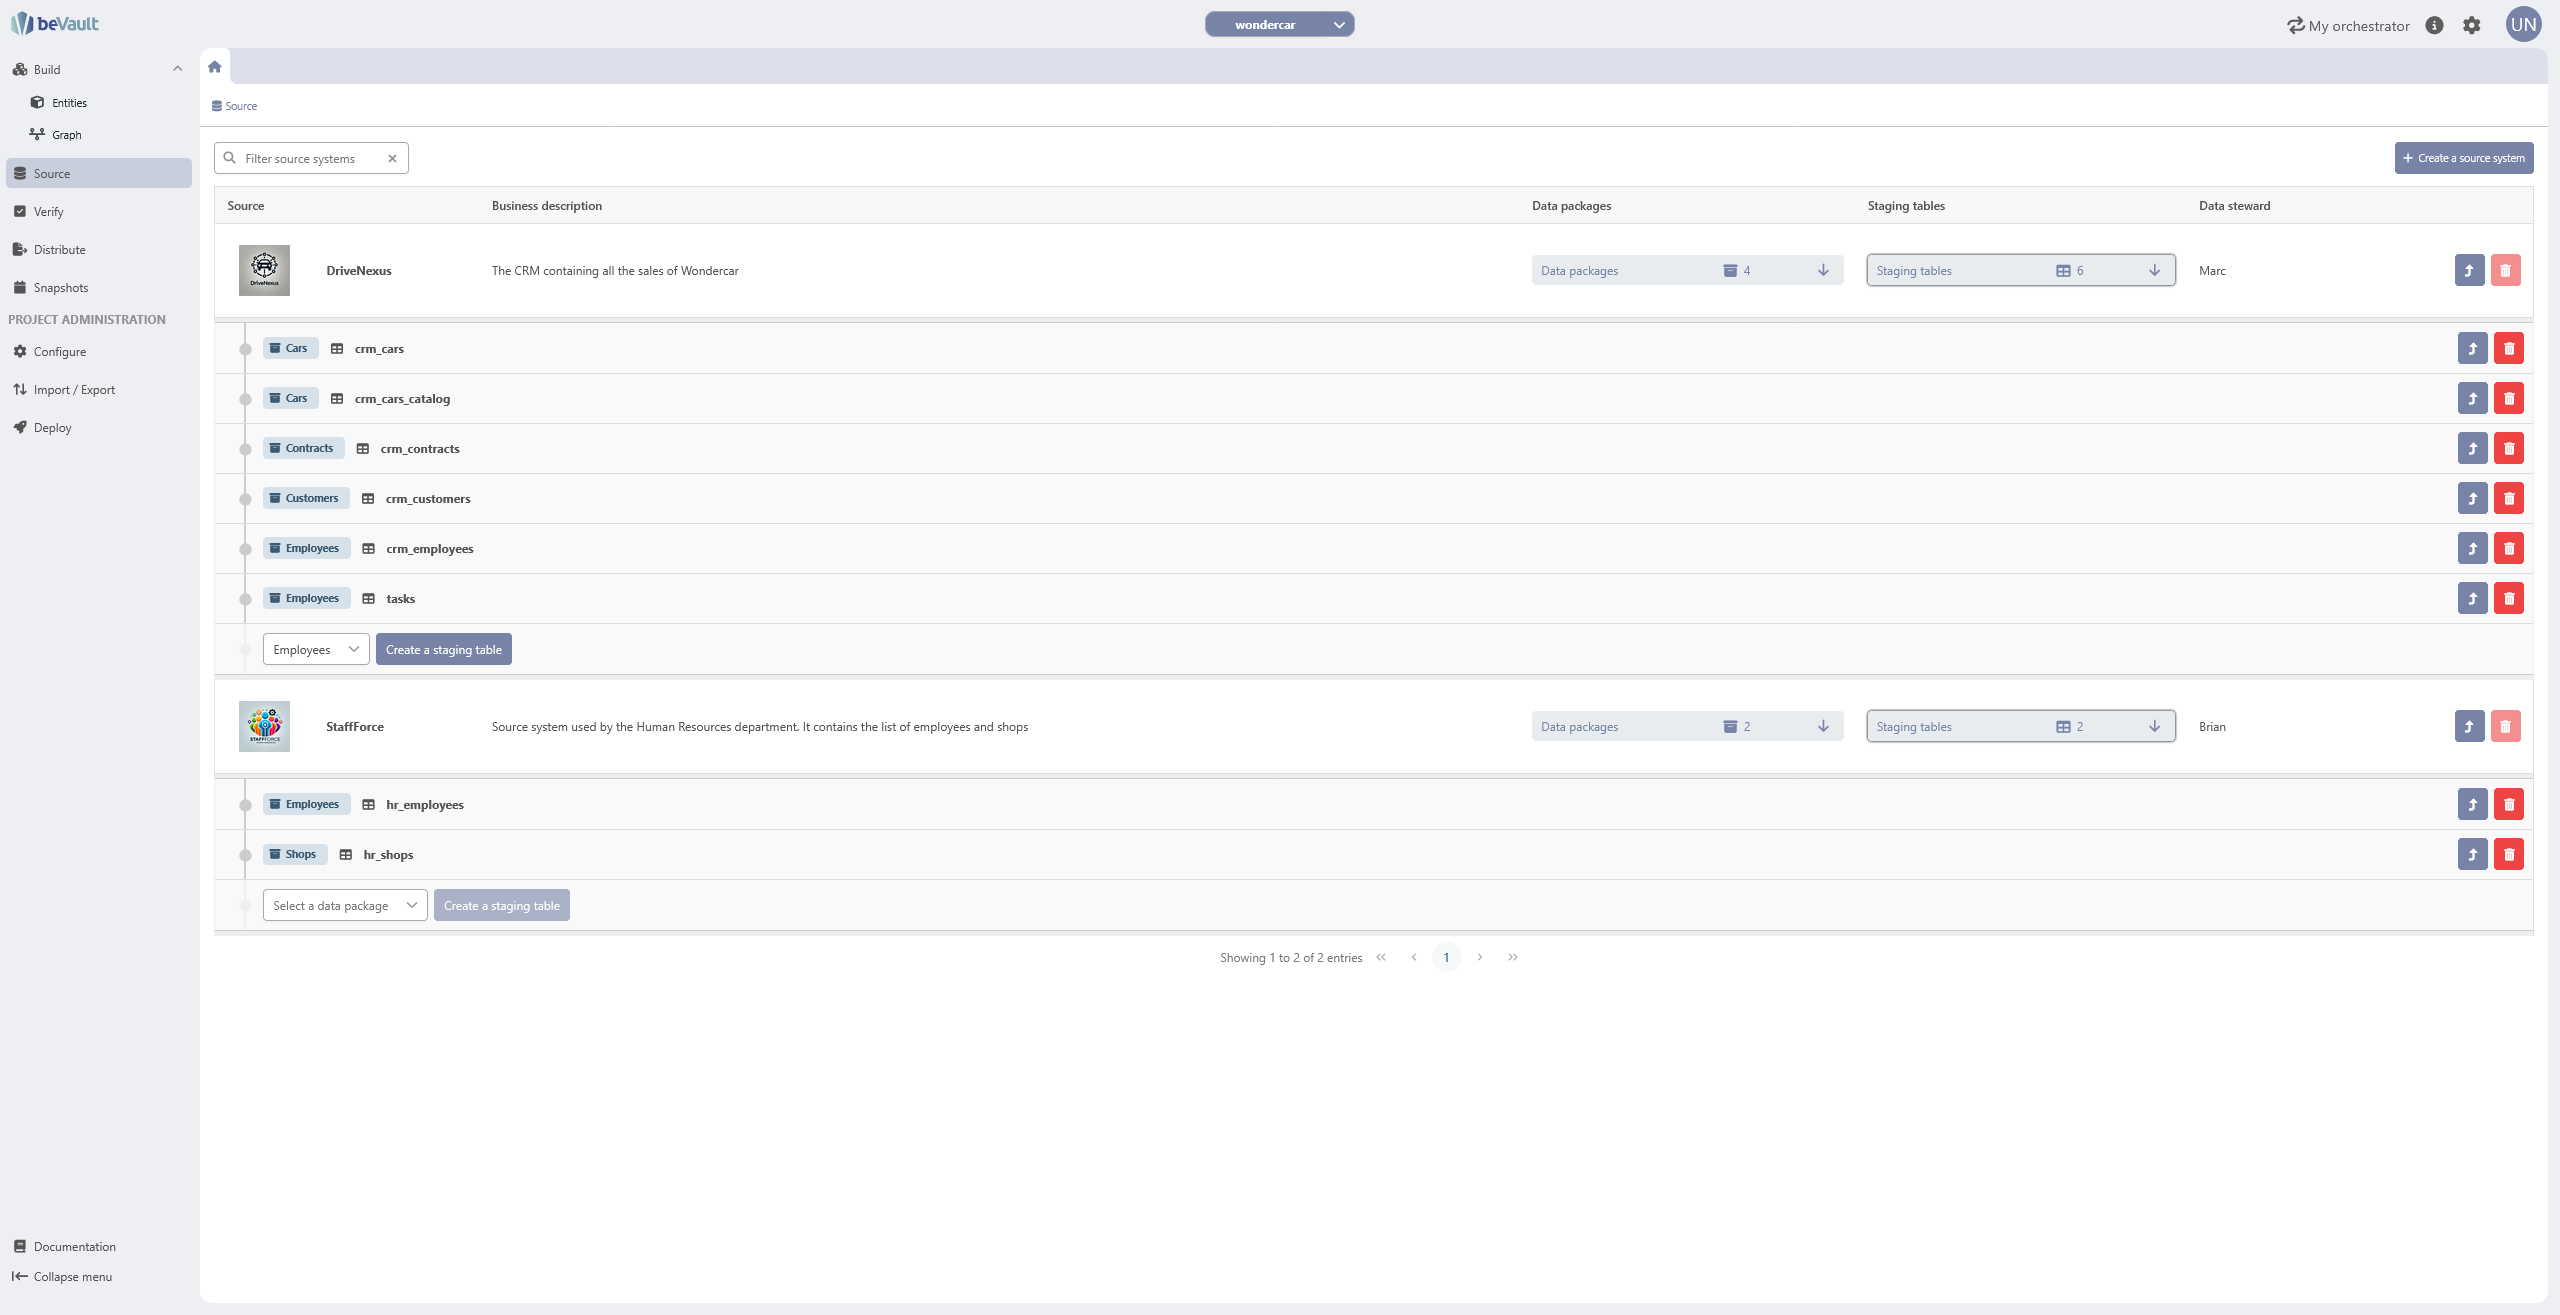
Now that you have a data model and your sources' data are in the staging tables, you need to map the staging tables’ columns to the model.
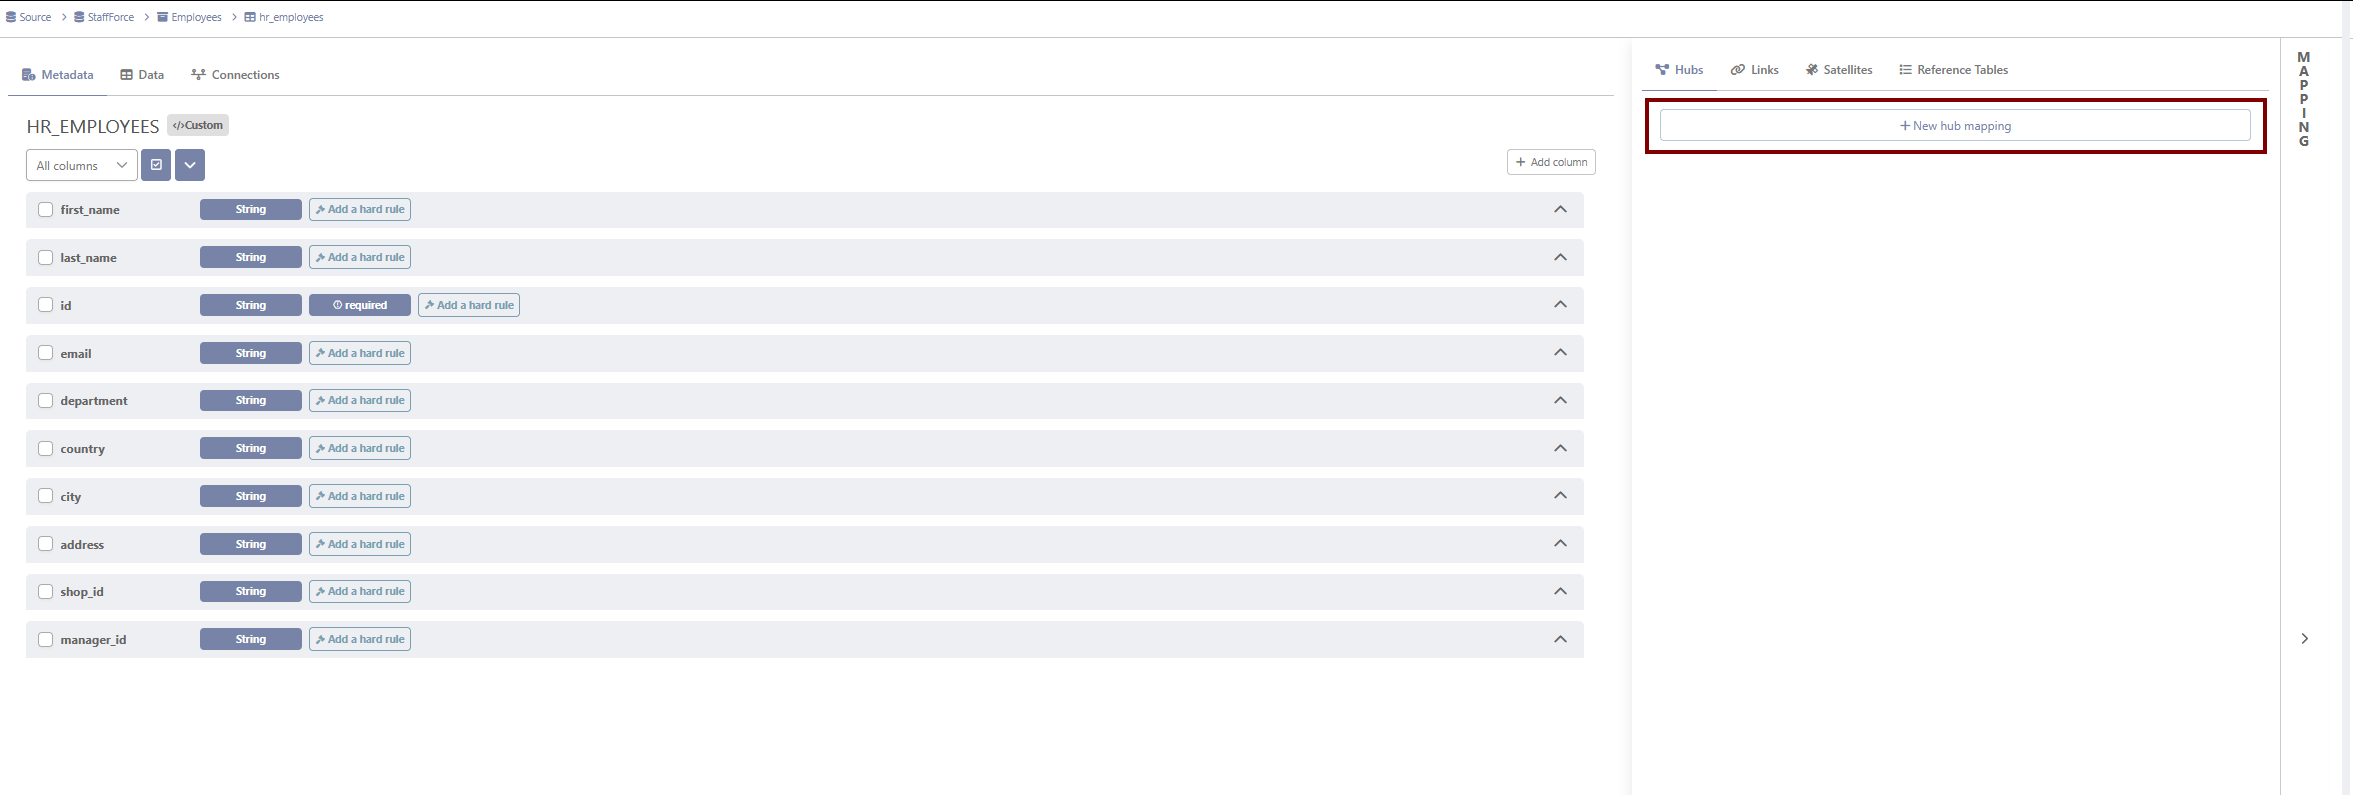
First, navigate to the “Source Systems” module, and click on the edit button of the staging table “hr_employees”. This will open a dynamic tab with the staging table data from the modeling environment and the different mappings on that table.
6.1 Map a hub
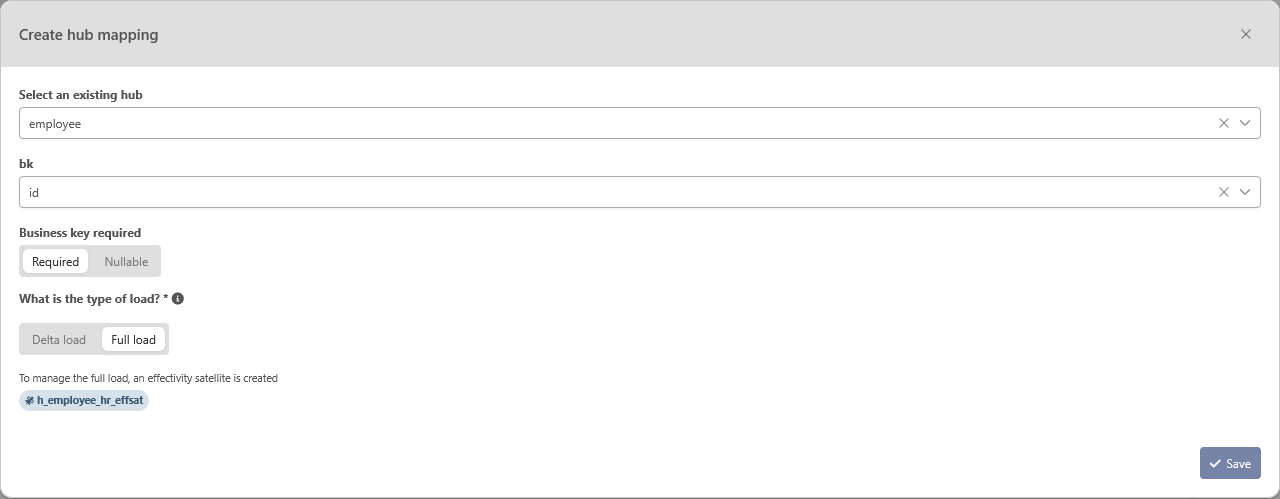
We will first map the column ID to the hub “employee”. To do so, you need to follow those steps :
-
Click on the button “New hub mapping” in the “Hubs” section
-
No need to enter a name for the mapping. An arbitrary one will be given
-
Select the hub “employee”
-
Select the column “id” for the business key (bk)
-
Leave ‘Expect null business key' unchecked given that it is considered as unusual to miss a business key for a record in this staging table
-
Select the option “Full load”. Since this column contains the list of all the employees’ IDs, you can select this option. This way, we can detect the suppression of an employee in the source system when a line is missing during a specific load.
-
Click on “Save”
-
Repeat this operation for the hub shop with the column “shop_id”. However, select “Delta load” since this staging table doesn’t contain the complete list of shop IDs.
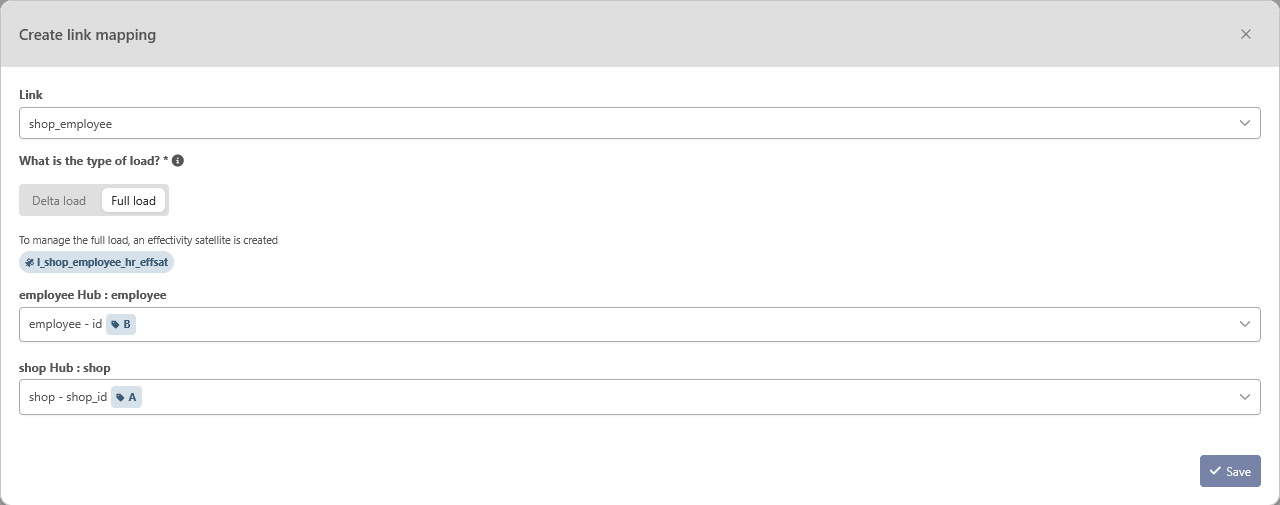
6.2 Map a link
With the two mappings for the hubs employee and shop, we can create the mapping for the link “contract_car”.
-
Click on the “Links” section and then on the button “Create a new mapping”
-
No need to enter a name for the mapping. An arbitrary one will be given
-
Select the link “contract_car”
-
Select the option “Full load”. Since this staging table is supposed to contain all the assignations of employee for a shop, you can select this option. This way, we can detect the suppression of an assignation of employee to a shop in the source system when a line is missing during a specific load.
-
Select the hub mappings for each hub reference
-
Click on “Save”
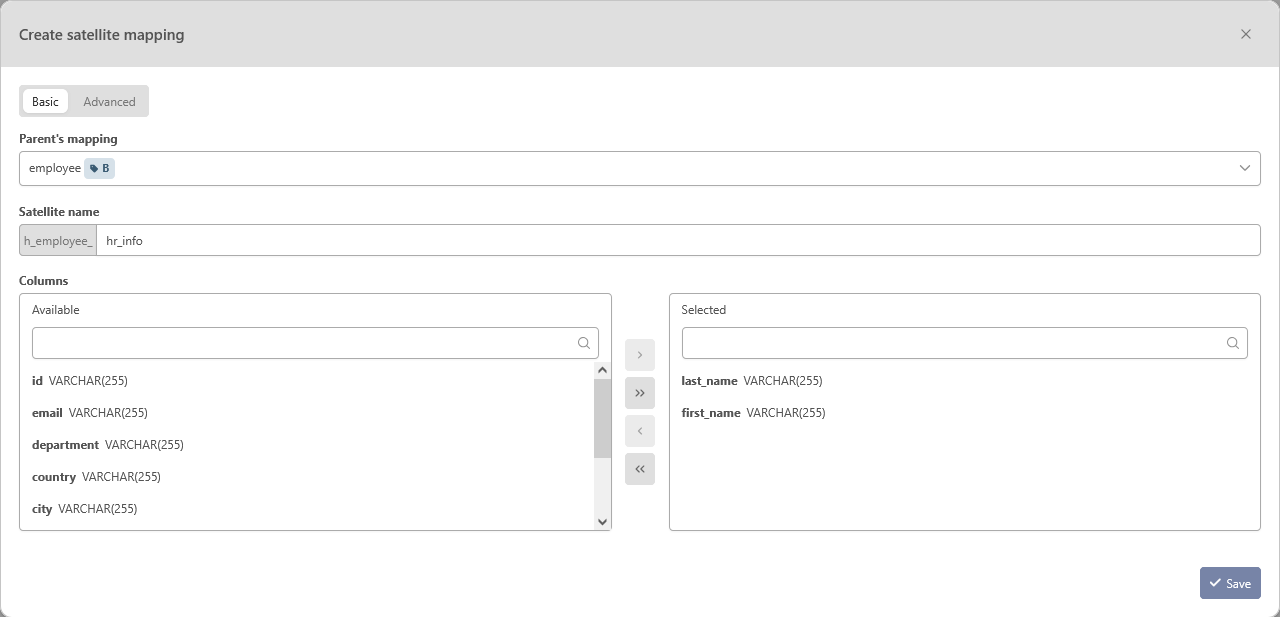
6.3 Create a satellite
As explained during the creation of the data model, satellites are related to only one source and therefore are created here in this module.
We will create the satellite with the descriptive information about the employees.
-
Click on the “Satellite” section and then on the button “Create a new mapping”
-
Enter a name for your satellite. You don’t need to prefix it with the parent’s name, as it will be automatically added.
-
No need to enter a name for the mapping. An arbitrary one will be given
-
Select the mapping on the hub “employee”
-
Check the columns that you want to include in the satellite. In this case, first_name and last_name.
-
Click on “Save”