State Machines
Existing State machines
The State Machine section allows the user to manage the different State Machines created in your account. In this section, you can create, view details, edit, or delete activities.

Find State Machines
You can use the search bar to find state machines. You can find a state machine either by name (or part of it) or flag’s name.
Set/Unset a State Machine as (un)favorite
States allows you to set state machines as “favorite” in order to make them appear easily at the top of the State machine list view.
You will just have to click on the “star” button on the left of a state machine’s name in the list view:

Consequently, a card will appear on the top of the page, allowing you some actions and providing you some information:
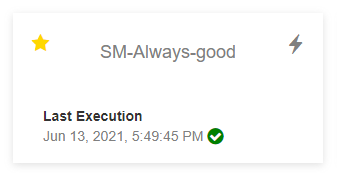
Specifically,
the “star” button, if clicked, will remove your State Machine among the favorites
the “lightning” button if clicked, will allow you to quickly launch a new execution
the “Last execution status” will provide you the status of the state”s machine latest executions (succeeded, error, ongoing)
To remove the state machine among the favorites, simply “unstar” the state machine (either in the list view, either in the card).
Setting a state machine as a favorite is user-based. Your choice will no impact other user’s settings.
Add/remove flags to/from a State Machine
States contain a lot of State Machines. Therefore, sometimes it gets difficult to find the most relevant or to understand their scope.
It may be particularly interesting to add some flags to your State Machines in order to allow you to find them easily.
To do so:
Open an existing State Machine
Click on the bookmark icon close to the state machine’s name

A pop-up wizard will be displayed, where you can add/remove flags (without any space). To add more flags, simply divide them by a comma (“,”).
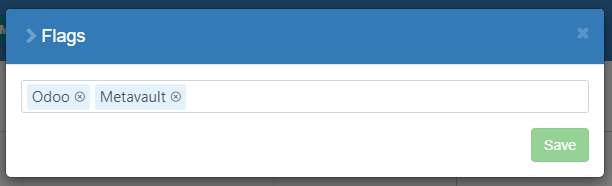
Once this is done, click on the “Save” button.
The flags will be displayed close to the State Machine’s name in the form and list view.


To remove or modify the flags, just modify them from the same wizard.
Once a flag is created, it will automatically create some metadata stored in “Tags” (see below).
Add/remove metadata to/from a State Machine as Tags
It is also possible to add even more information to your State Machine as “metadata”. For instance, you may want to say which is the Source system (e.g. Odoo), the source owner (e.g. JEM), the data package (e.g. Projects).
This information will be stored as “Tags”, with a “Key” and one or more “Value(s)”.
When a flag is created, it will automatically create tags whose “Key” is flag and “Values” are flag’s names.
To do this, open a State Machine and display the “Tag” tables.

To add a tag, click on the “Add tag” button. A wizard will appear:
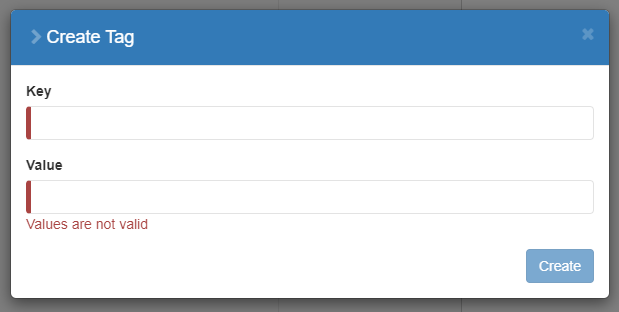
You will need to fill:
One key (e.g. “Source System”, “Source owner”, “Data package”,…)
One or more Value(s) (e.g. “Odoo”, “JEM”, “Project”,…).
Once this is done, click on the “Create” button and the tag will be displayed in the “Tags” table.

To modify the tag’s value, click on the value (e.g. JEM)
To delete a tag, simply click on the “Delete” button
Copy the RSS link to the clipboard
As explained in the Settings section, States support RSS feeds to notify you about all the state machine’s activities.
To copy the RSS link to the clipboard:
Enable the RSS in State Machine
Click on the RSS icon corresponding to the state machine you are interested into
The link will be automatically copied to your clipboard
Add the link to your RSS editor


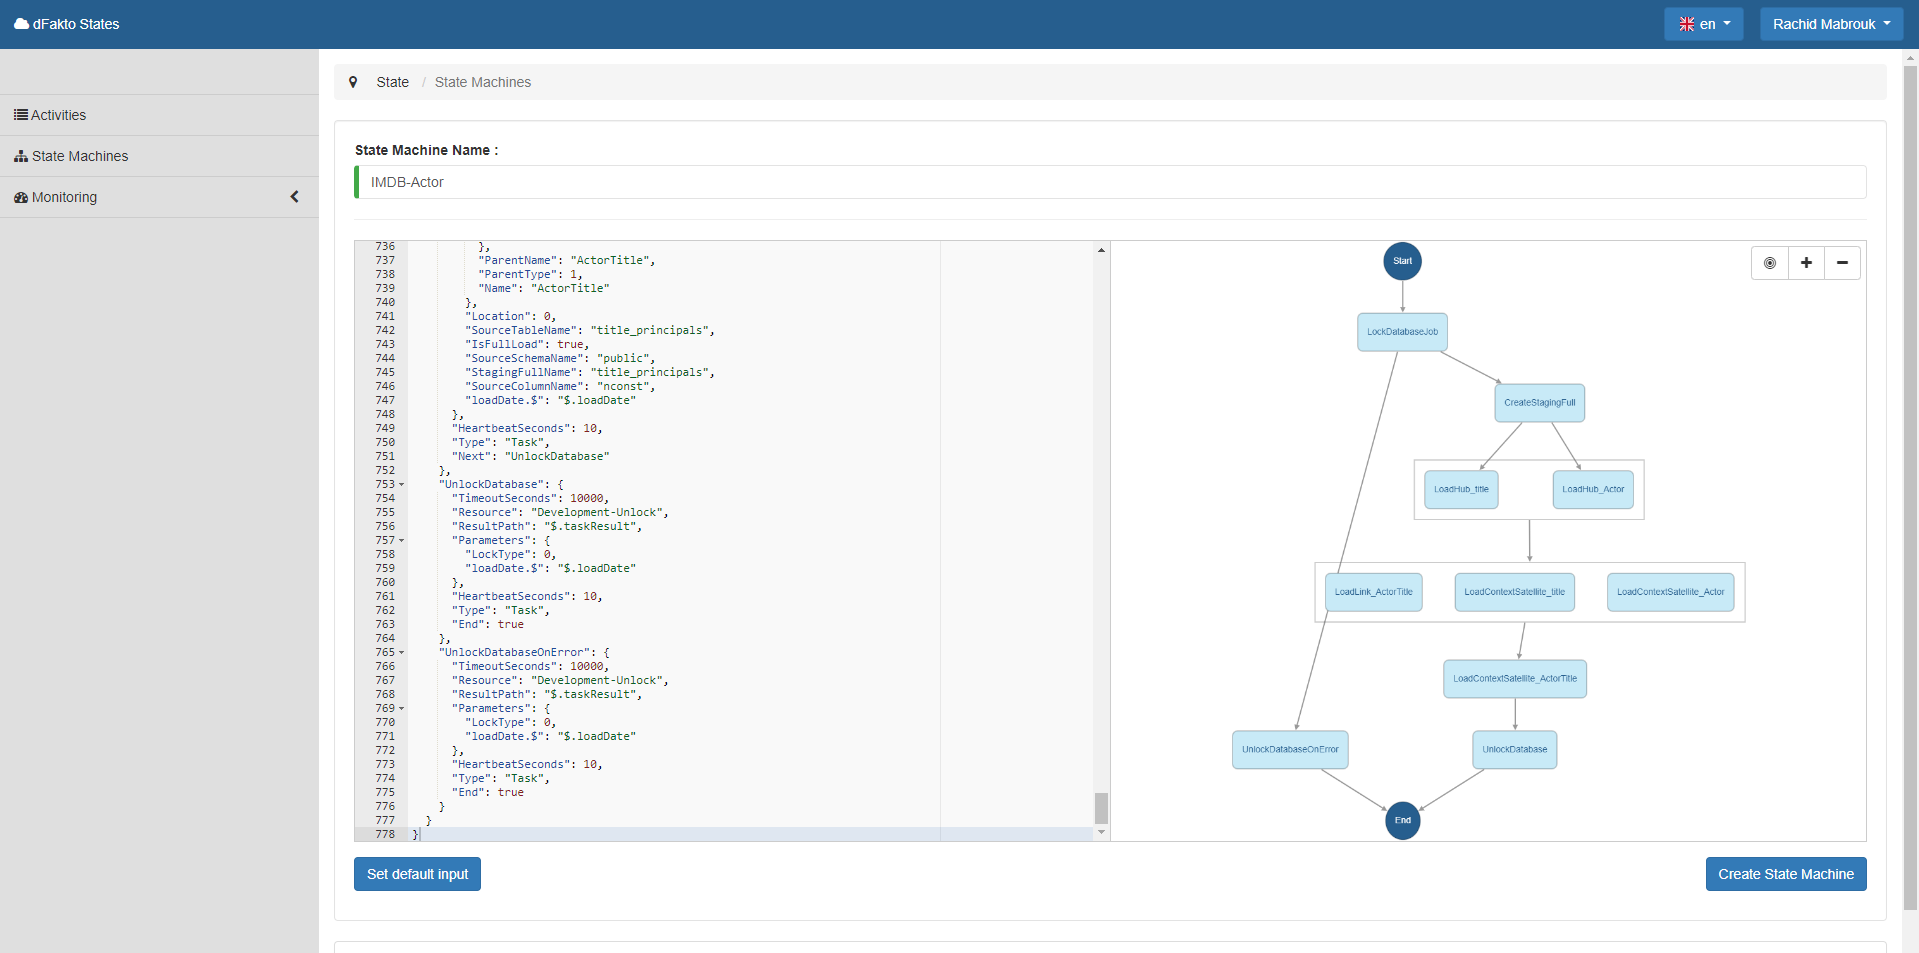
Create a State Machine
To create a new state machine, click on the "Create State Machine" button and enter the following required inputs:
State Machine Name
input your code using the Amazon State Language
You will see a live visualization of the workflow on the right, which appears when the code is properly written.
This workflow will help you visualize the different tasks in your code.
To save, confirm by clicking on "Create State Machine" under the code section.
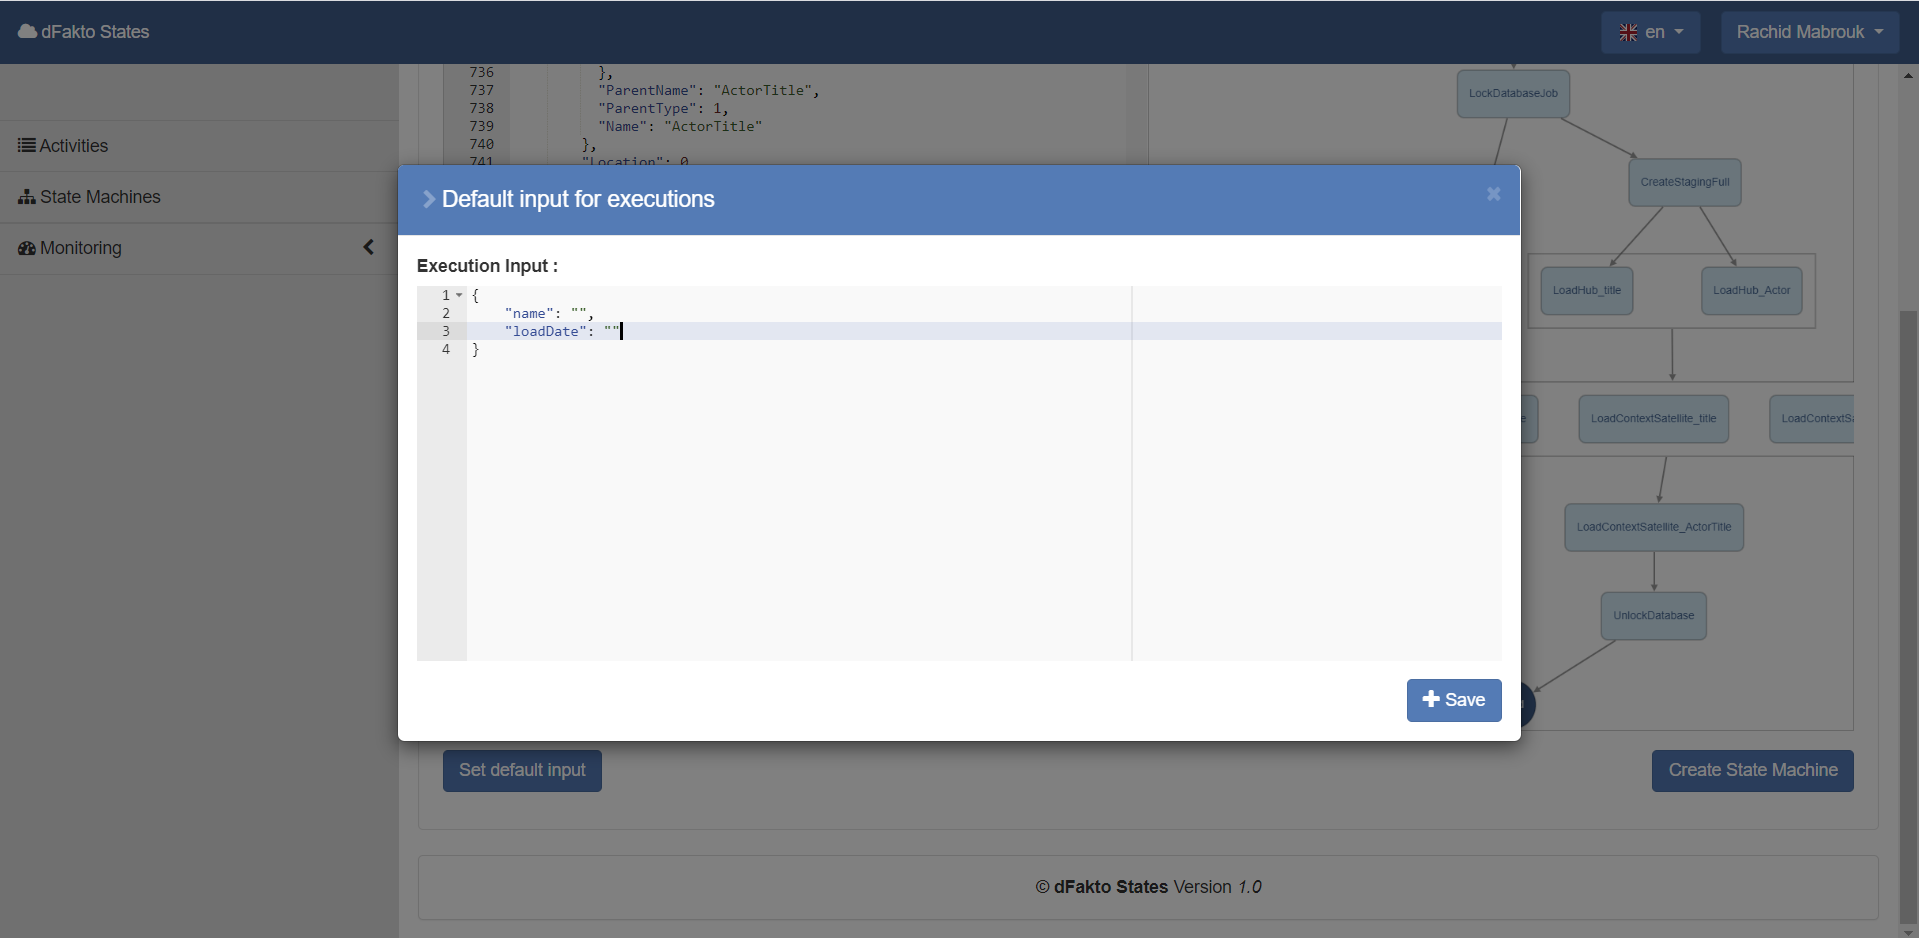
Default Input
It is possible to attach a default input to state machines.
The execution input of a given state machine often looks the same, following the same template. Consequently, the user can define a default input template per state machine, that will be shown when he wants to execute the selected state machine.
View Details of a State Machine
Click on the State Machine line you wish to see if you wish to view the details of the state machine. The following information will appear:
the state machine code, in ASL (Amazon State Language)
visualization workflow,
current status of each execution launched.
Executions
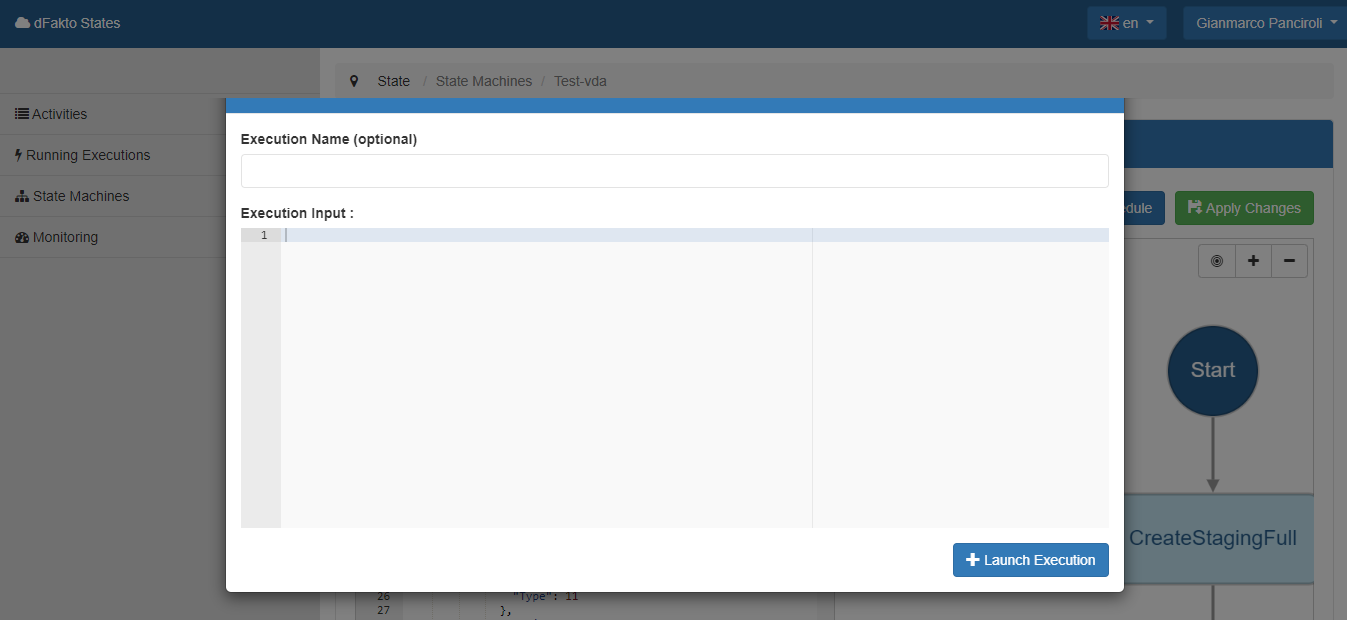
Start the execution of a State Machine
To start the execution of a state machine, go to State Machines and click on the one you want to launch.
Then click on the "Start Execution" button on the upper left of the window.
A window will appear for which you have:
the possibility to give a name to the execution (it may be easier to identify if you have several executions launched),
"Execution Input" is the input you want to send to the first state asked by the state machine:
The input code to send is in JSON language
For this step you must edit the JSON code in order to add the needed input, or else an error message will appear if the execution failed.
if a default input has been set for this state machine, the default input will appear.
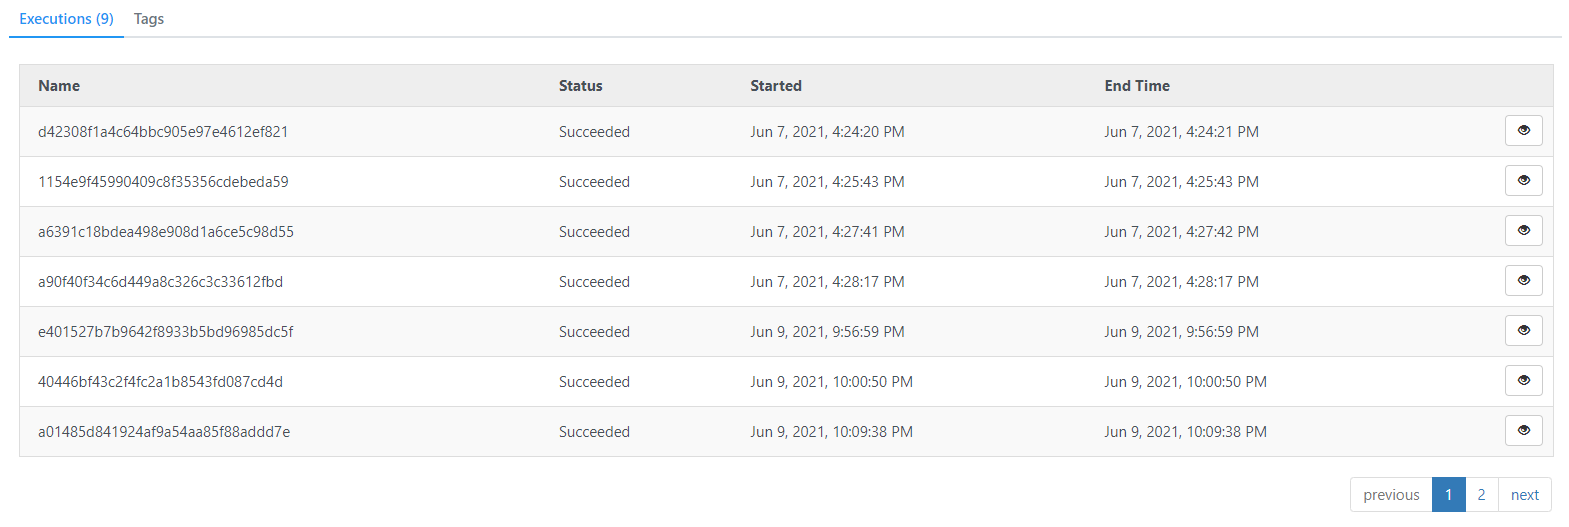
View the different Executions launched in a State Machine
Once a state Machine has been launched, you are able to view all executions launched in the State Machine and if it has succeeded.
An "Execution Details" panel will appear above the States Machine's visual workflow.
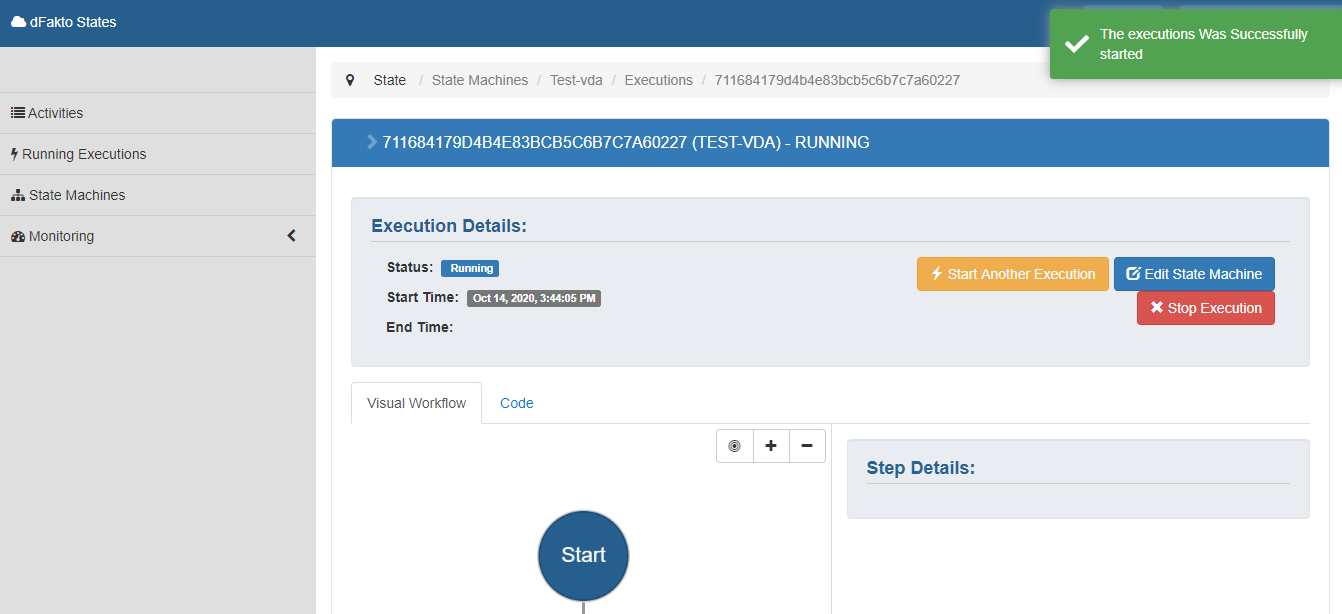
The status can be:
"Running" which means that your execution is still running. If the status does not evolve, you may want to check the execution in detail to identify which state is blocking. Indeed there is a possibility that one of the states requires an additional input, so it will not produce any output as long as the state has not received this input. It may also indicate that there is no worker available able to manage the blocking state.
"Succeeded", which means that your State Machine has correctly and fully been executed.
"Failed" which mean that the execution failed for some reason (Task, Abort, Timeout)
To view the executions from a State Machine:
Go to the State Machine menu,
Click on the desired State Machine you want to analyze,
Go to the section : Name_of_your_State_Machine - Executions
Choose the desired execution you want to analyze. In this section, you will see the names previously given and timestamps to each execution, to help you find the one you are looking for.
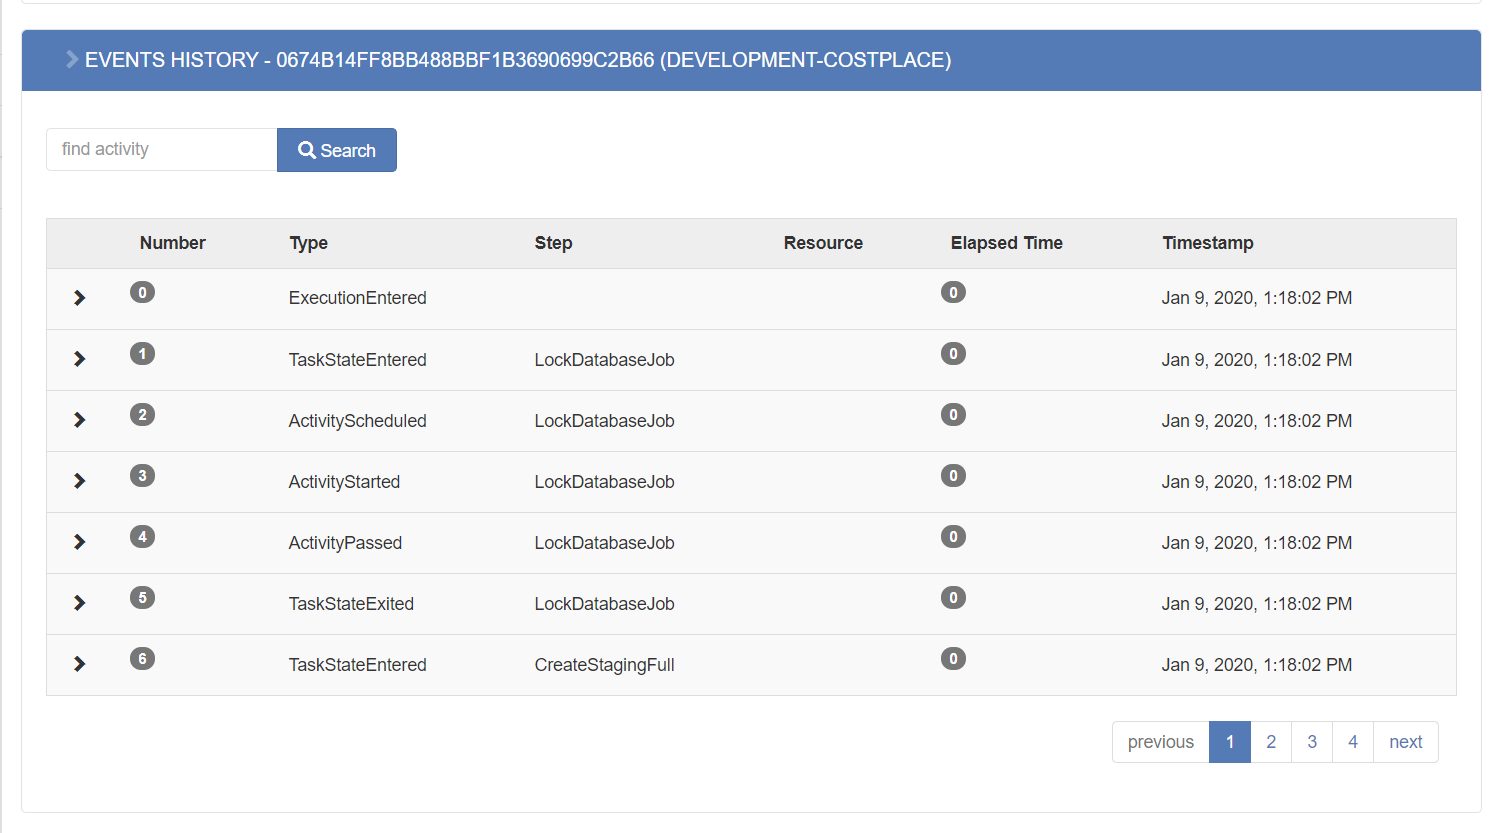
History Log and Step Details of an Execution in a State Machine
dFakto States also enables you to view the history log of all events and results in detail. In this sense, it is possible to follow the whole flow executed step by step.
Go to the State Machine menu,
Click on the desired State Machine you want to analyze,
Go to the section : "Name_of_your_State_Machine - Executions"
Choose the desired execution you want to analyze.
Now you can either:
View the input and output from a selected step. by clicking on the desired step in the workflow diagram
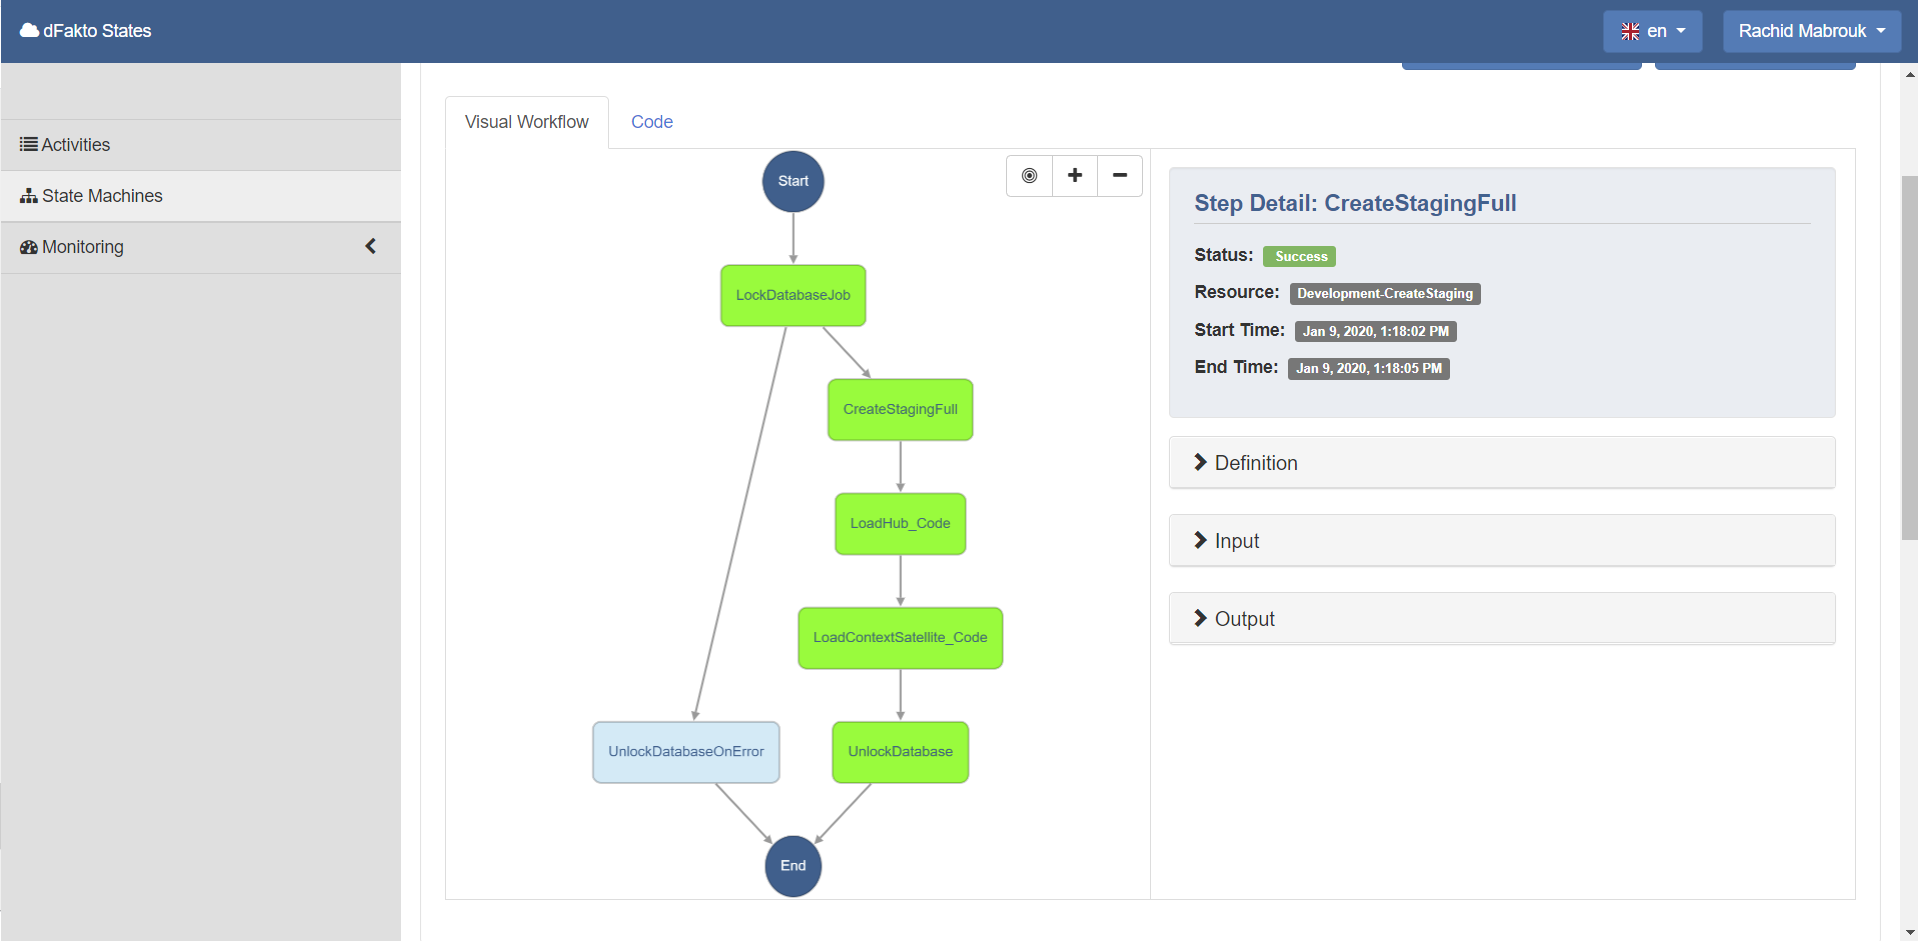
The states color indicates their status.
Green : success
Grey : failure
Blue : running
The right hand menu appear after clicking on a state, and allow the user to quickly see the Amazon State Language code of this state, its input and its output.
2. View a track record of all events occurred during the execution of the steps of the State Machine, by scrolling down to the section "Events History - Name_of_your_Execution".