State Machines
Existing State machines
The State Machine section allows the user to manage the different State Machines created in your account. In this section, you can create, view details, edit, or delete state machines.
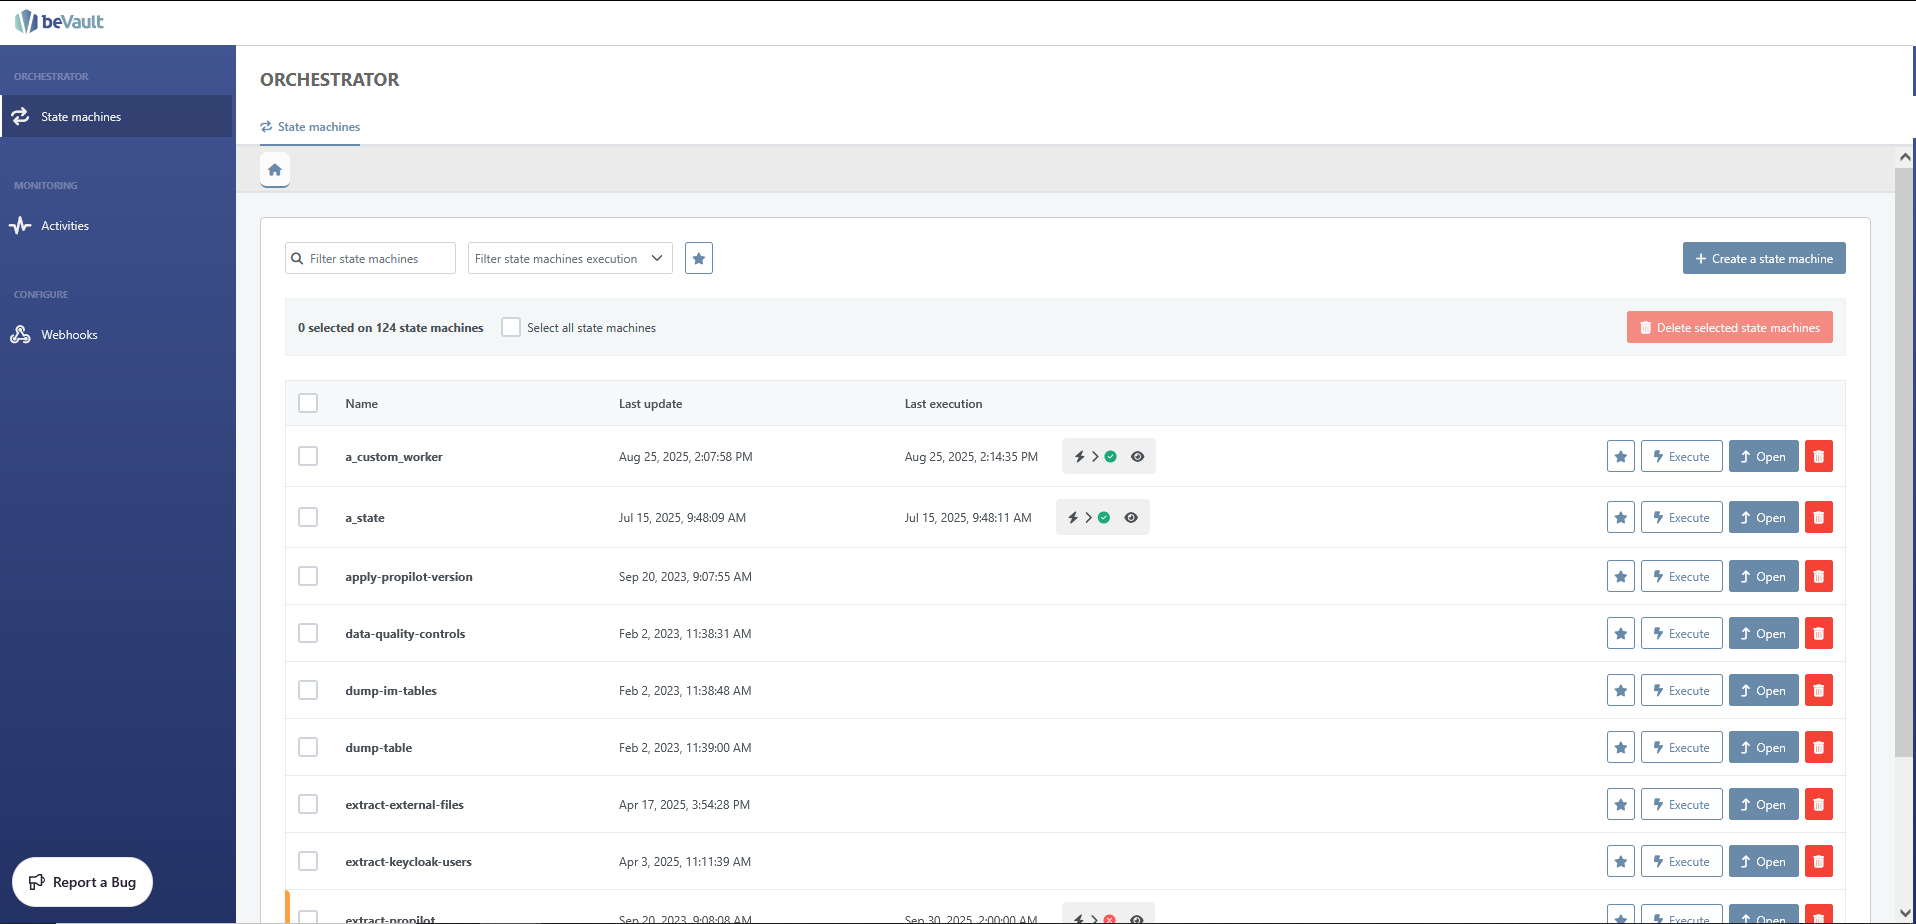
Find State Machines
There 3 ways to ease the search of a state machine
You can use the search bar to find state machines. You can find a state machine either by name (or part of it).
You can use the dropdown list next to the search bar to select one or several of the following options
‘Show machines with an execution running’
‘Show machies with last execution succeeded’
‘Show machies with last execution failed’
‘Show machies with last execution aborted’
You can filter to see only your state machines set up as favorite

Set/Unset a State Machine as (un)favorite
States allows you to set state machines as “favorite” to make them appear easily through a filter.
You will just have to click on the blue “star” button on the left of a state machine’s name in the list view:

Once selected, the star will appear in gold in the list.
To remove the state machine among the favorites, simply “unstar” the state machine (either in the list view, either in the card).
Setting a state machine as a favorite is user-based. Your choice will not impact other user’s settings.
Create a State Machine
To create a new state machine, click on the “Create State Machine” button
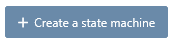
A tab will appear in which you will be asked to enter the following information:
Name (mandatory and unique)
Code of the state machine using the Amazon State Language
The default input that will be used when lauching the state machine
While writing the code, you will see a live visualization of the workflow on the right, which appears when the code is properly written.
This workflow will help you visualize the different tasks in your code.
To save, confirm by clicking on “Save changes” under the code section.
To cancel the creation, click on ‘Cancel changes’ or close the tab.
Open and edit a state machine
To open a state machine,
Click on the button ‘Open’ at the end of the row of the state machine

If you are in an execution detail tab, click on the button 'Open state machine'

The tab of the state machine will appear displaying 3 sections
State machine configuration
Tags
Executions
State machine configuration
In this section, you can see and edit the details of the state machine configuration
The name
The code of the state machine
The default input
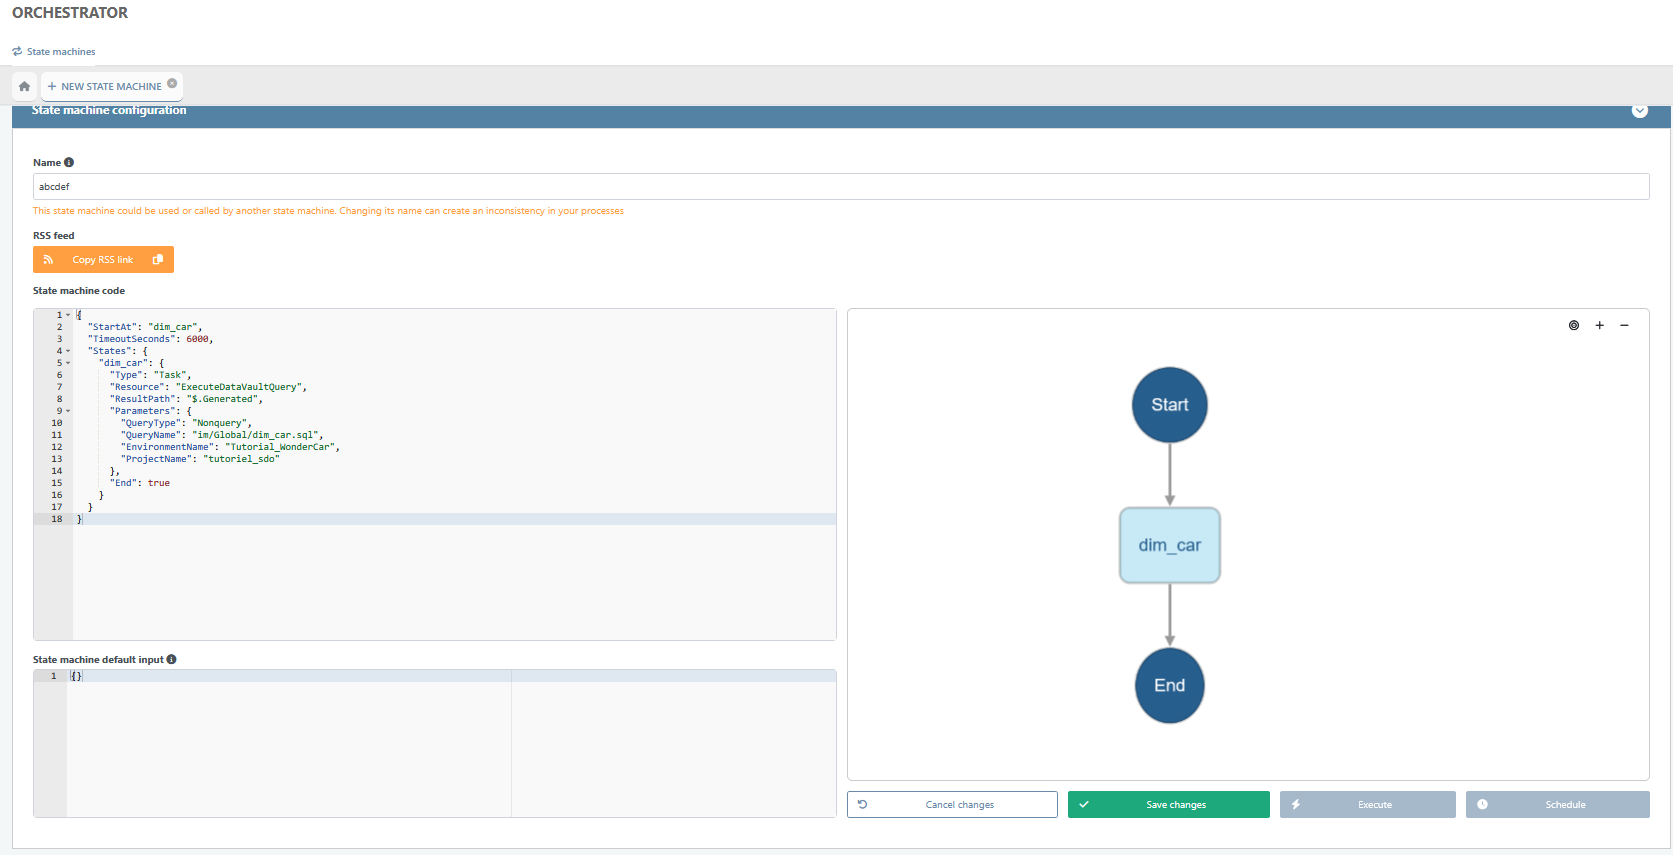
Additionnally, you may also set up a schedule for your state machine by clicking on the button ‘Schedule’ below the graph of the state machine.
A pop-up will appear in which you can
Select a timezone
Enter an input that will be used for every scheduled execution of the state machine
Define if the schedule execution can be launched if there is already another execution running for the same state machine
Define the frequency of the execution either through a selector or by entering it using the CRON format (in the tab ‘Advanced’)
As explained in the Settings section, States support RSS feeds to notify you about all the state machine’s activities.
To copy the RSS link to the clipboard, you will first need to enable the RSS in your profile settings. Then click on the button ‘Copy RSS Link’ that appears below the state machine name if the RSS feeds are activated.

The link will be automatically copied to your clipboard with a notification stating so.

You will then only need to copy the link in your RSS editor
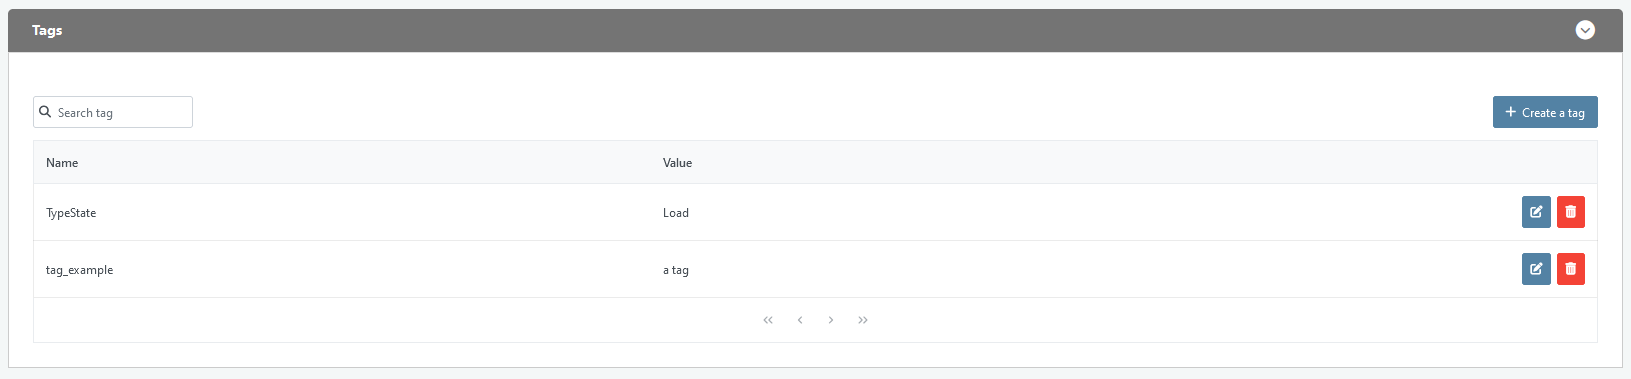
Tags
In this section, you can manage tags on your state machine. Each tag is defined by a key and a value.
Through this feature, you can
search them by filling the search bar above the list.
create them by clicking on the button ‘Create a tag’. It opens a pop up in which you will be asked the key (name) and the value of the tag
edit the existing one by clicking on the ‘pencil’ blue button in the row of the tag. Please note that only the value of the tag can be edited
delete a tag by clicking on the red ‘trash can’ button
Execution
Once a state Machine has been launched, you can view all executions launched in the State Machine and if they have succeeded.
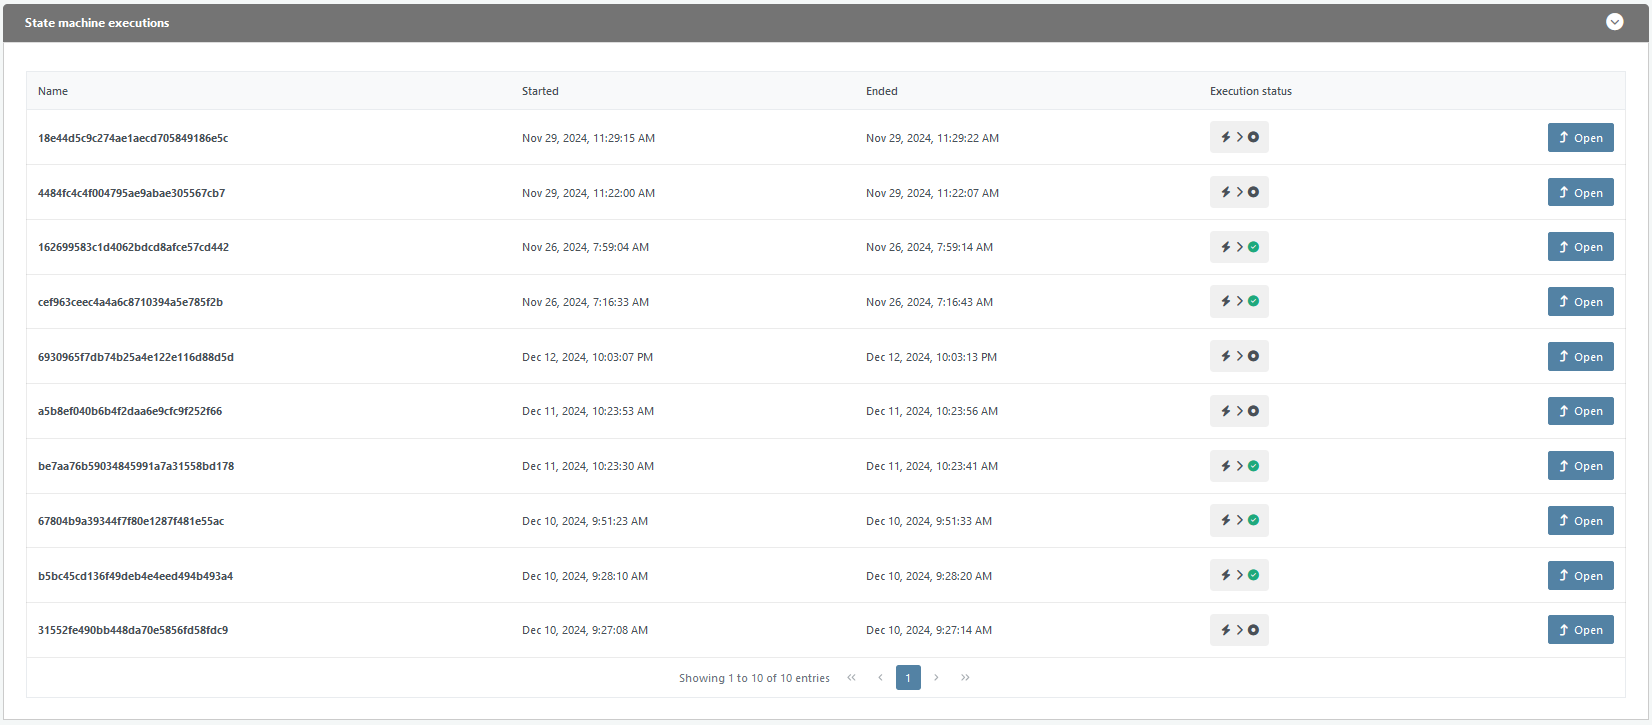
The status can be:
“Running” which means that your execution is still running. If the status does not evolve, you may want to check the execution in detail to identify which state is blocking. Indeed, there is a possibility that one of the states requires an additional input, so it will not produce any output as long as the state has not received this input. It may also indicate that there is no worker available able to manage the blocking state.
“Succeeded”, which means that your State Machine has correctly and fully been executed.
“Failed” which means that the execution failed for some reason (Task, Timeout)
“Aborted” which means that the execution was manually stopped
For each execution, you can see
Its id (Column: “Name”)
Its start date
Its end date
Its status
A button to reach to complete details of the execution. Clicking on this button opens a tab with history log and step details of the execution of a state machine.
History Log and Step Details of an Execution in a State Machine
In this tab, you can either:
View the input and output from a selected step. by clicking on the desired step in the workflow diagram
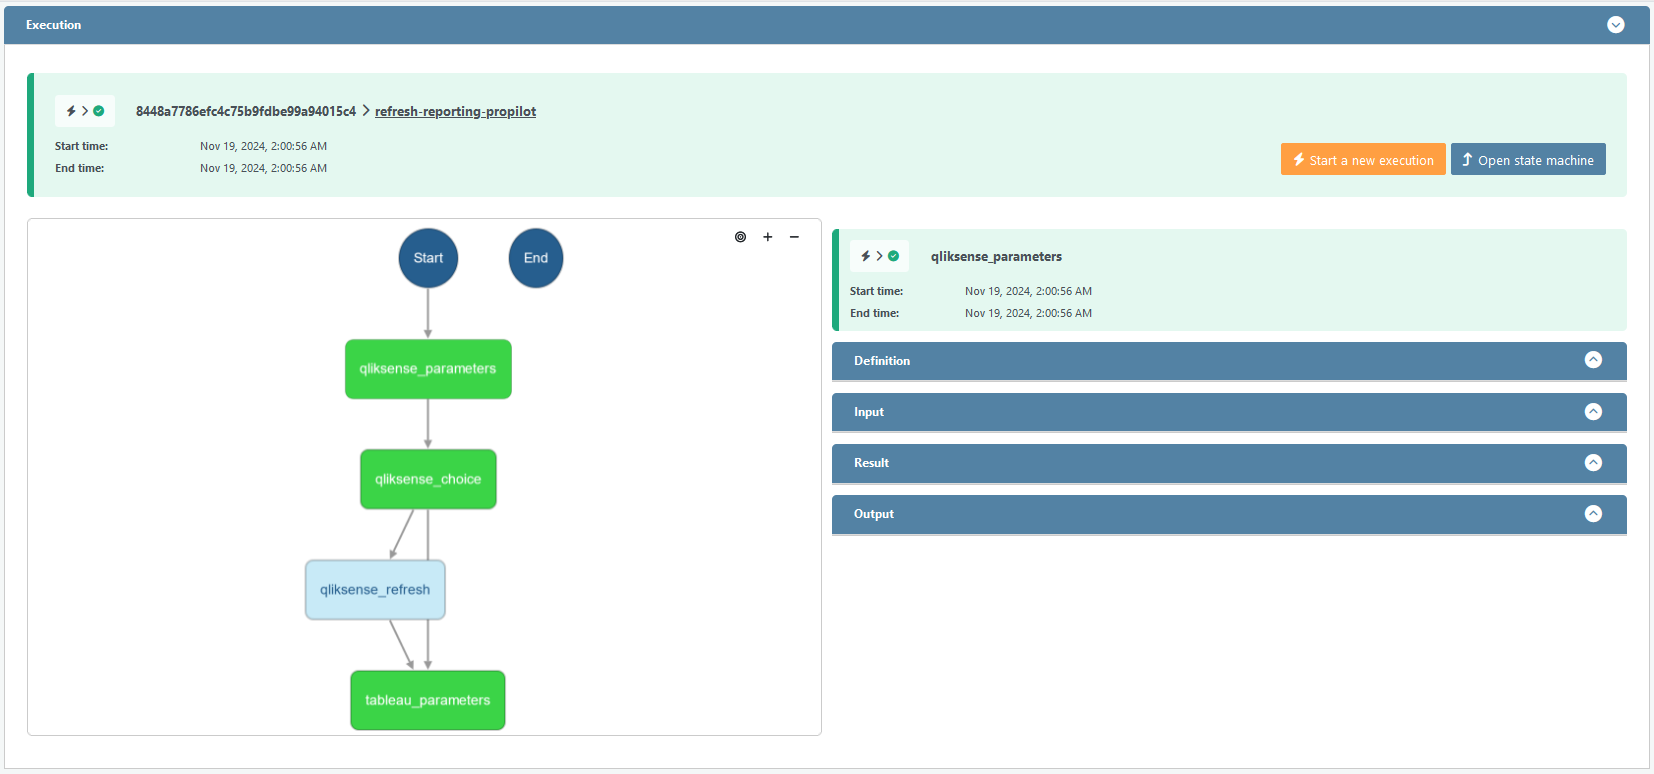
The states color indicates their status.
Green : success
Grey : failure
Light Blue : Waiting to run
Blue: Running
The right-hand menu appears after clicking on a state, and allows the user to quickly see the Amazon State Language code of this state, its input, its output and its result.
Relaunch an execution by clicking on the button 'Start a new execution”
Please know that, if the execution is still running, the button will not be available. However, a button to stop the execution will be available instead. It will allow you to abort the execution
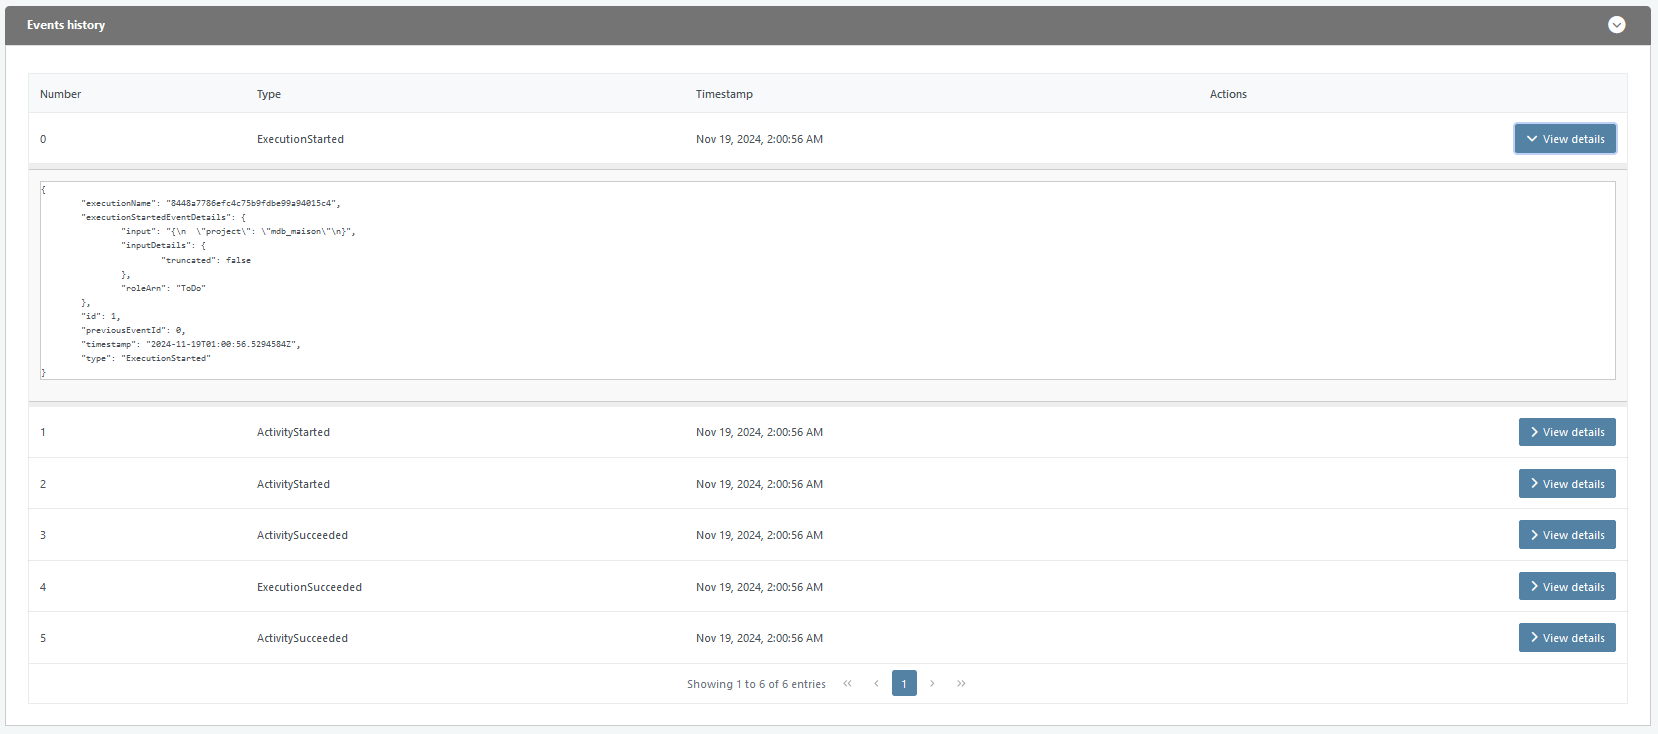
View a track record of all events that occurred during the execution of the steps of the State Machine, by scrolling down to the section “Events History”.
Please know that, for each event, you can see the details of the event by clicking on the button “View details” at the end of the row of the event
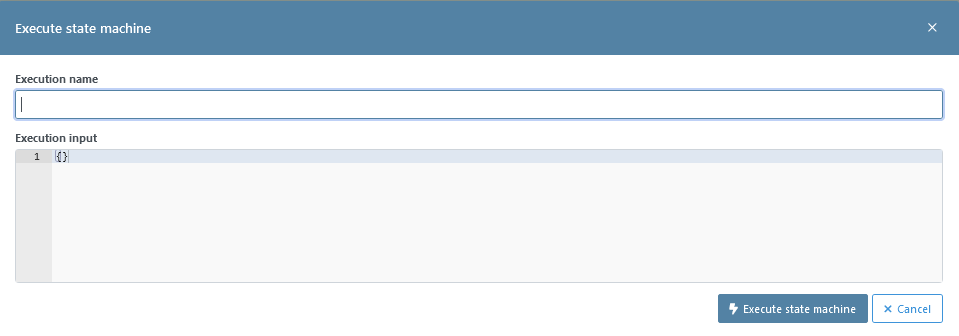
Start the execution of a State Machine
To start the execution of a state machine
you can click on the button ‘Execute’ in the list of state machine on the main page of the module ‘State machines’
you can click on the button ‘Execute’ in the tab of a state machine configuration
you can click on the button ‘Start a new execution’ in the tab of an execution
A pop-up window will appear for which you have:
the possibility to give a name to the execution (it may be easier to identify if you have several executions launched),
“Execution Input” is the input you want to send to the first state required by the state machine:
The input code to send is in JSON language
For this step, you must edit the JSON code to add the needed input, or else an error message will appear if the execution failed.
if a default input has been set for this state machine, the default input will appear.
Delete a state machine
In order to delete a state machine, you need to reach the main page of the “State machines” module. There, you may
either delete it individually by clicking on the trashcan button at the end of the row of the state machine
or delete several ones simultaneously, by checking first the box at the beginning of the row of the state machines you want to delete and then clicking on the button ‘Delete selected state machine’
