Tutorial Scenario Resolution - Part 2: Simple Model with Link & Satellites
For this second part of the tutorial, we will use the case explained here Tutorial Scenario, but we will focus on the model for the source HR System, with 2 Hubs, 1 Link and 2 Satellites.
.png?inst-v=844dc17a-cc7c-410d-81b7-836a7dbade24)
In order to reproduce this model,
Integrate the new table from the source
Create a new Hub
Create a new Link
Adapt the mapping to add hubs, links and satellite
Deploy a new version
Load new data into the data vault
Resolution:
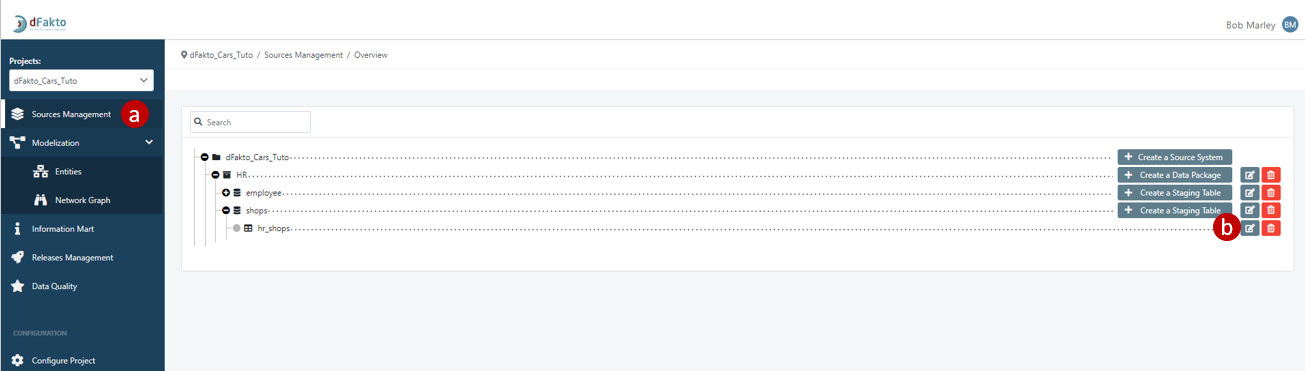
Create a new data package named “Shops” and create the related staging table “hr_shops” from the Excel file HR.
Go to Source Management
Create a Data Package in the HR source
Name it “shops”
Click on the “Save” button
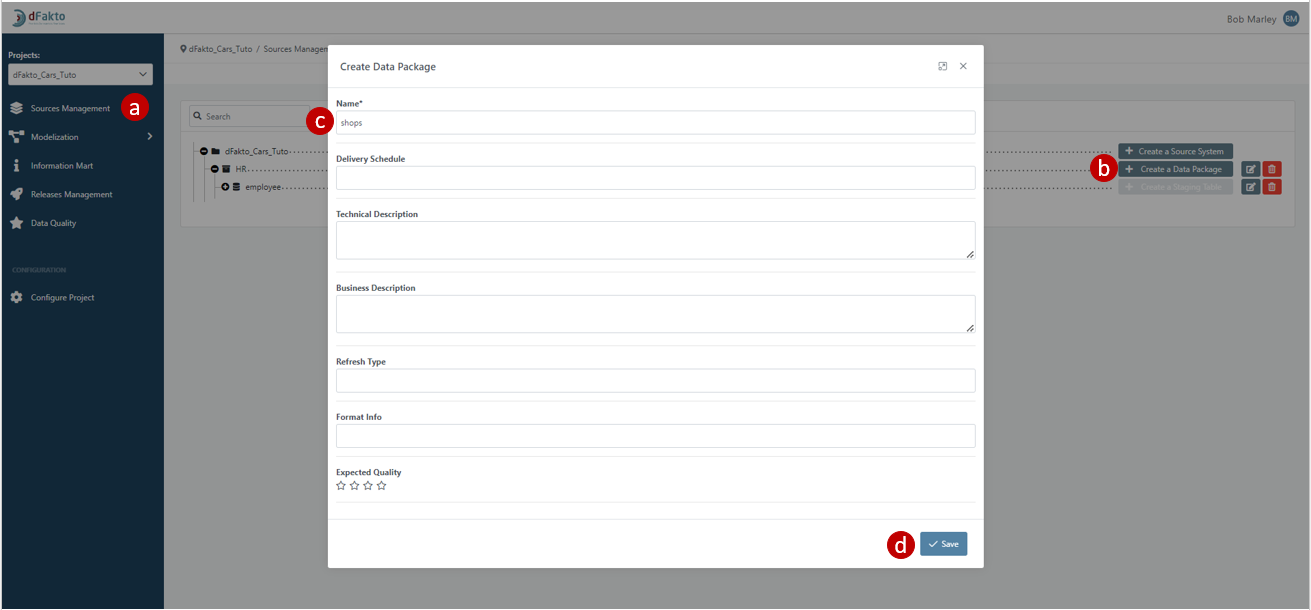
You should see this wizard appear to confirm the creation:

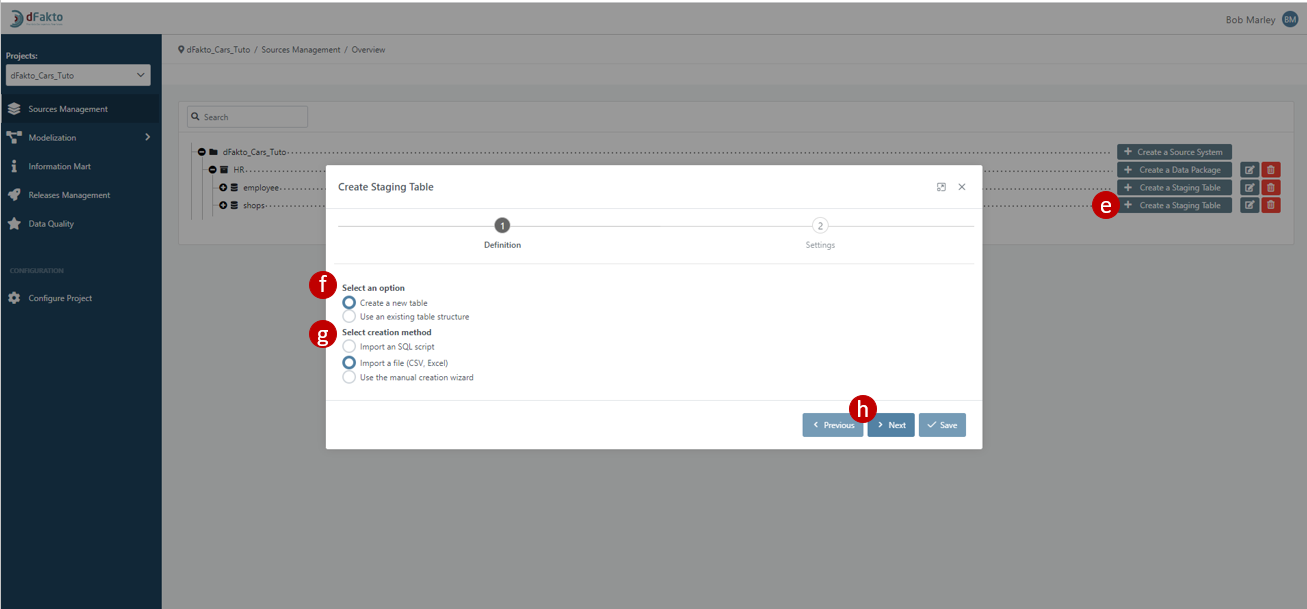
Create a new staging table
Select the “Create a new table” option
Select “Import a file (CSV, Excel)”
Click on the “Next” button to continue
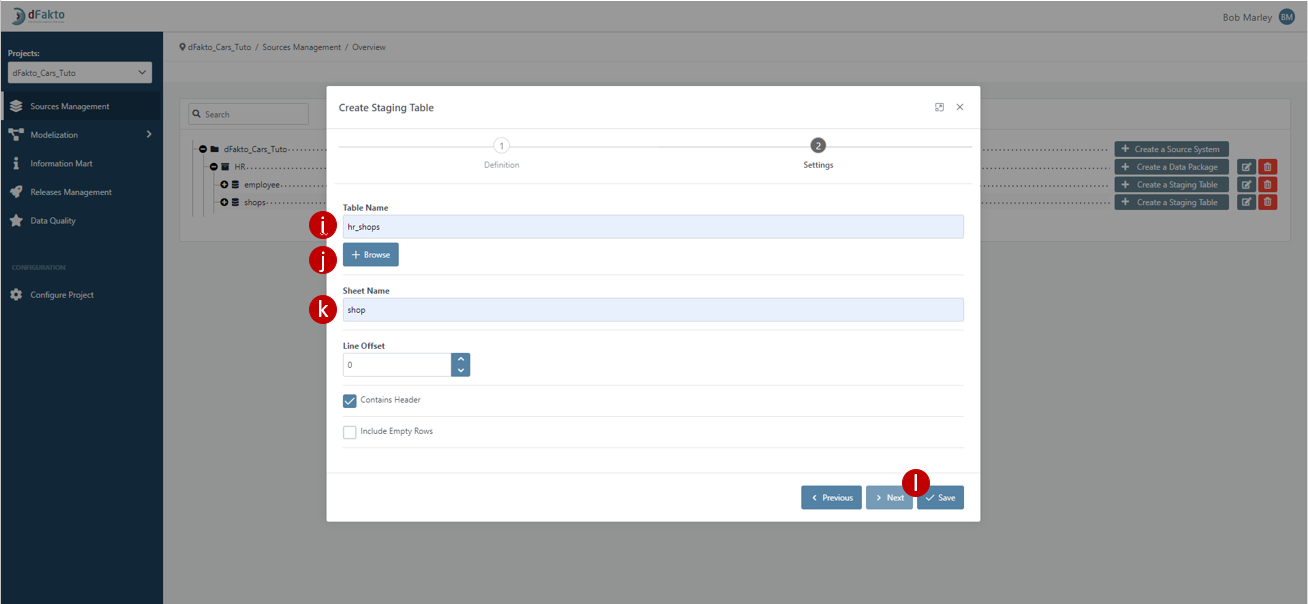
Name the table “hr_shops”
Click on the “Browse” button to retrieve the hr_extract file
Set the sheet name as “shop” (the file tab)
Click on the “Save” button to finish
You should see this wizard appear to confirm the creation:

Your source structure should look like this
Create a new hub “Shop” (We will use the Network Graph section this time)
Go to Modelization > Network Graph
Click on the “+Add Hub” button to create a draft hub
Name it “Shop”
Click on the “Save” button

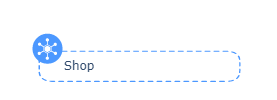
You will be able to drop the draft hub into the scheme area, it will then look like below, implying that it’s still a draft
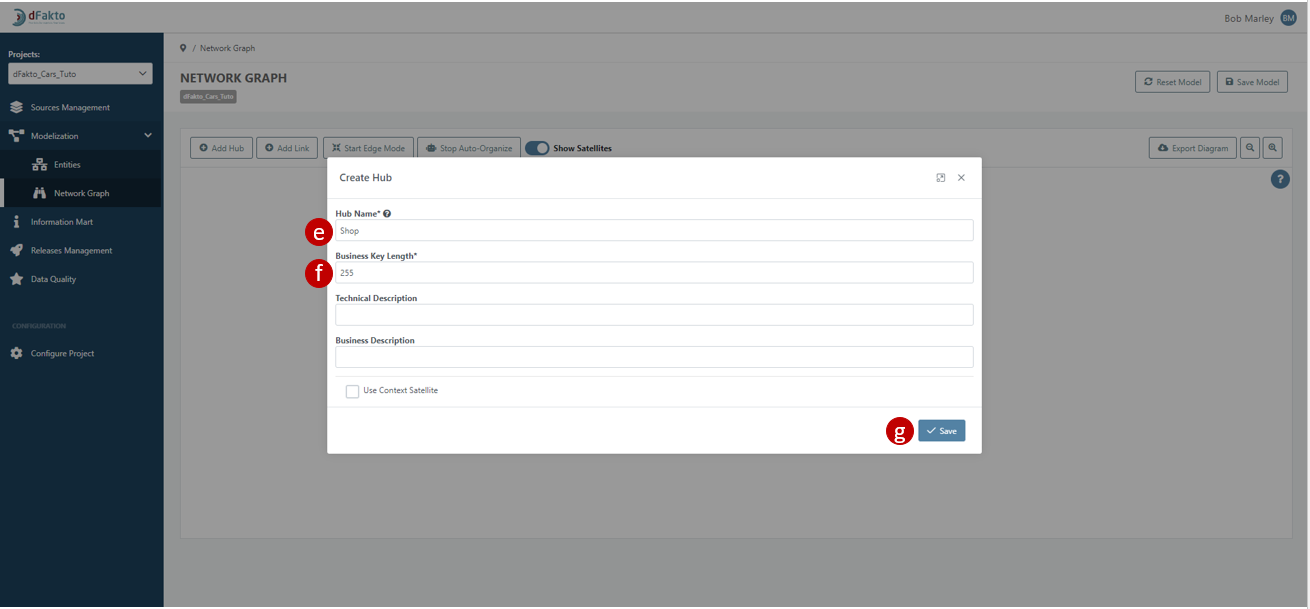
Click on the draft hub, a option menu will appear, then select “Create” to effectivelly create the hub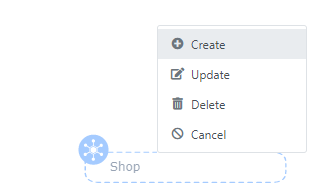
Set the name as “Shop”
Define a key length of 255
Click on Save
You will know that the hub has been properly created when a green wizard pops up in the upper right corner, and the hub in the chart will be filled:

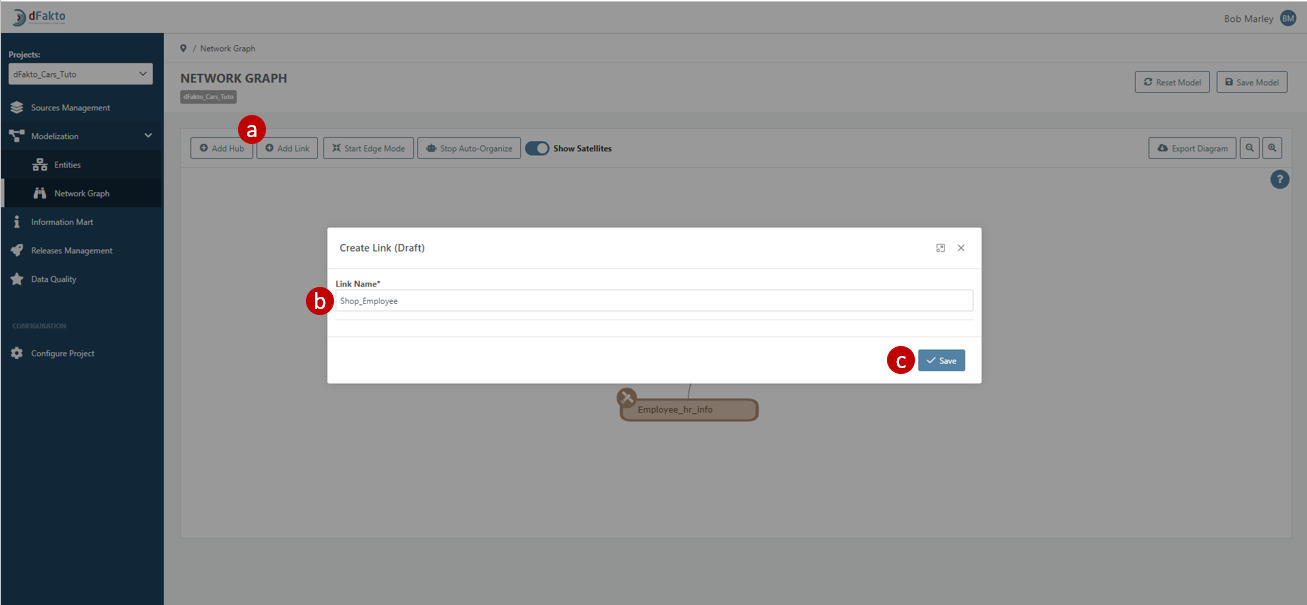
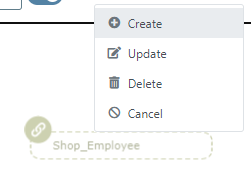
Create a Link between both Hubs named “Shop_Employee”
In the Network Graph section, hit the “+Add Link” button
Set the name of the draft link as “Shop_Employee”
Click on “Save”
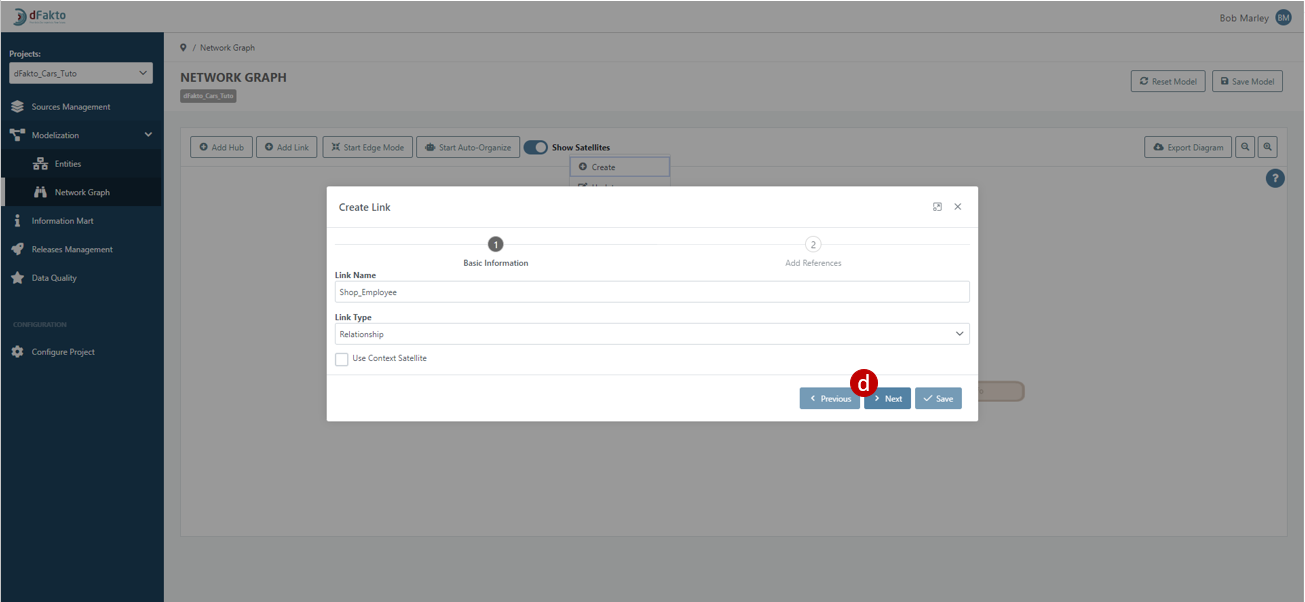
From the draft link, click on “Create”
If the pre-filled information is correct, hit the “Next” button
Set the 1st Hub Reference Name as “Shop”
Select the related Hub in the dropdown list
Click on “Add Hub Reference”
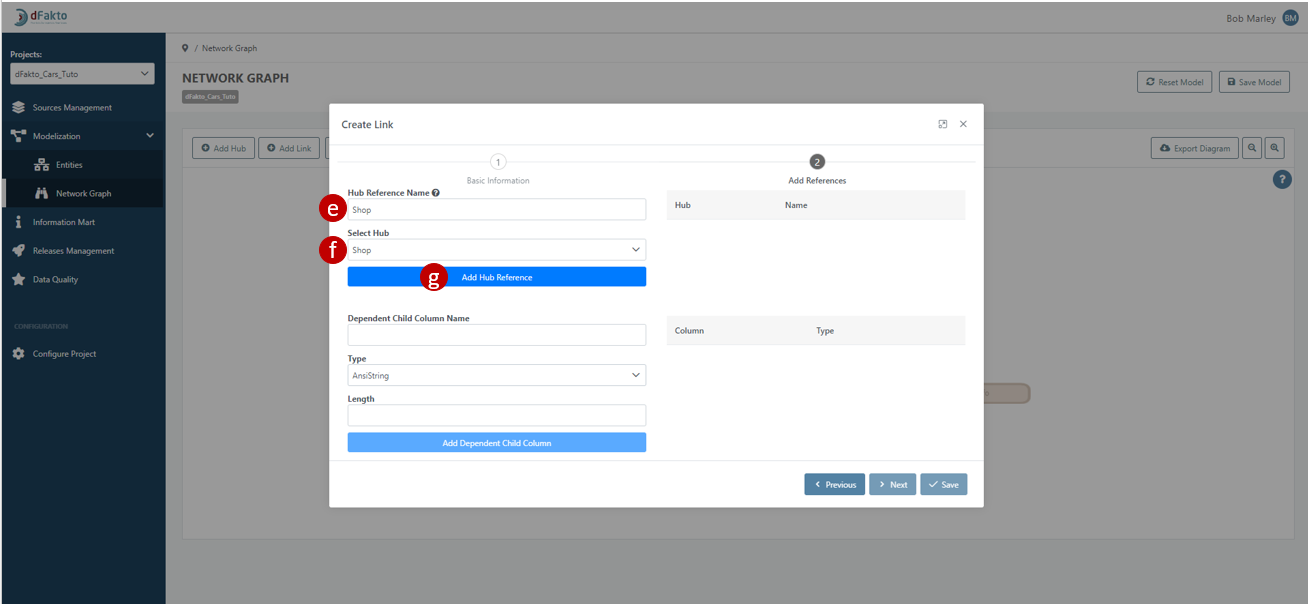
You will notice that the Hub Shop appear in the right table
Repeat the operation for the Hub Employee
Click on “Save”

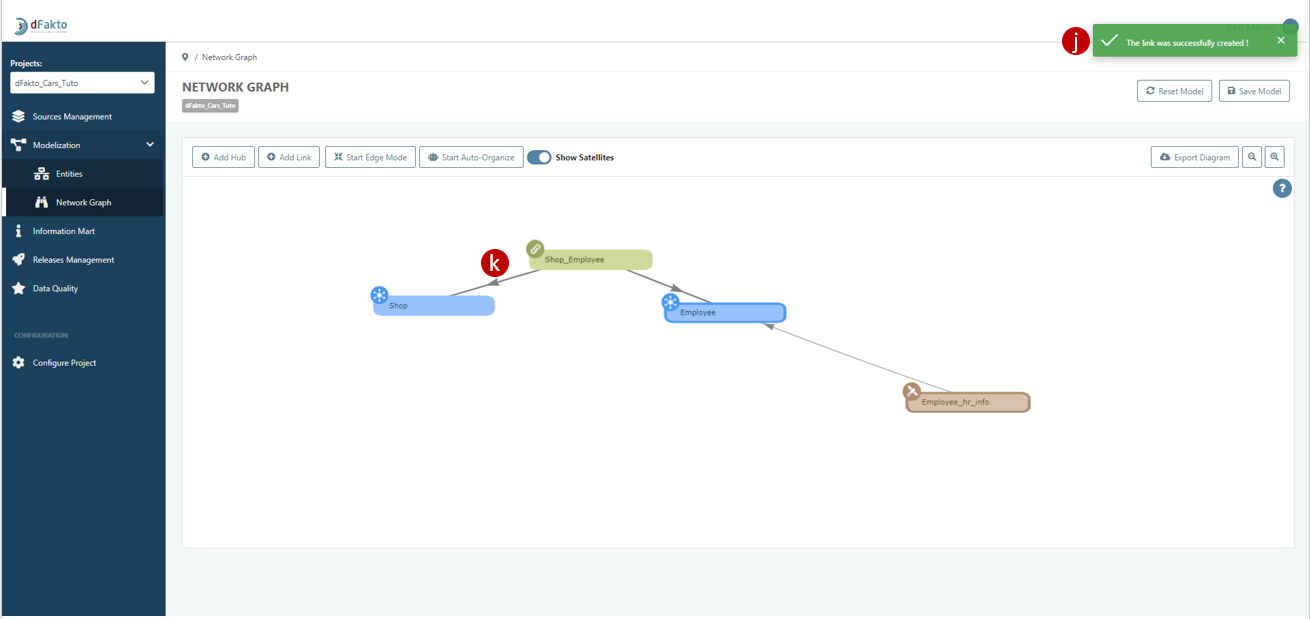
You will know that the operation succeeded when the green wizard appear on the upper right corner
And the arrows are automatically created to bind the link and both hubs
Adapt the Mapping
In the Source management section
Edit the staging table “hr_shops” to access the mapping area
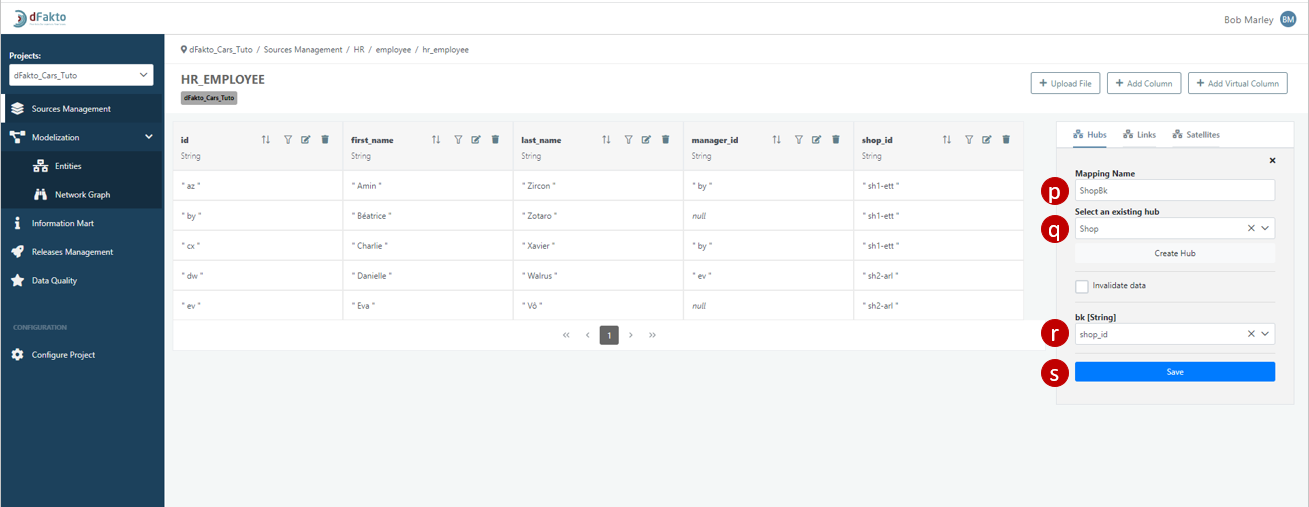
Create a New Mapping for Hubs
Set the mapping name as “ShopBk”
Select the existing hub “Shop”
Hit the checkbox “Invalidate data”
Define “id” as the business key
Click on “Save”

Create a new satellite (source_info by convention), attached to the hub “Shop”, and the associated mapping (concept_source by convention).
Set the satellite name as “hr_info”
Set the mapping name as “hShop”
Attach it to the mapping of the Hub “ShopBk”
Select columns that are not primary or foreign keys
Click on “Save”

Now let’s focus on the mapping for the staging table HR_EMPLOYEE, there is already 1 hub and 1 satellite, let’s add the other hub and let’s create a mapping for the Link.
Create a new mapping in the staging table hr_employee, a hub mapping named “ShopBk”
Select the related hub “Shop”
Select the shop_id as business key (
 do not invalidate data since shop_id is not the primary key of this table)
Click on Save
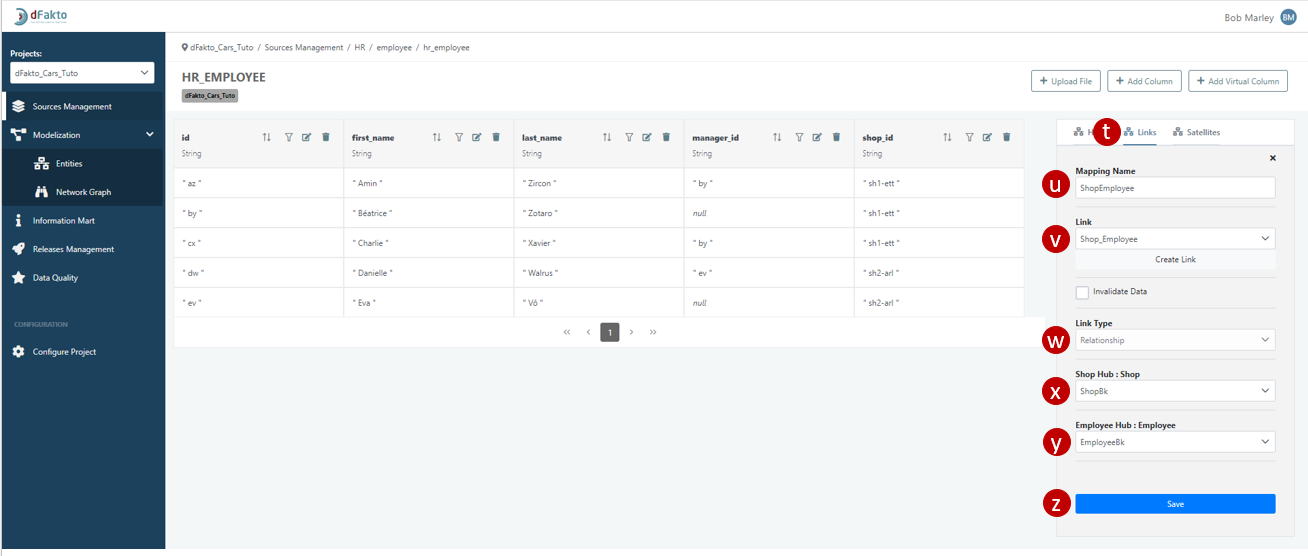
Finally, let’s create the mapping for the link Shop_Employee
Set the mapping name as “ShopEmployee”
Select the related link in the dropdown list
Adapt the Link Type if necessary
Select the hub shop
Select the hub employee
Click on Save to finish
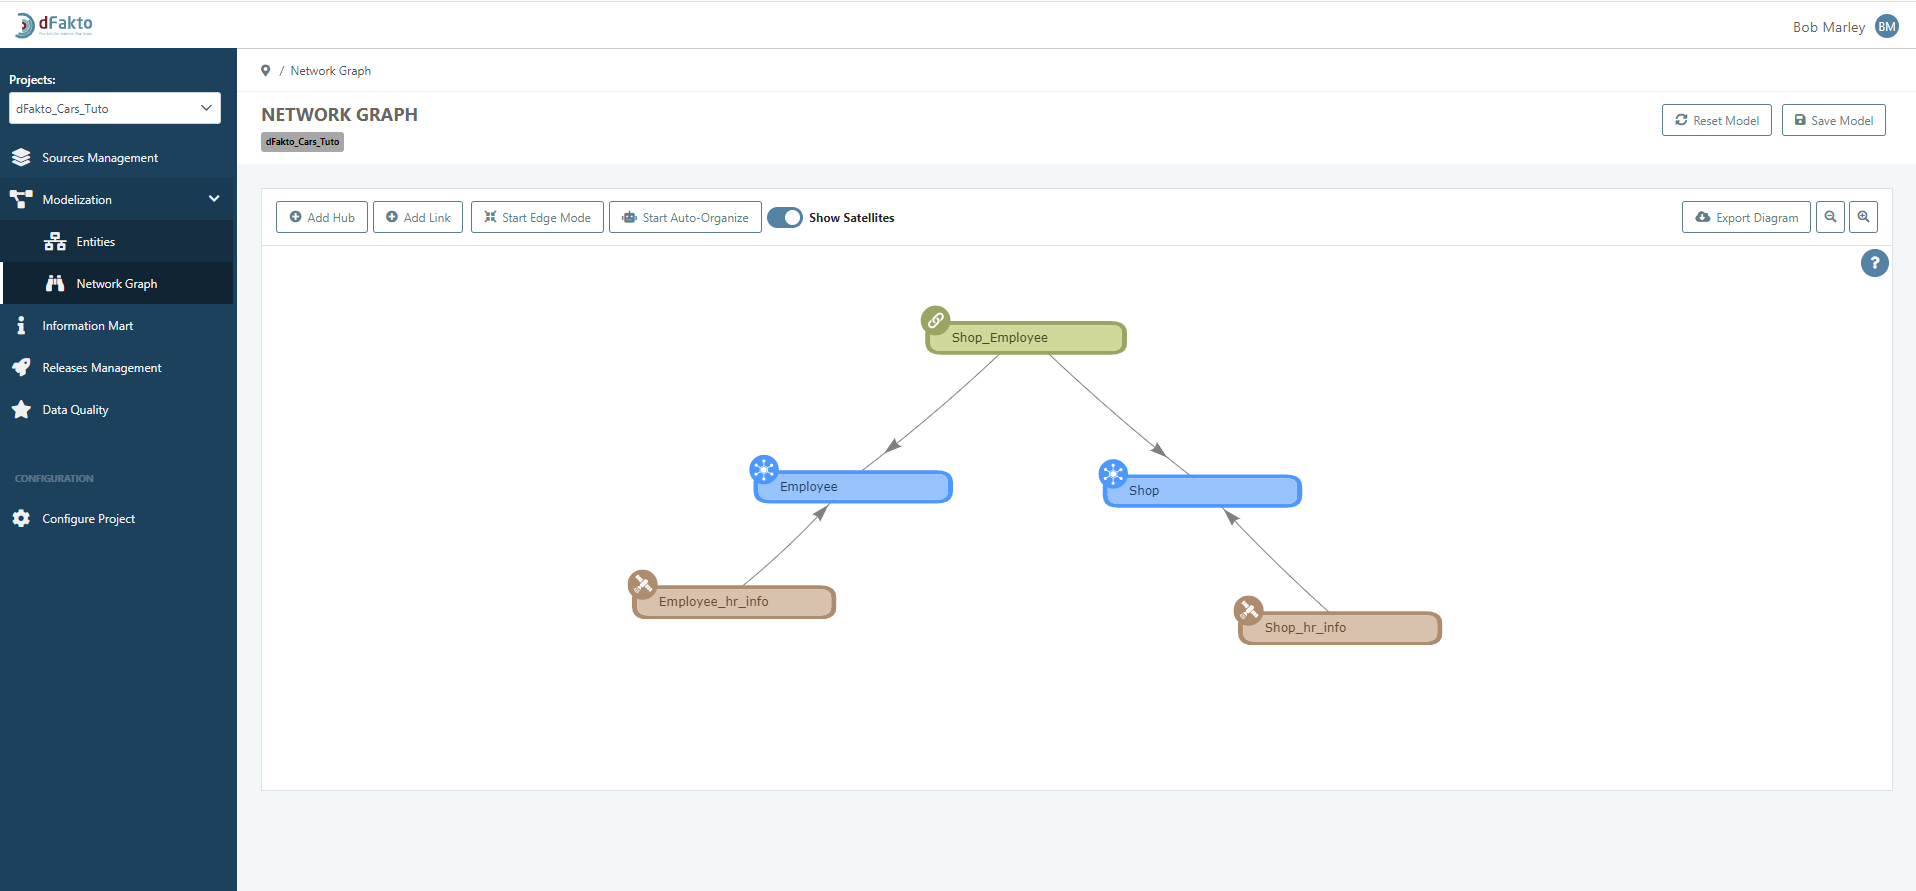
Your model should now look like this
Create and deploy a new version
.png?inst-v=844dc17a-cc7c-410d-81b7-836a7dbade24)
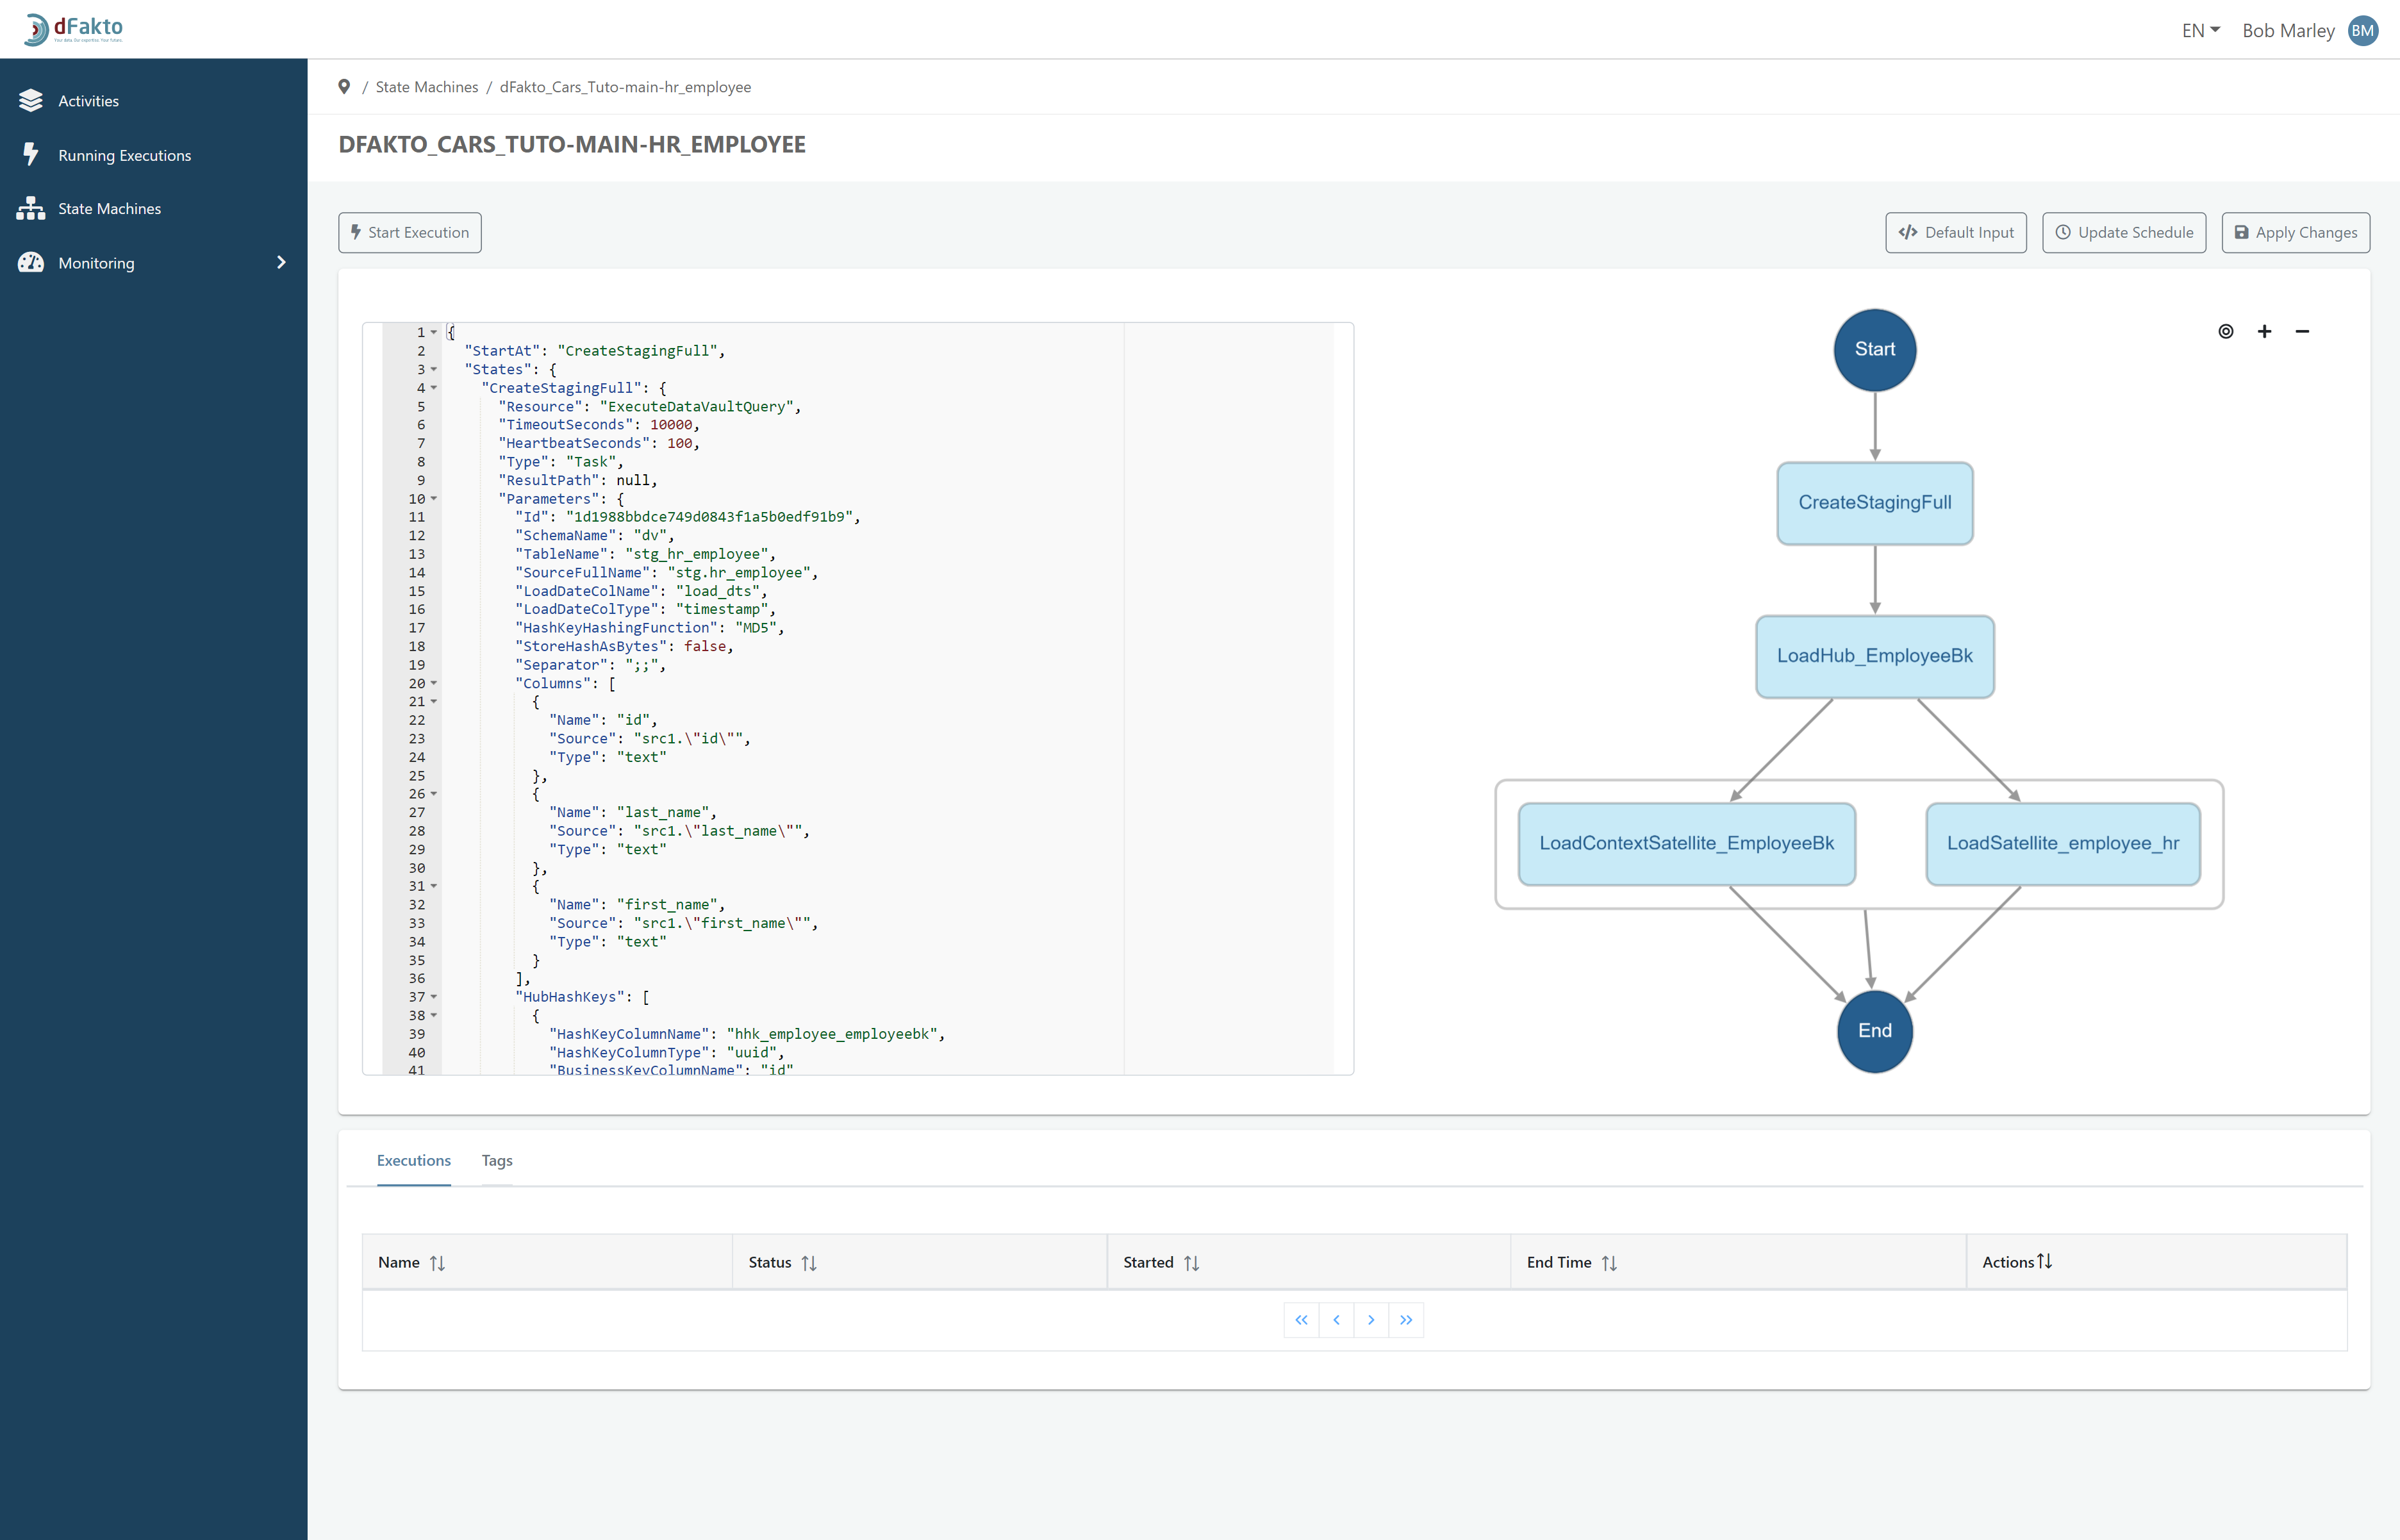
Load data into the datavault by executing the state machine related to the data package employee on the Orchestrator