Tutorial Scenario Resolution - Part 1: Simple model
For this first part of the tutorial, we will use the case explained here Tutorial Scenario, but we will focus on a basic model with 1 Hub and 1 Satellite.
.png?inst-v=844dc17a-cc7c-410d-81b7-836a7dbade24)
In order to reproduce this model,
Create a Project “dFakto Cars”
Create an Environment
Integrate the source system HR
Create a Hub Employee
Create the mapping for the hub and the satellite
Deploy Version
Load data in the datavault
Resolution
Create a Project “dFakto Cars”
Select the projects dropdown list
Create a new project and name it “dFakto_Cars_Tuto”
.png?inst-v=844dc17a-cc7c-410d-81b7-836a7dbade24)
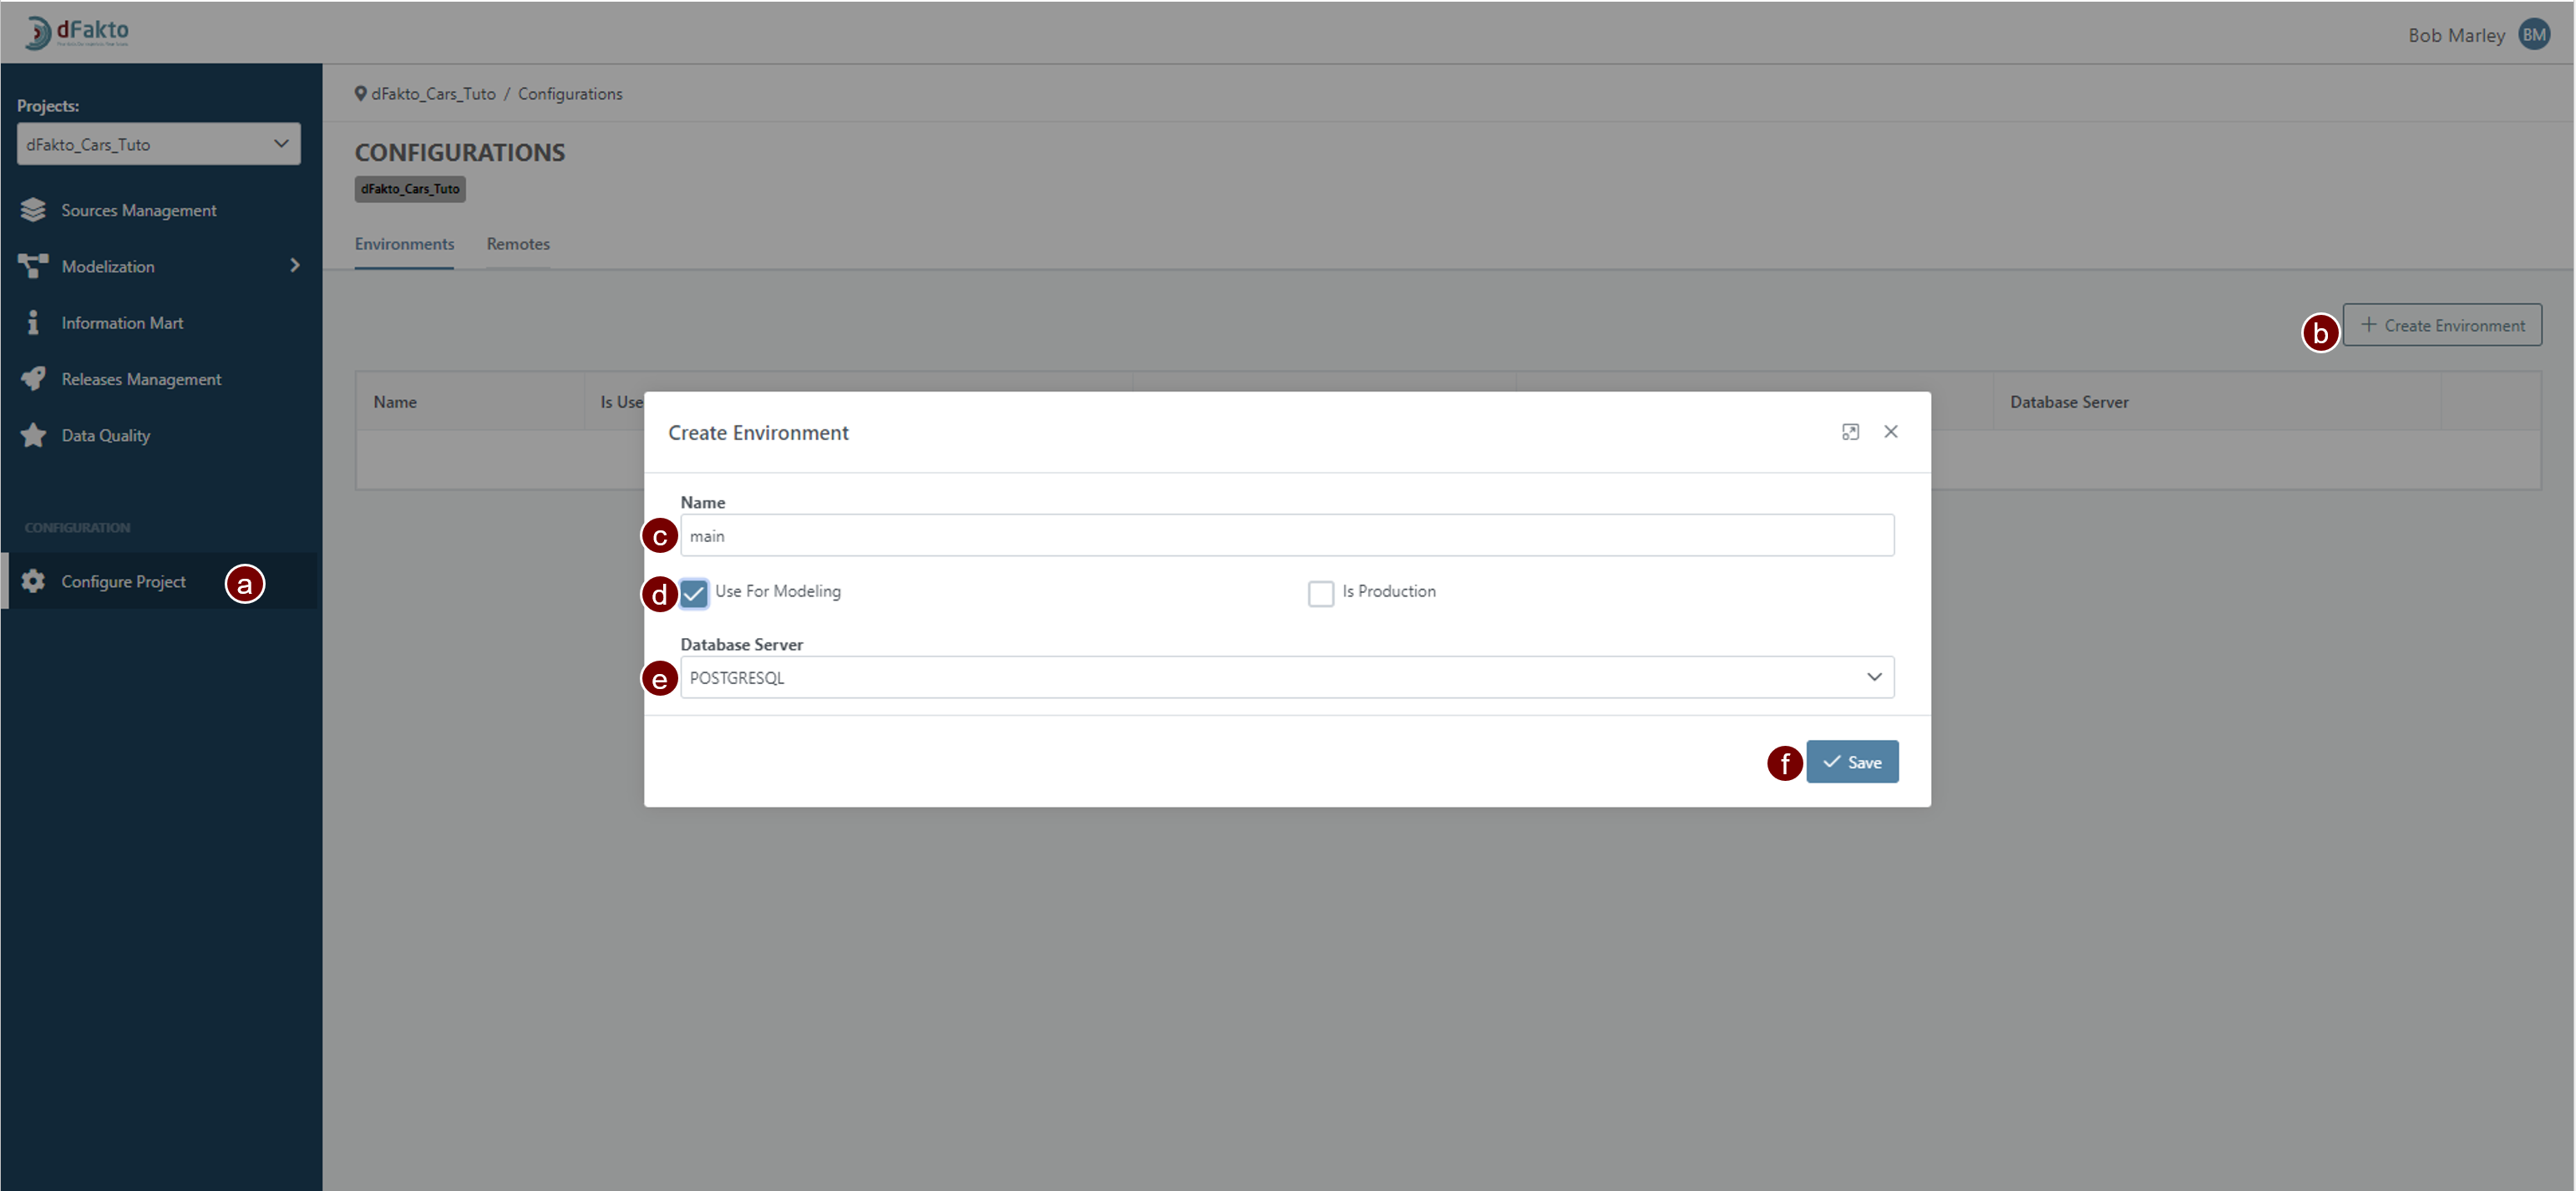
Create an Environment “main”
Go to the “⚙️ Configure Project” section
Click on the “+Create Environment” button
Set the environment name as “main”
Check the box “Use for Modelling”
Select the database server type “POSTGRESQL”
Click on Save
You will know that your environment has been successfully created when the following wizard appears on the top right of the screen:

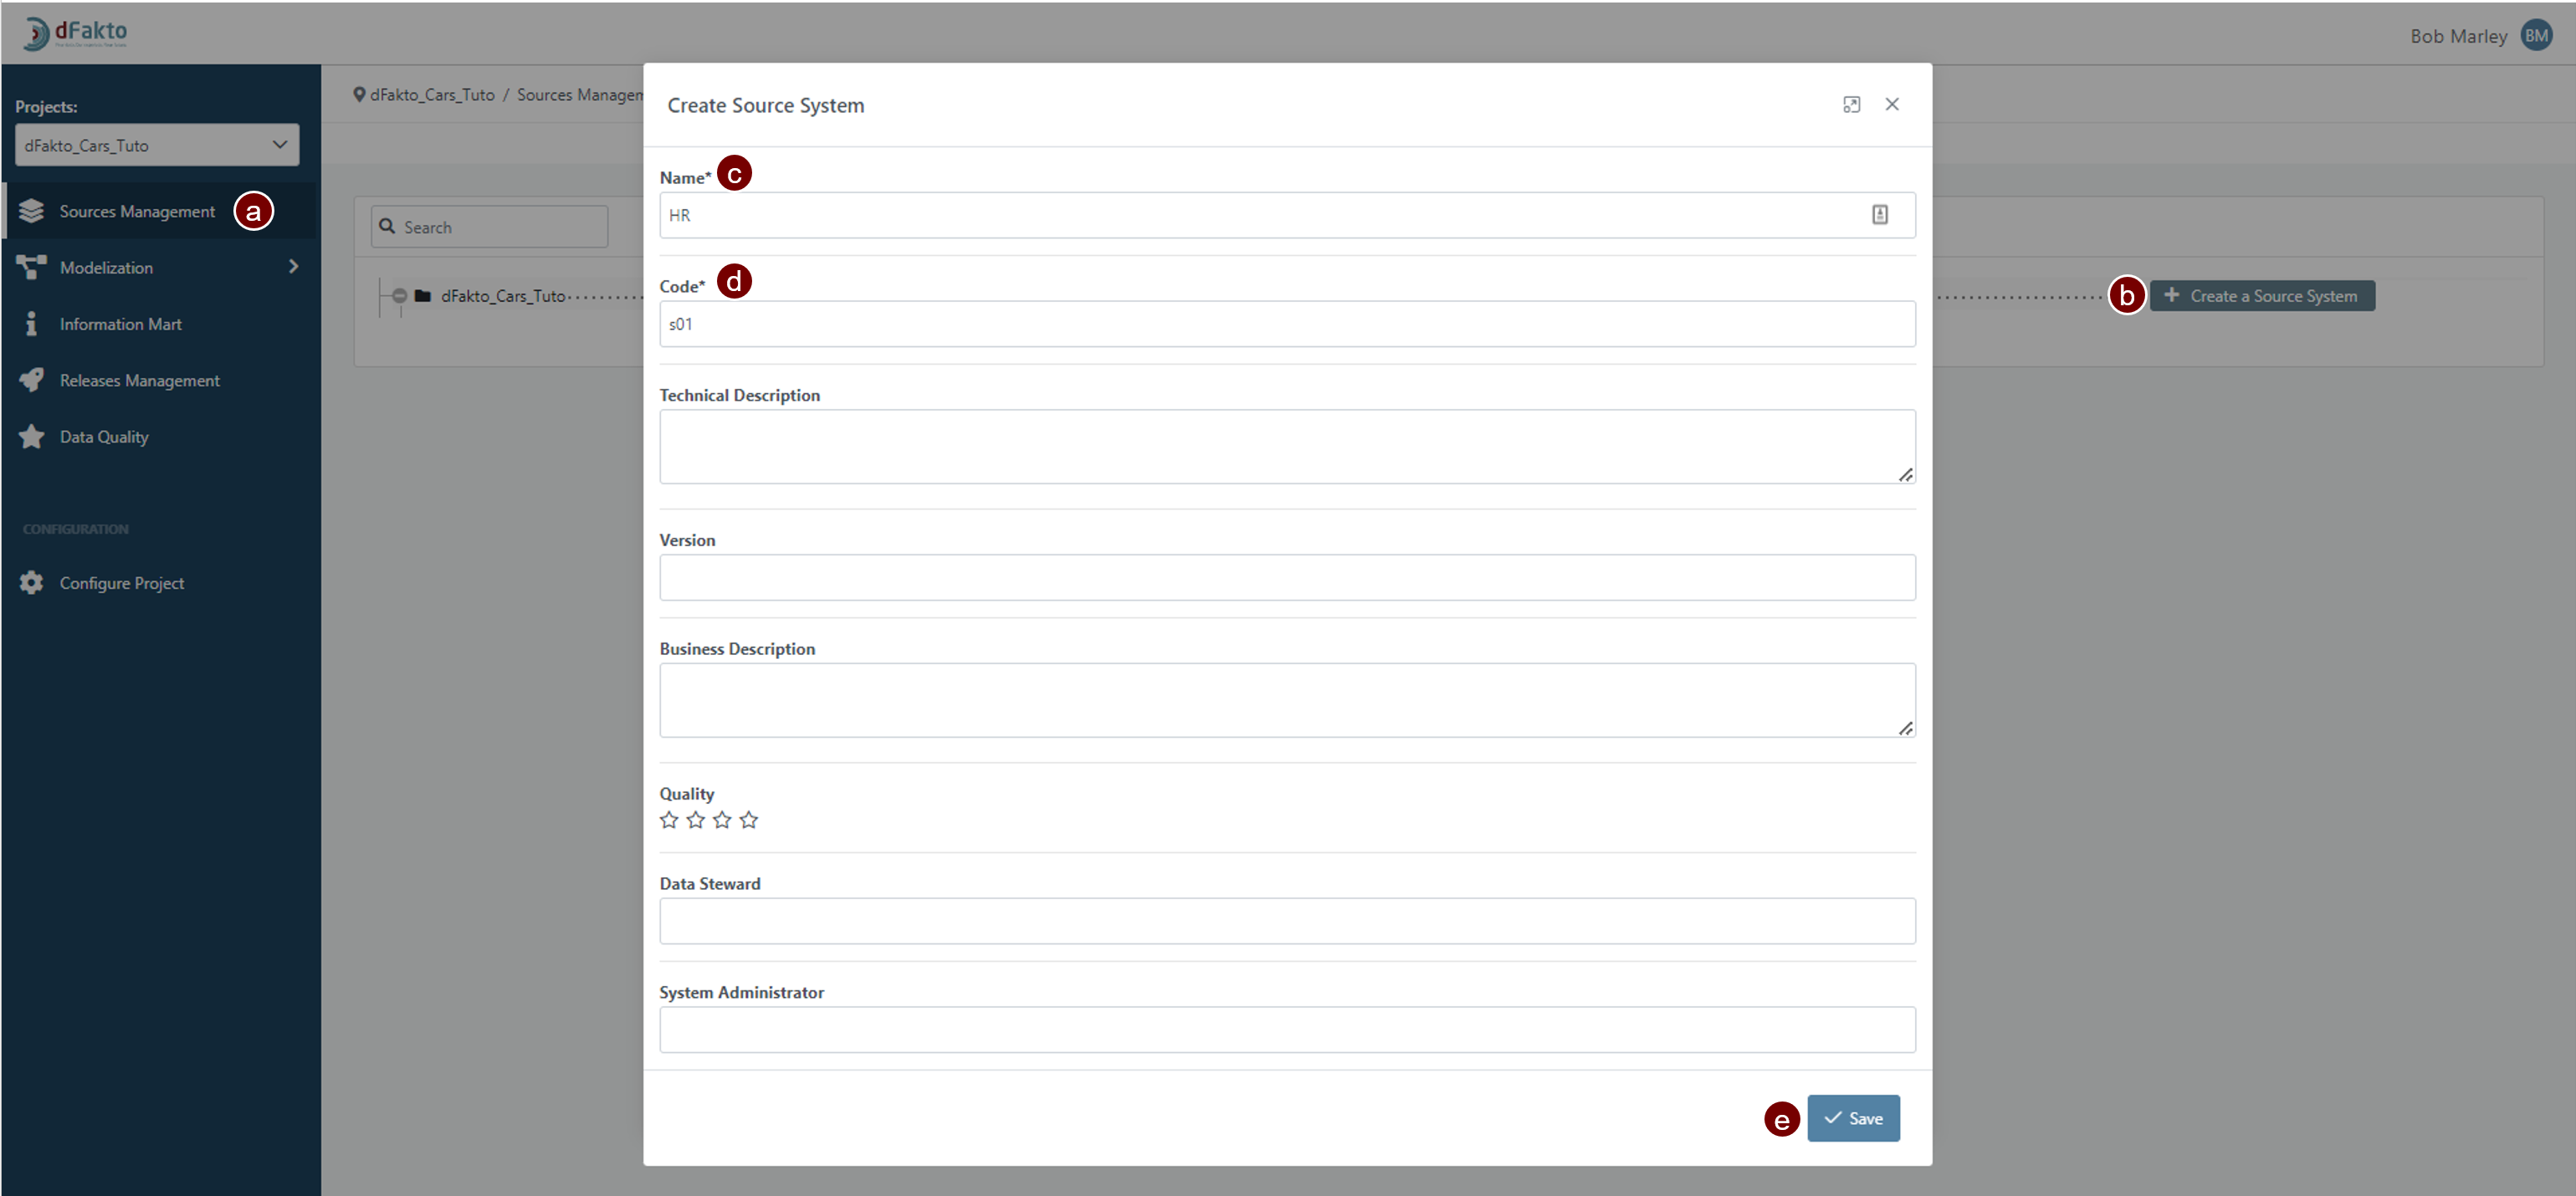
Create Source System “HR” in Sources Management
Go to the “Sources Management” section
Click on the “+Create a Source System” button
Define the Name as “HR”
Define the Code as “s01”
Click on the “Save” button
You will know that your source system has been successfully created when the following wizard appears on the top right of the screen:

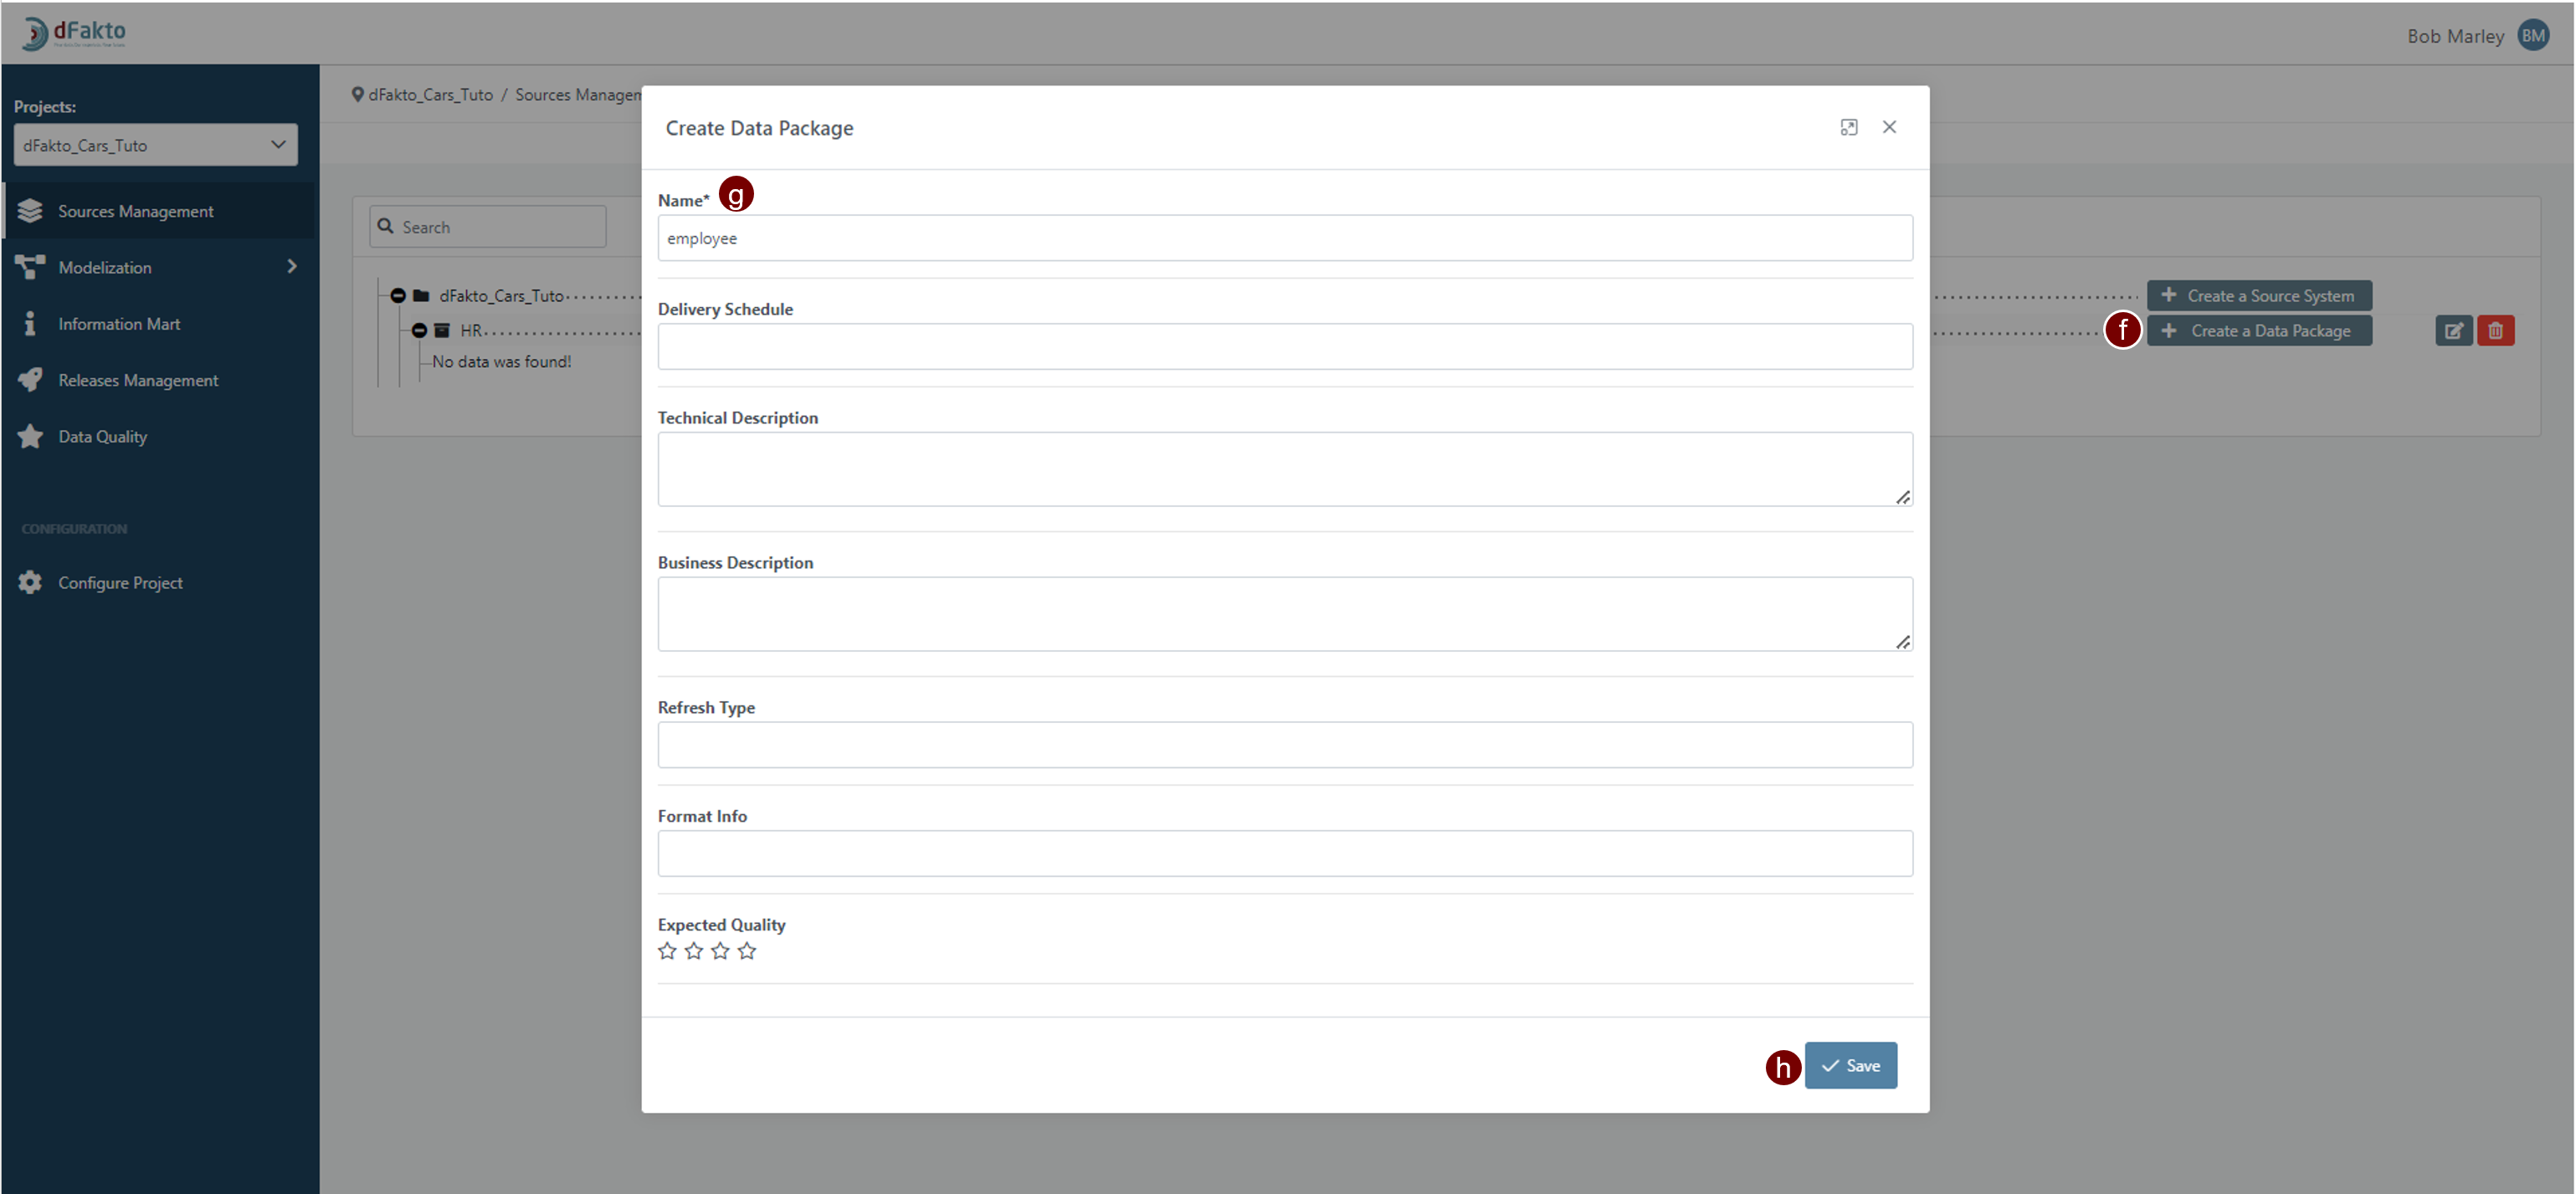
Click on the “+Create a Data Package“ button
Define the name as “hr_employee”
Click on the “Save” button
You will know that your data package has been successfully created when the following wizard appears on the top right of the screen:

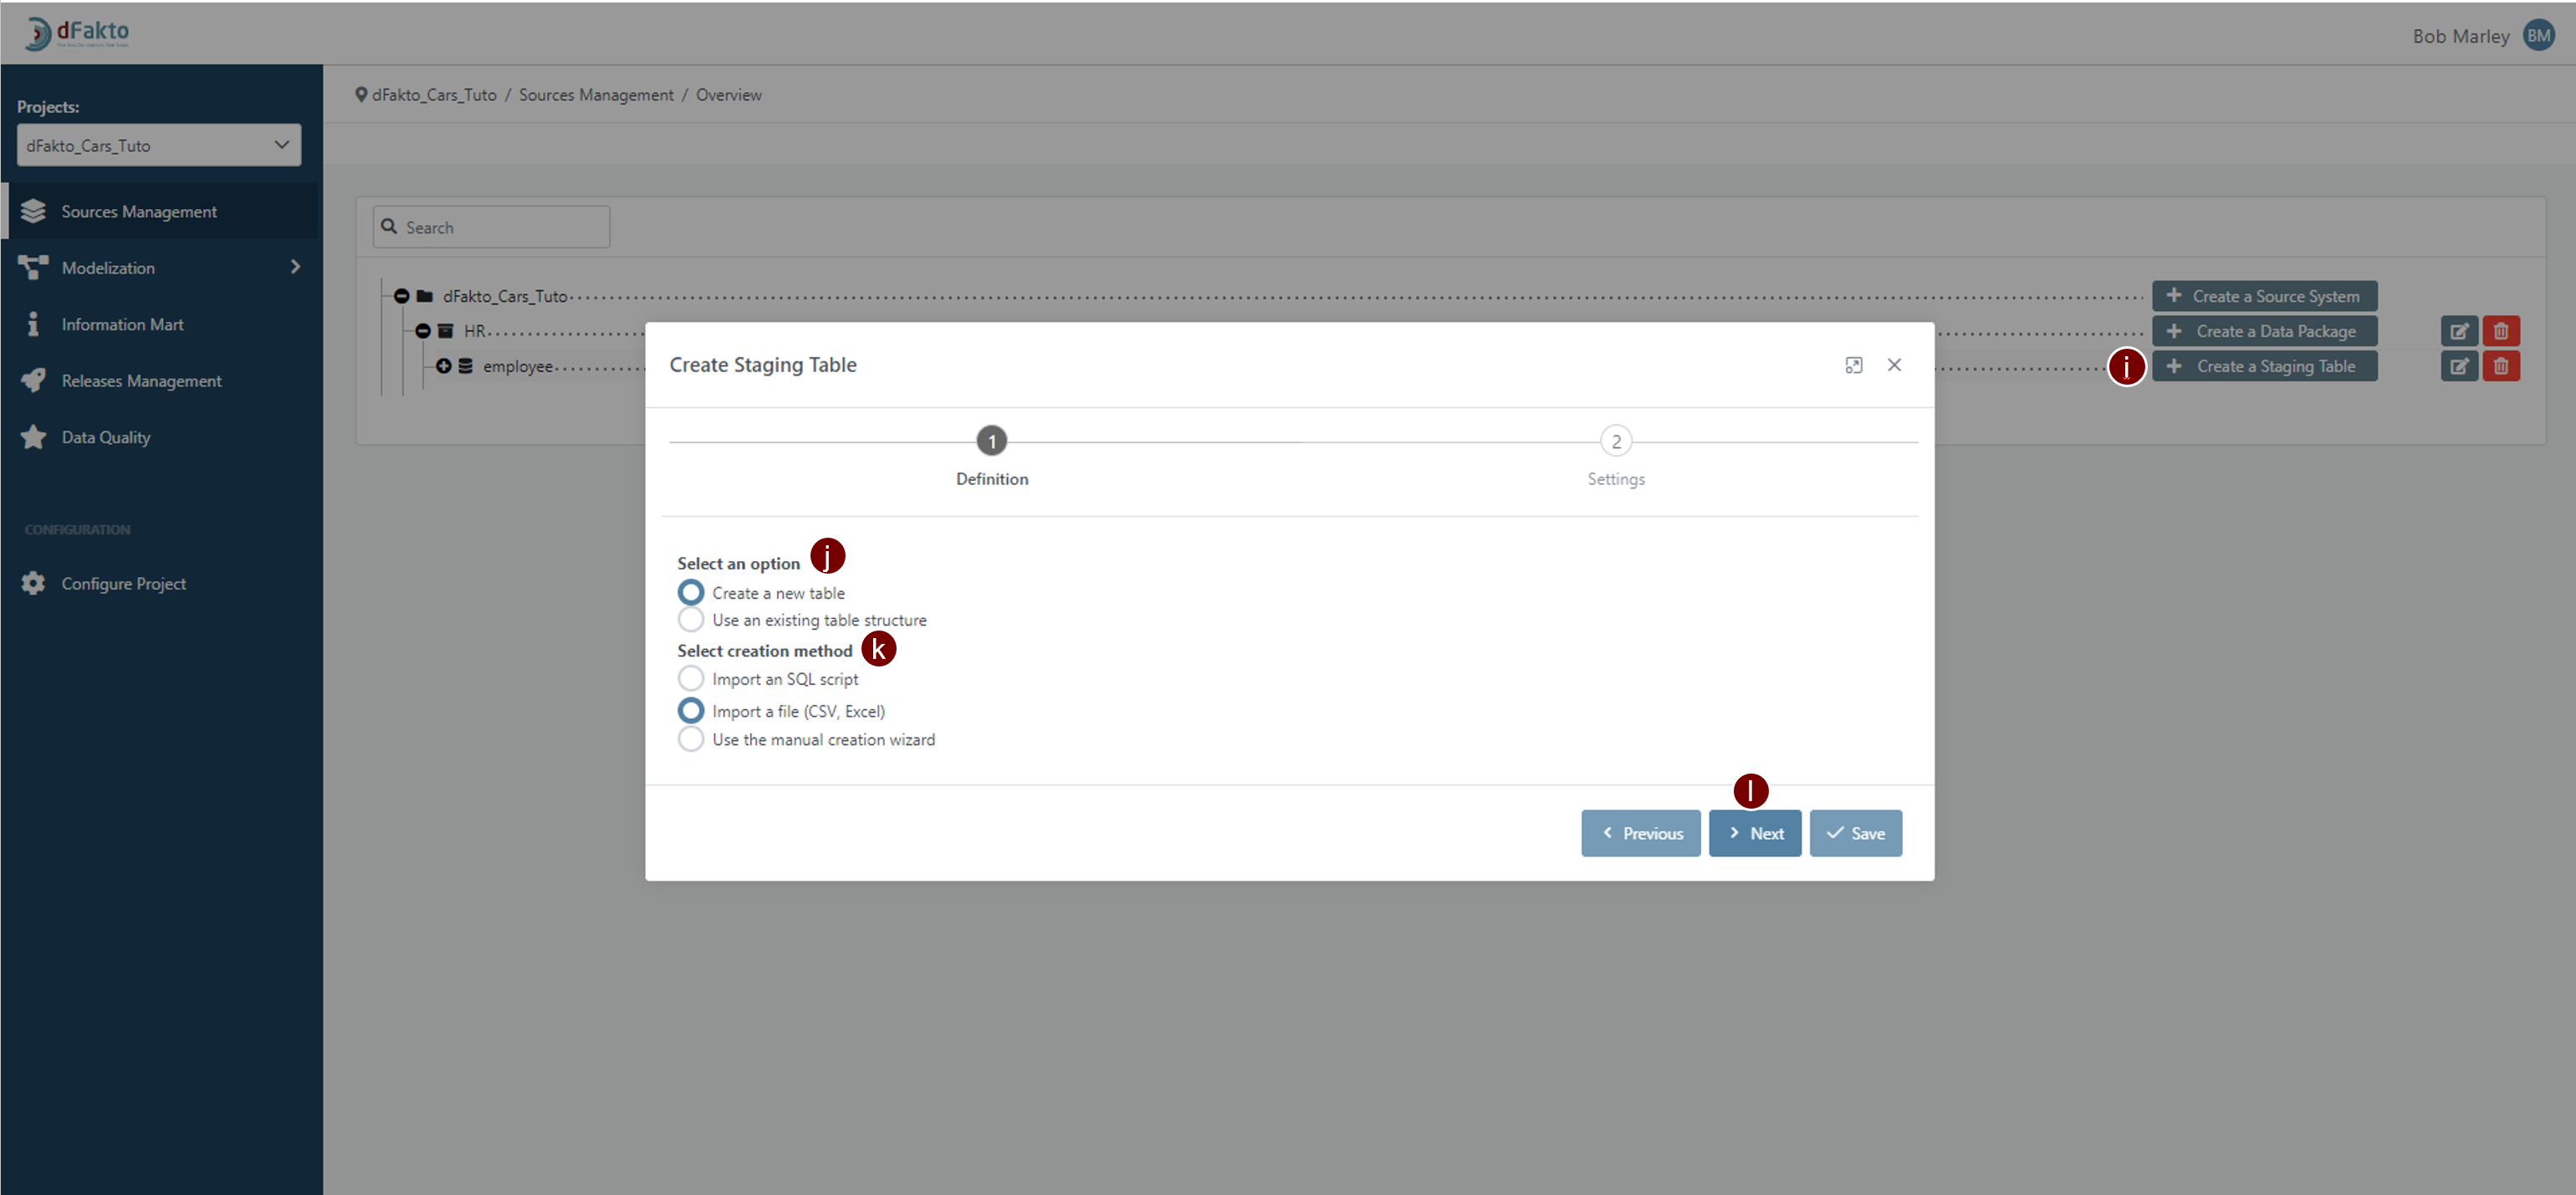
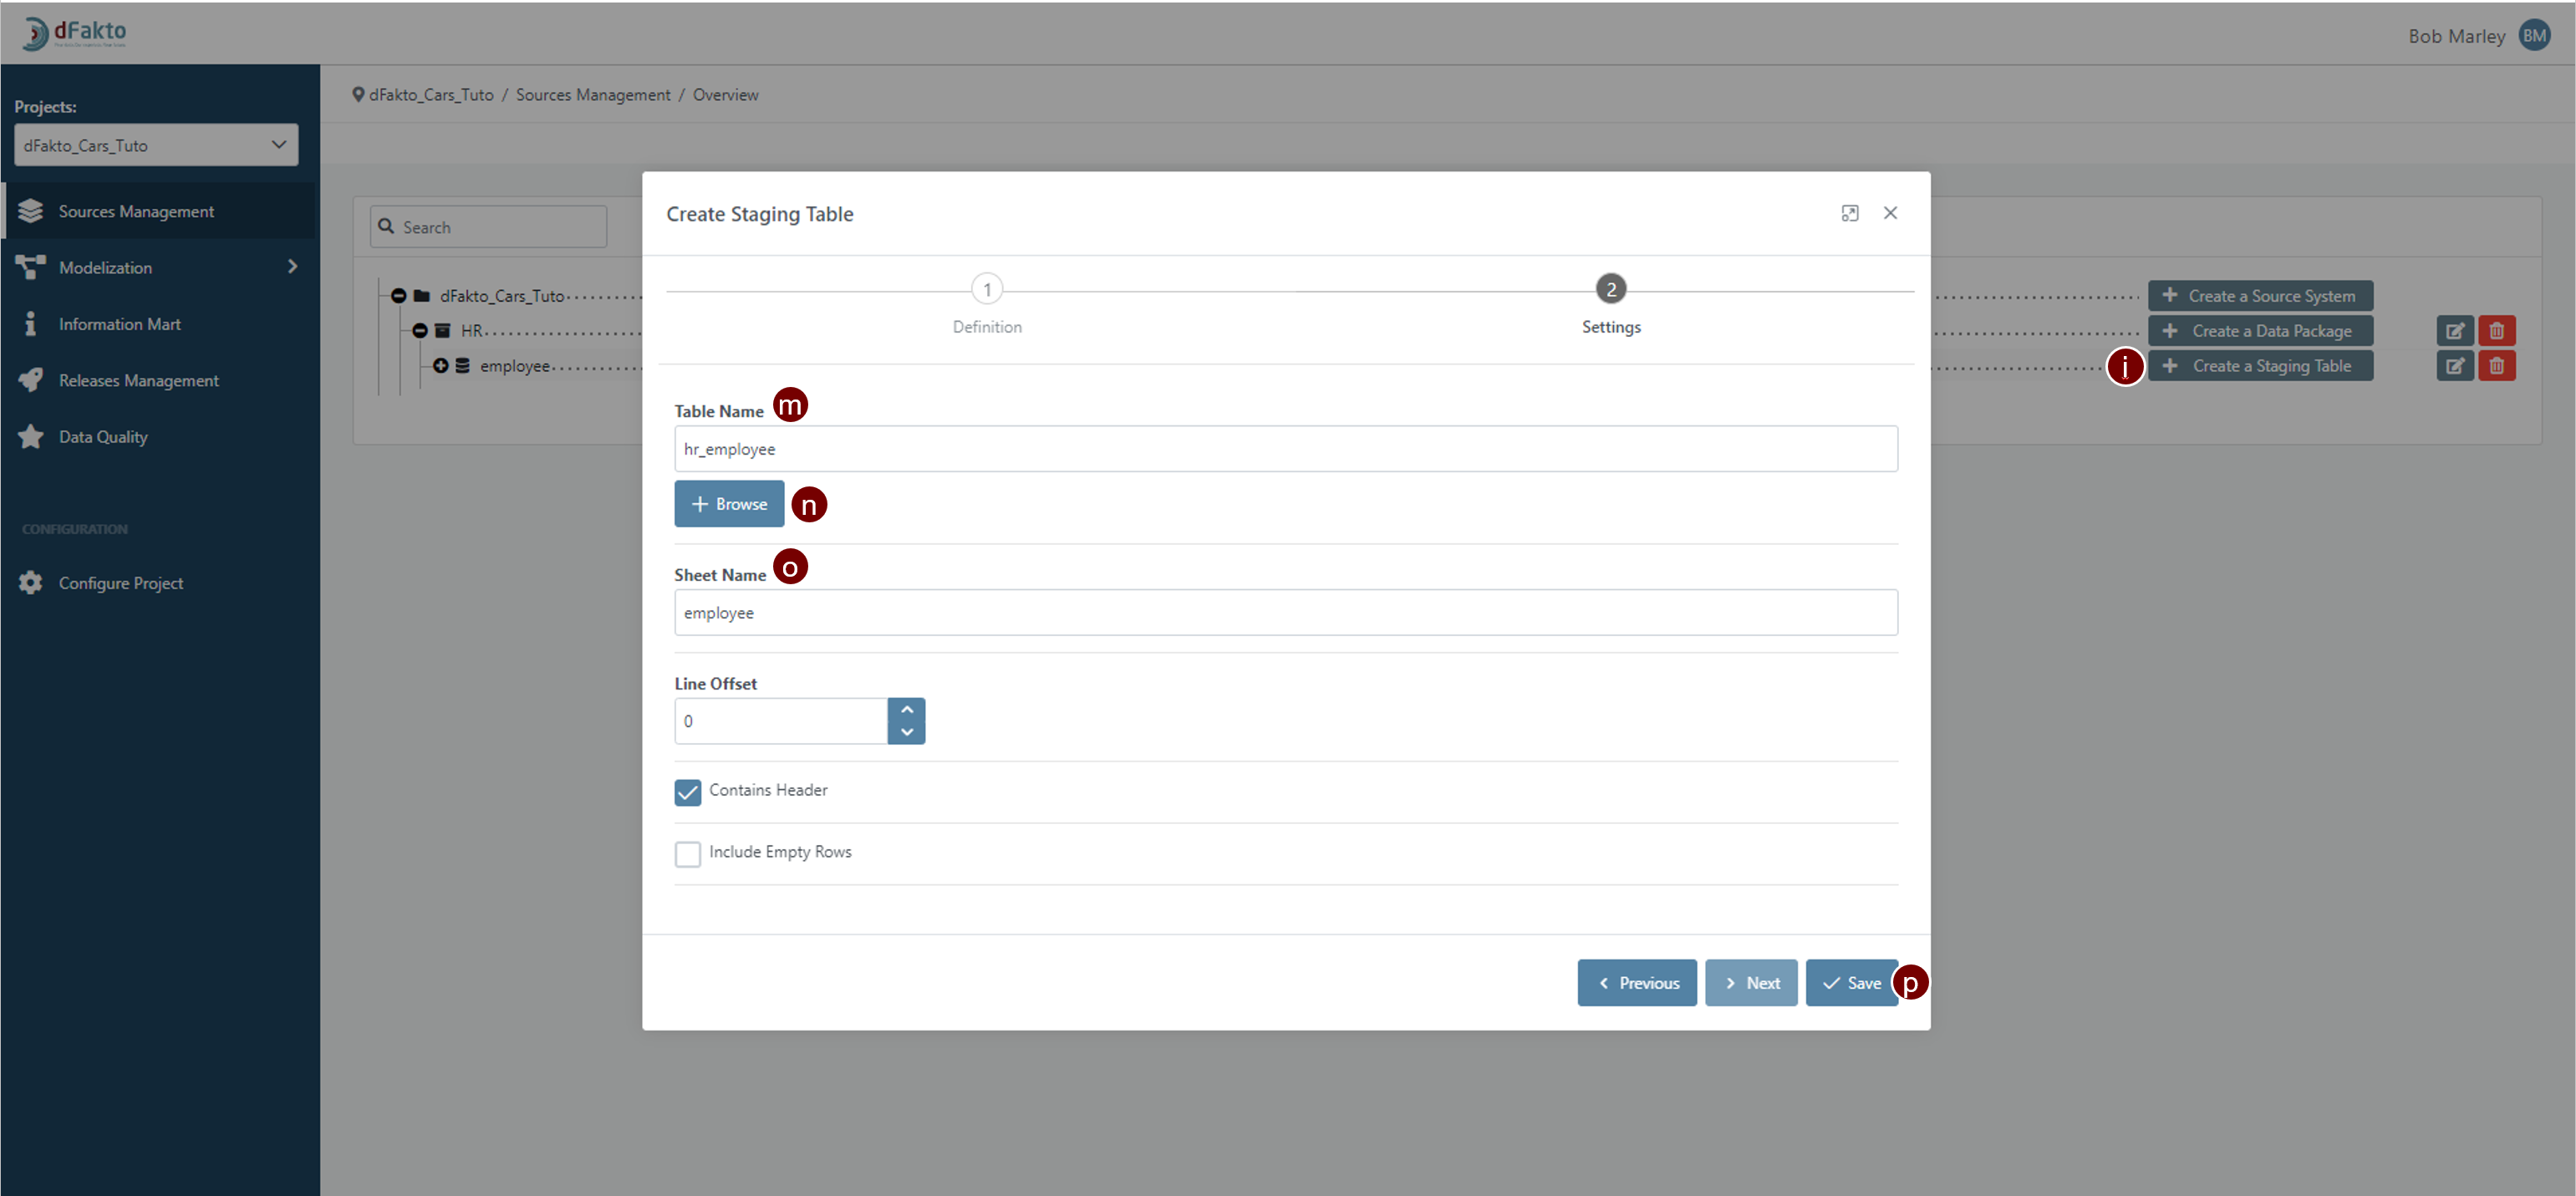
Create a new staging table by clicking on the “+Create a Staging Table“ button
Select the option “Create a new table”
Select the creation method “Import a file (CSV,Excel)”
Click on the “Next” buttonhr_employee” by importing a file in your environment
Define the table name as “hr_employee”
Click on the “+Browse” button to retrieve the excel file “hr_extract”
Define the Sheet Name as “employee” (this corresponds to the name of the tab in the excel file)
Click on the “Save” button
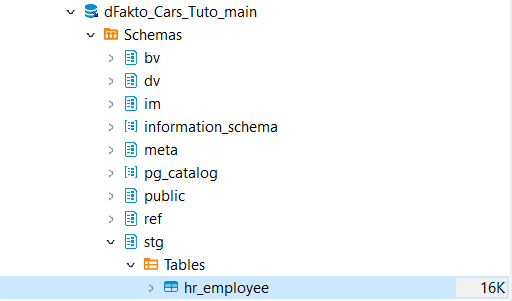
You will know that your staging table has been successfully created when the following wizard appears on the top right of the screen:

Impact in the database:
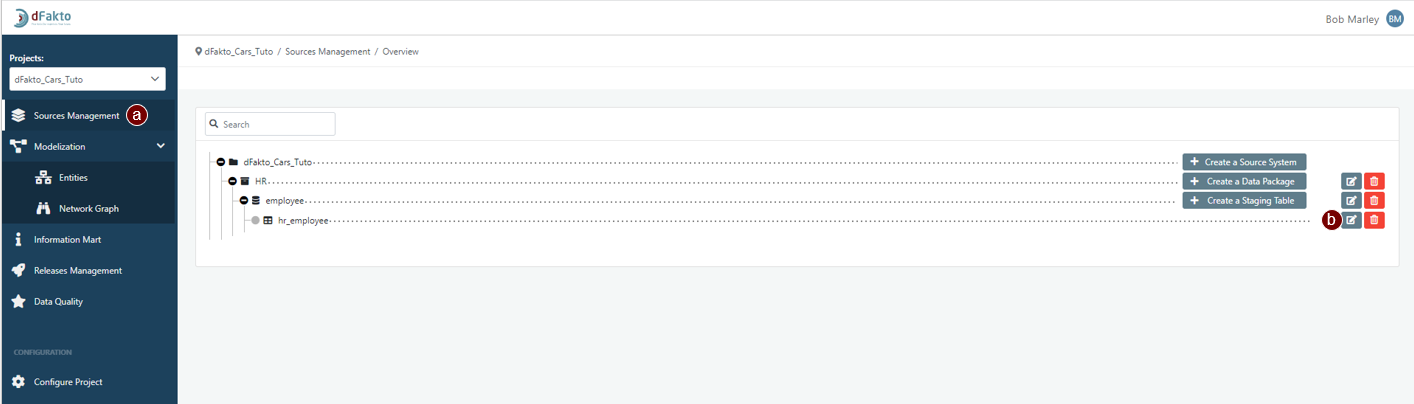
Create a Hub “Employee”
Go to the Modelization section, to the Entities tab (note that this is also feasable through Network graph tab).
Go to Hubs tab
Create a new hub by hitting the “+Create Hub” button
Set the hub name as “Employee”
Set the Business Key Length as “25”
Click on the “Save” button

You will know that your Hub has been successfully created when the following wizard appears on the top right of the screen:

Mapping for the Hub Employee
Go to the Sources Management Section
Edit the staging table to access the mapping “section”
in the Hubs tab, hit the “+Create a New Mapping” button
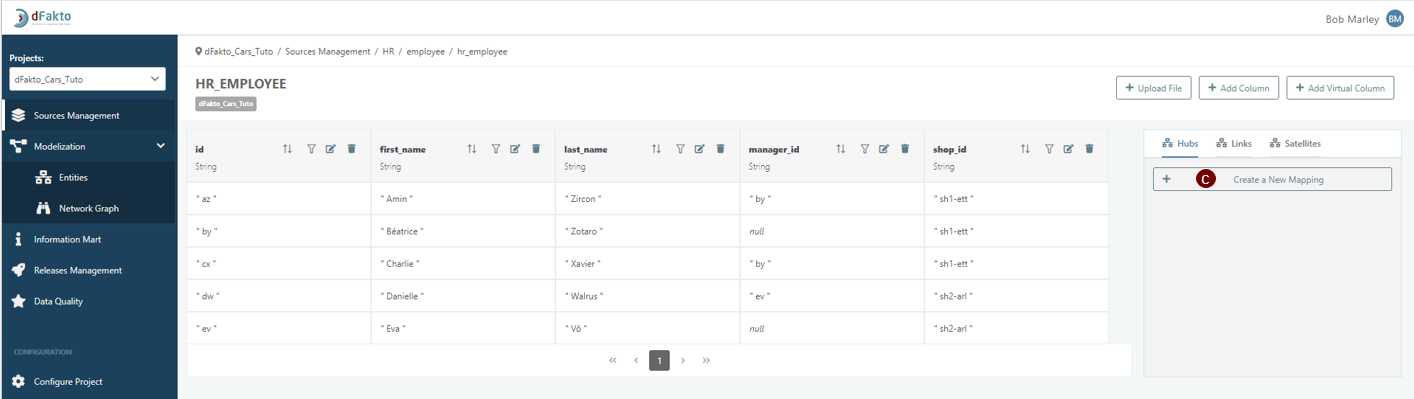
Set the mapping name as “EmployeeBk” (follow the convention “HubName” + “Bk”)
Select an existing hub (here Employee)
Check the box “Invalidate data”
Select the column containing the business key
Click on the “Save” button

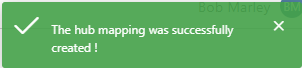
You will know that your hub mapping has been successfully created when the following wizard appears on the top right of the screen:
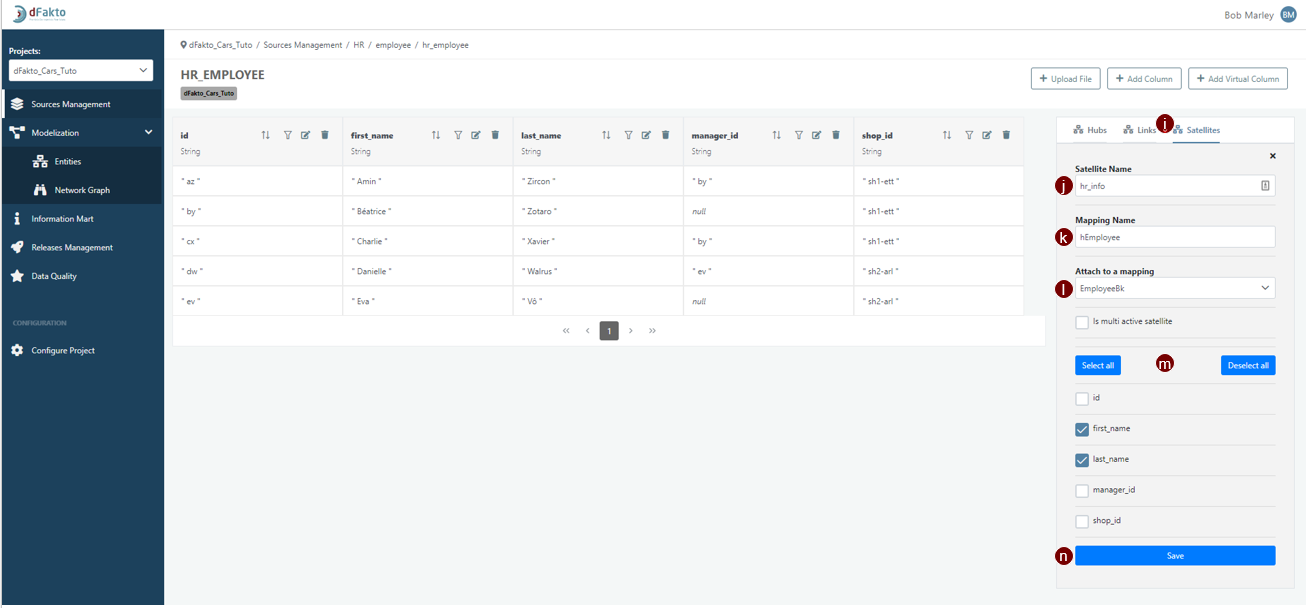
Create a satellite by hitting the “+Create a New Mapping“ button in the Satellites tab
Set the satellite name as “hr_info” (following the convention “source-name_info”)
Set the mapping name hEmployee (hHubName or lLinkName for satellites of links)
Attach to the mapping of the Hub Employee.
Select columns that are not bk or fk
Click on “Save”
You will know that your satellite has been successfully created when the following wizard appears on the top right of the screen:

Your model should now look like the scheme below
.png?inst-v=844dc17a-cc7c-410d-81b7-836a7dbade24)
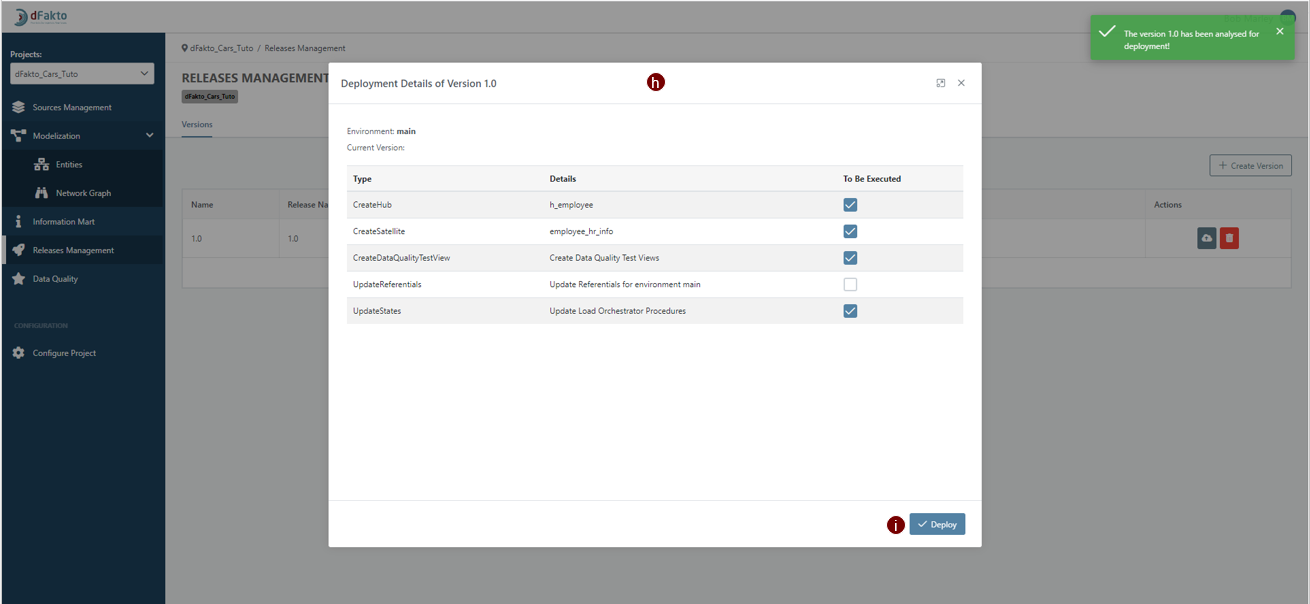
Deploy the version
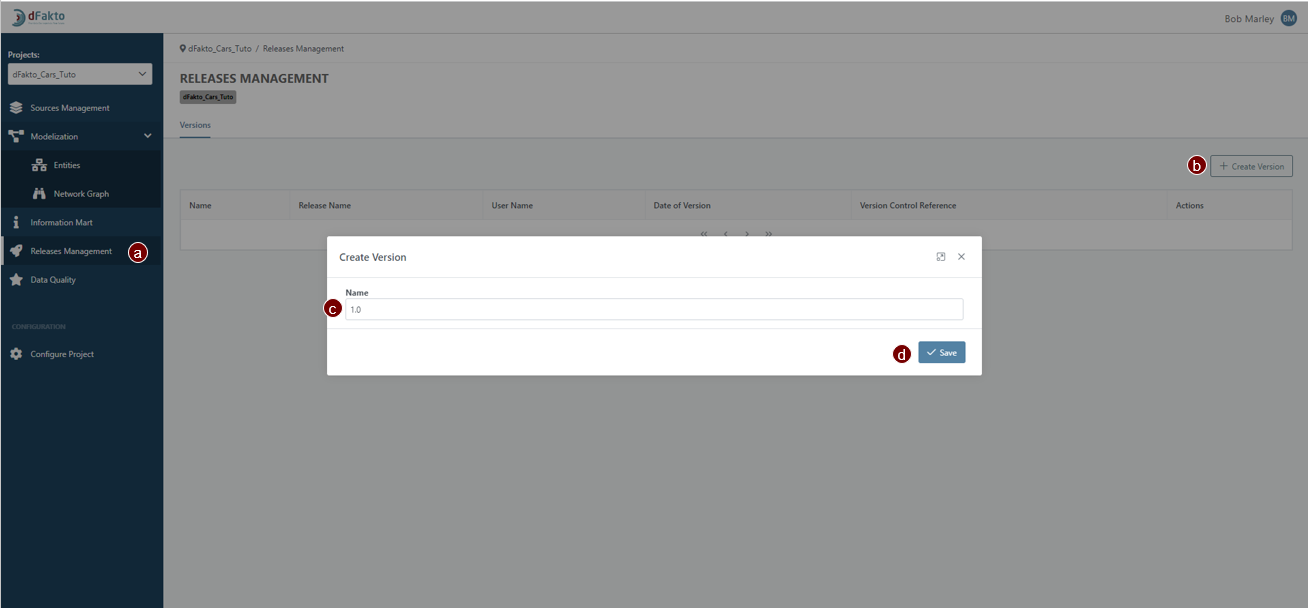
Go to the “🚀 Releases Management” section
Create a new version
Name it 1.0
Click on Save
Deploy the version you just created
Select the right environment
Deploy
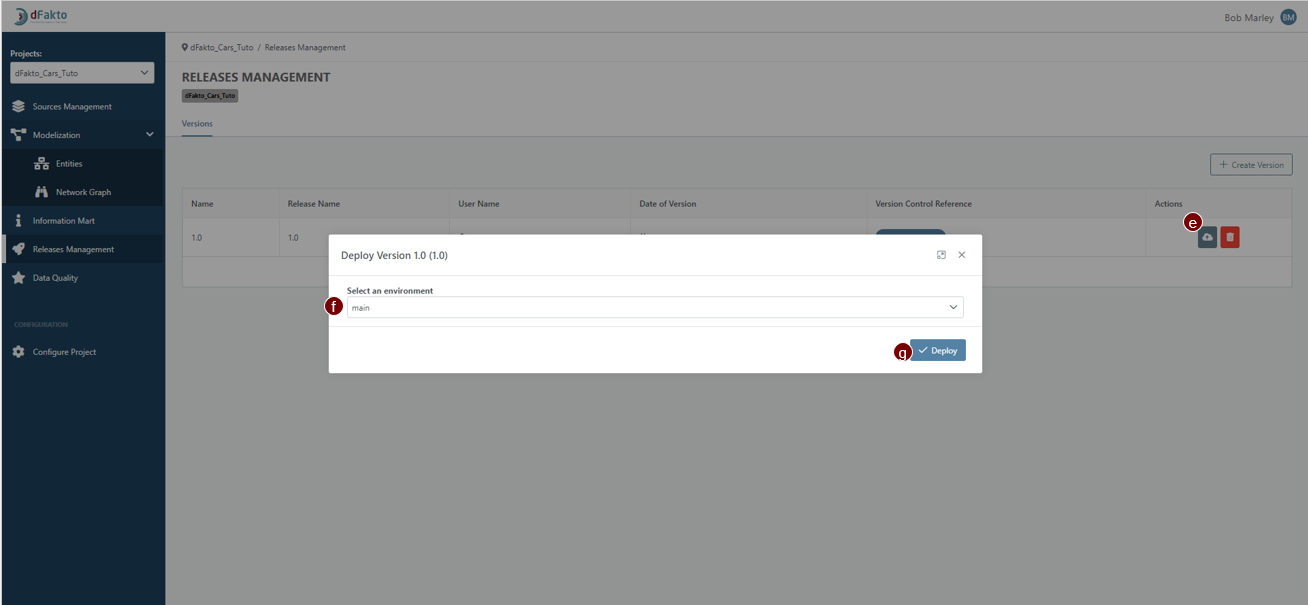
a summary wizard will pop-up showing you all tasks ready for execution
Click on Deploy
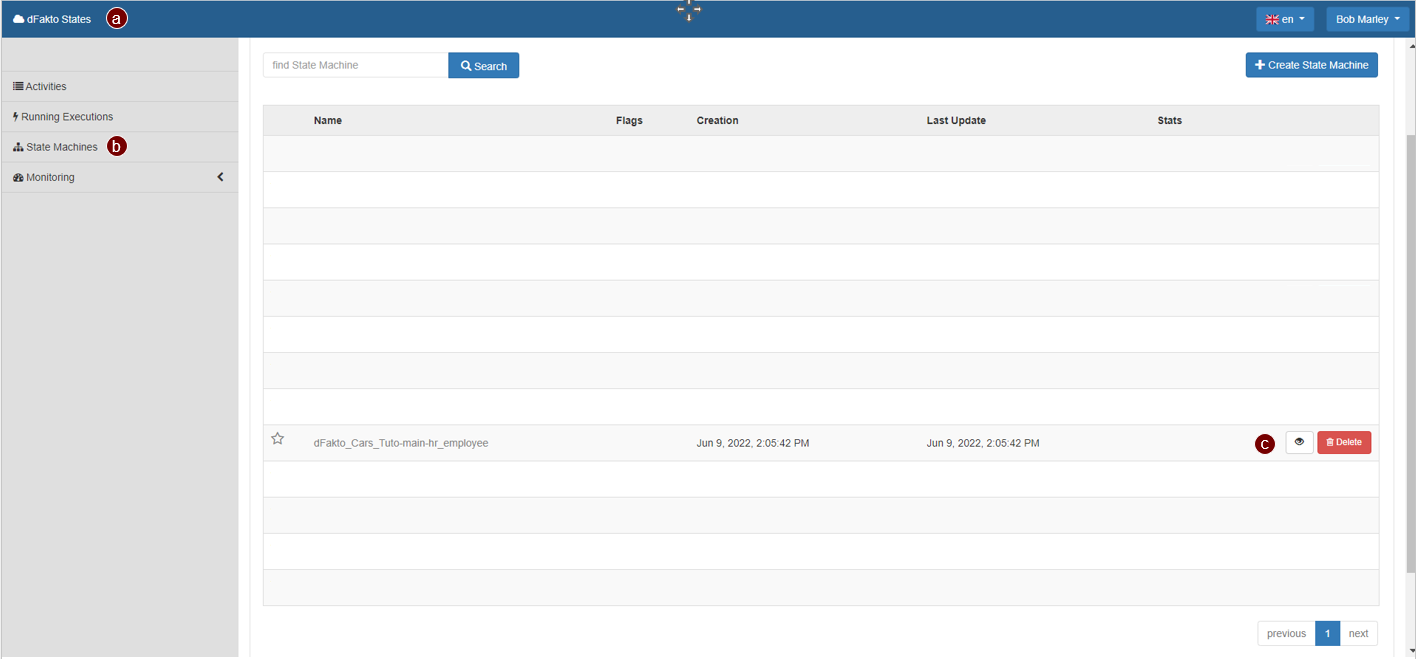
Load data into the datavault by executing the state machine related to the data package employee on the Orchestrator
Go to the Orchestrator (States)
Go to the State Machines tab
Find the state machine related “dFakto_Cars_Tuto-main-hr_employee” and click on the eye button to open details
Launch a new execution (in principles, nothing else is required, if you can’t successfully launch the execution, try the command: {} )

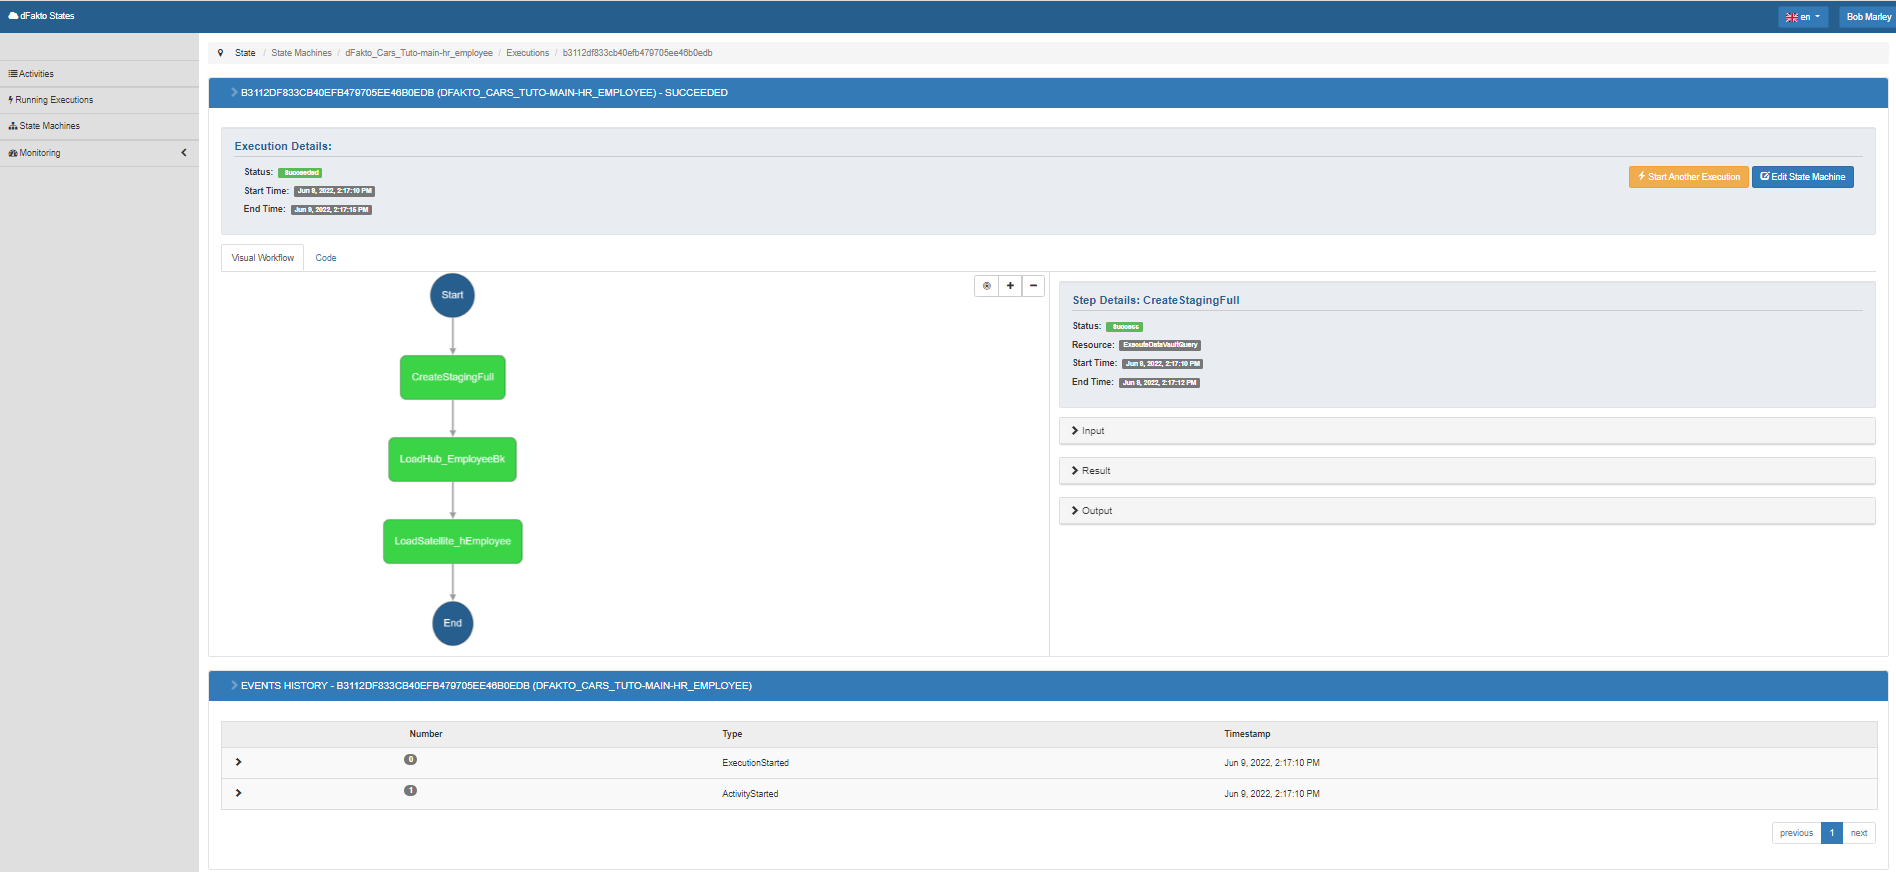
Data are now available in the datavault schema in the database.

Naming Convention
for Hub
mapping Name: “Name of concept” + “Bk” (ex: for the concept employee, mapping name = “EmployeeBk”).
for Satellites
Satellite name: “Source Name” + “_info” → (ex: for the satellite of hub employee from source CRM → satellite name = “crm_info”
hHubName if the satellite refers to a hub and lLinkName if it’s a link. → mapping name = “hEmployee”
or
Mapping name: “Concept Name” + “Source Name” → (ex. for the hub employee of source crm → mapping name = “employee_crm”