Staging Table Management
Staging tables are used to store data temporarily while it is being imported into the Data Vault. Each staging table is associated with a single data package.
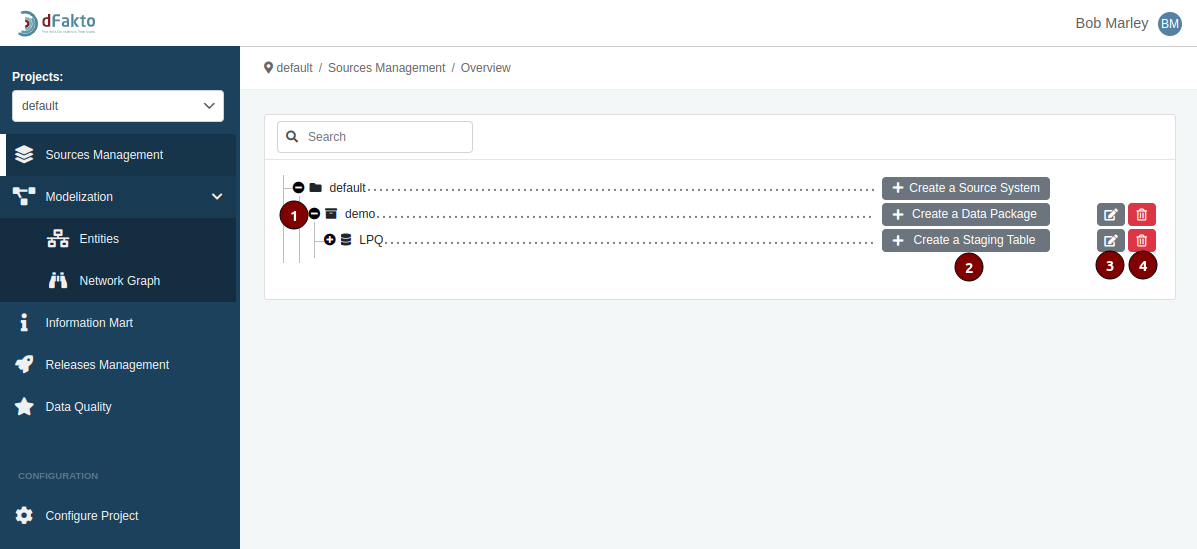
To manage the staging tables for a particular data package, follow these steps:
Open the data package by clicking on it. This will display the staging tables that are associated with the data package.
The following buttons are available for managing the staging tables:
Create a new staging table (2).
Edit an existing staging table (3).
Delete a staging table (4).
Create a staging table
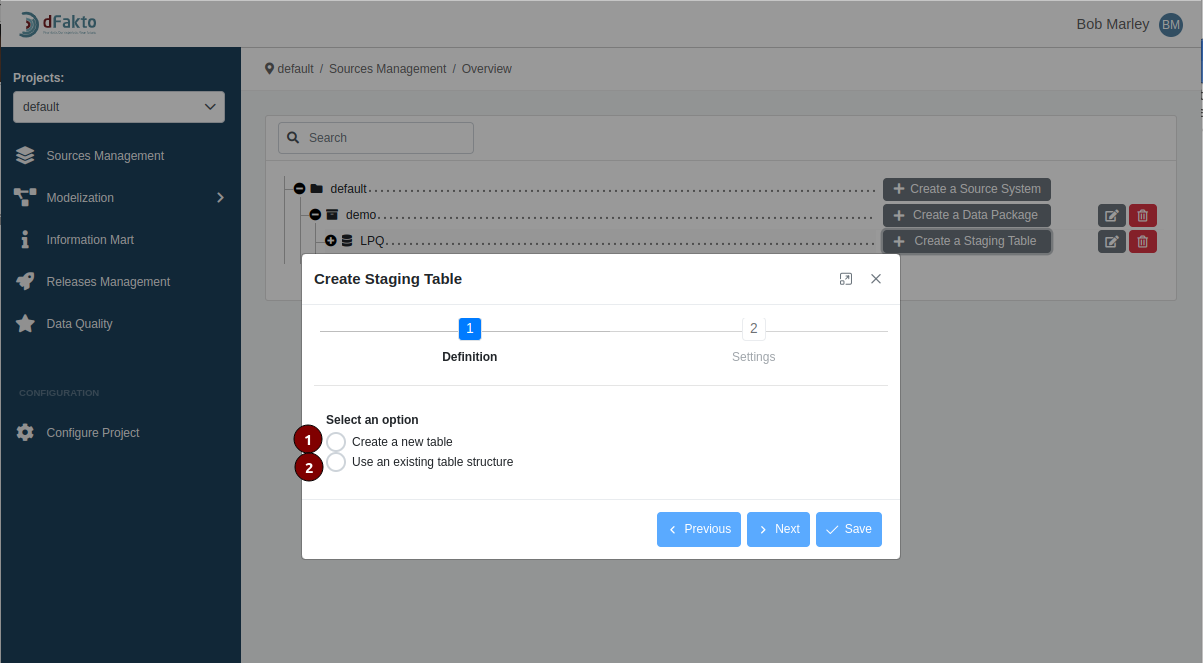
When you click the "Create a new Staging Table" button, a pop-up window will appear.
This window includes the following options:
Create a new table: This option allows you to create a new staging table if it does not already exist in the stg schema of the modeling environment's database.
Use an existing table: This option can be used if the table already exists in the stg schema of the modeling environment's database, but is not yet mapped to any data package.
If you choose the "Create a new table" option, you will see the following options for creating the table:
Create table with SQL: This radio button allows you to create a table directly by writing a SQL statement or by importing one.
Import table from file: This button allows you to create a table by importing a CSV or Excel file.
Create table with wizard: This button allows you to use a wizard to create the table.
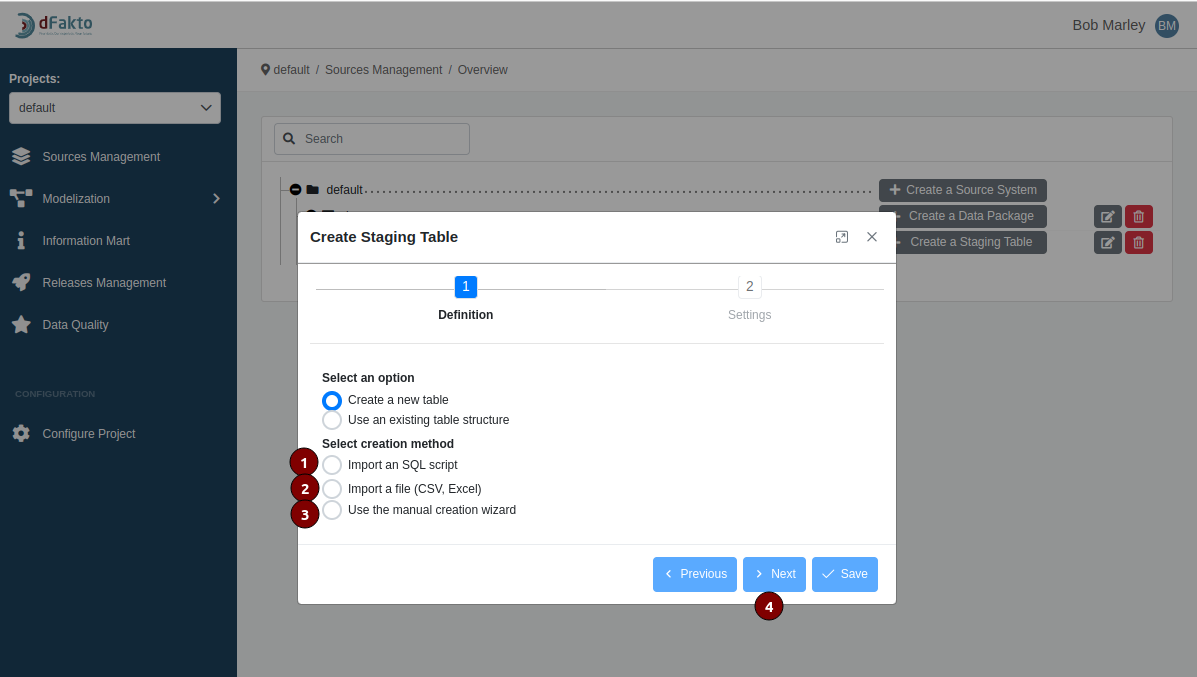
Once you have chosen how to create the staging table, the next button (4) will become enabled and allow you to proceed to the next stage of the creation process.
Create a staging table by using a sql script
When using the "Create table with SQL" option to create a staging table, you will need to provide the following information:
Table Name: MANDATORY - This field can only contain a maximum of 25 characters and a minimum of 2. The first character must be a letter or an underscore, and all subsequent characters can only be letters, numbers, or underscores.
Creation Type: MANDATORY - This field must be set to either "Table Creation" or "View Creation".
Query Editor: MANDATORY - This field is used to write a SQL statement using the same SQL dialect as the modeling environment.

Once you have entered a valid table name and written a query, the "Save" button (4) will become enabled and allow you to create the staging table.
The "Previous" button (5) can be used to return to the previous screen and choose a different method for creating the staging table.
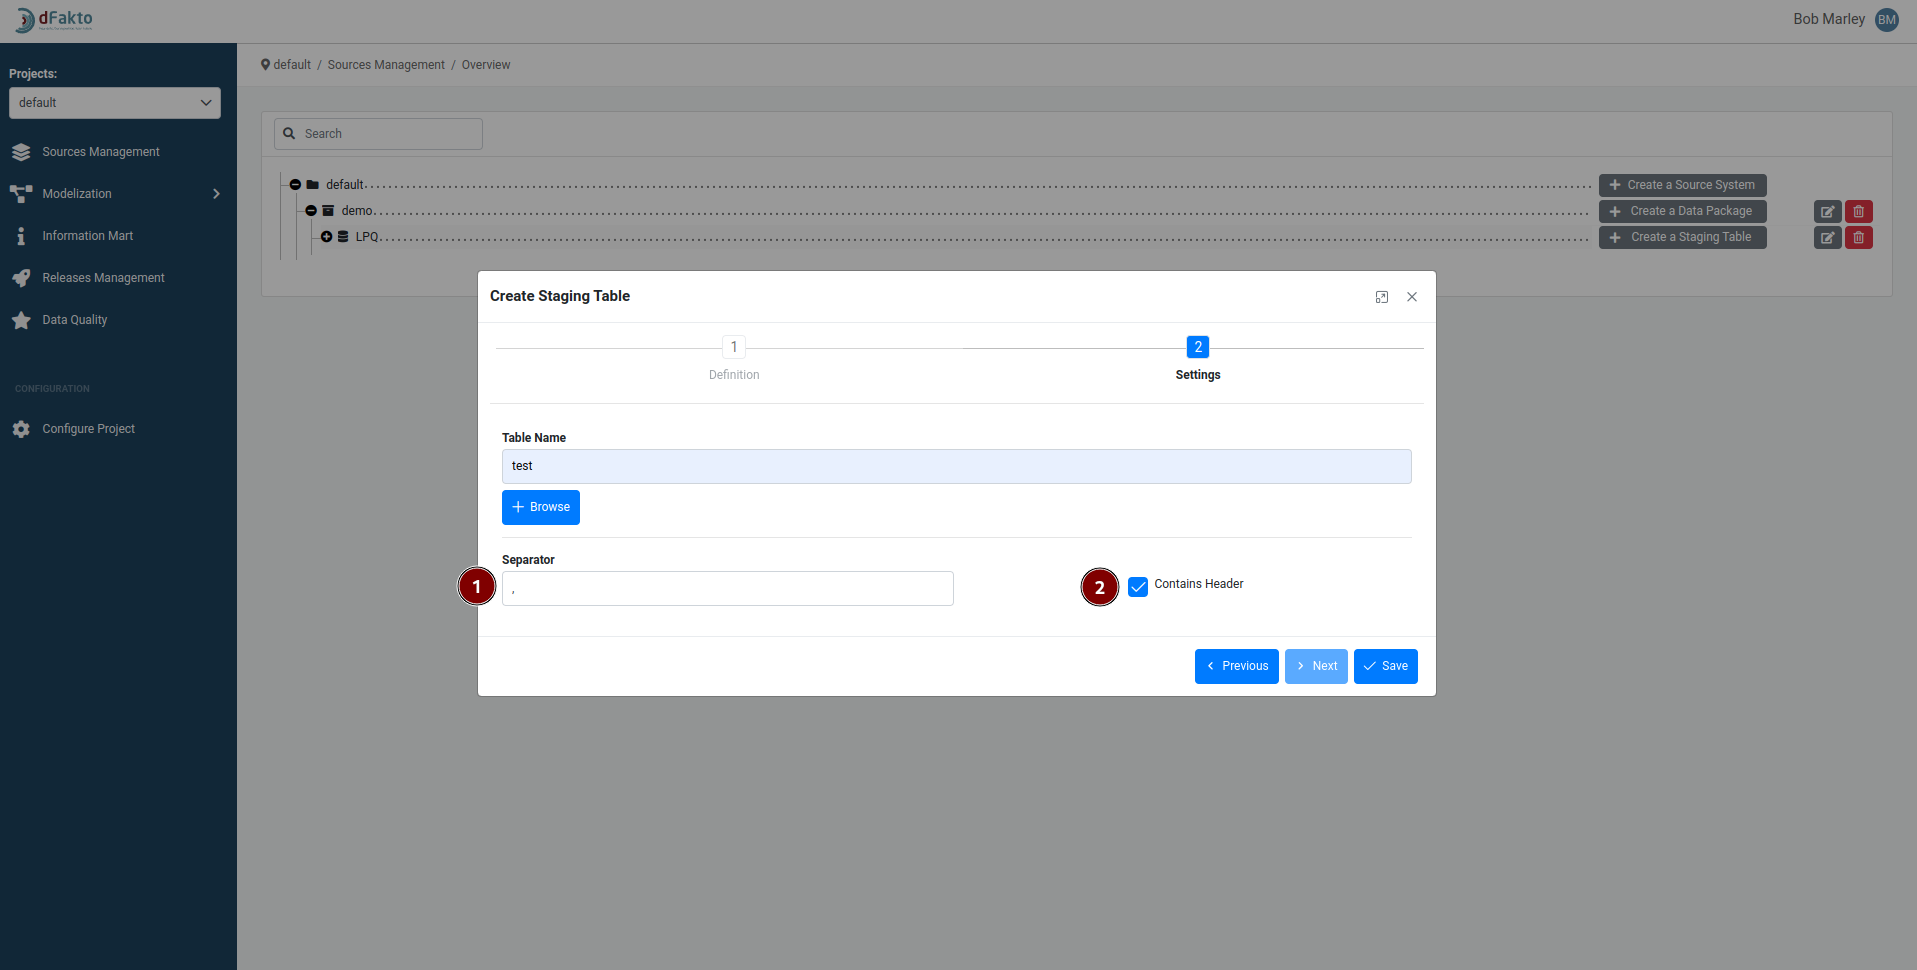
Creating a staging table by importing a file
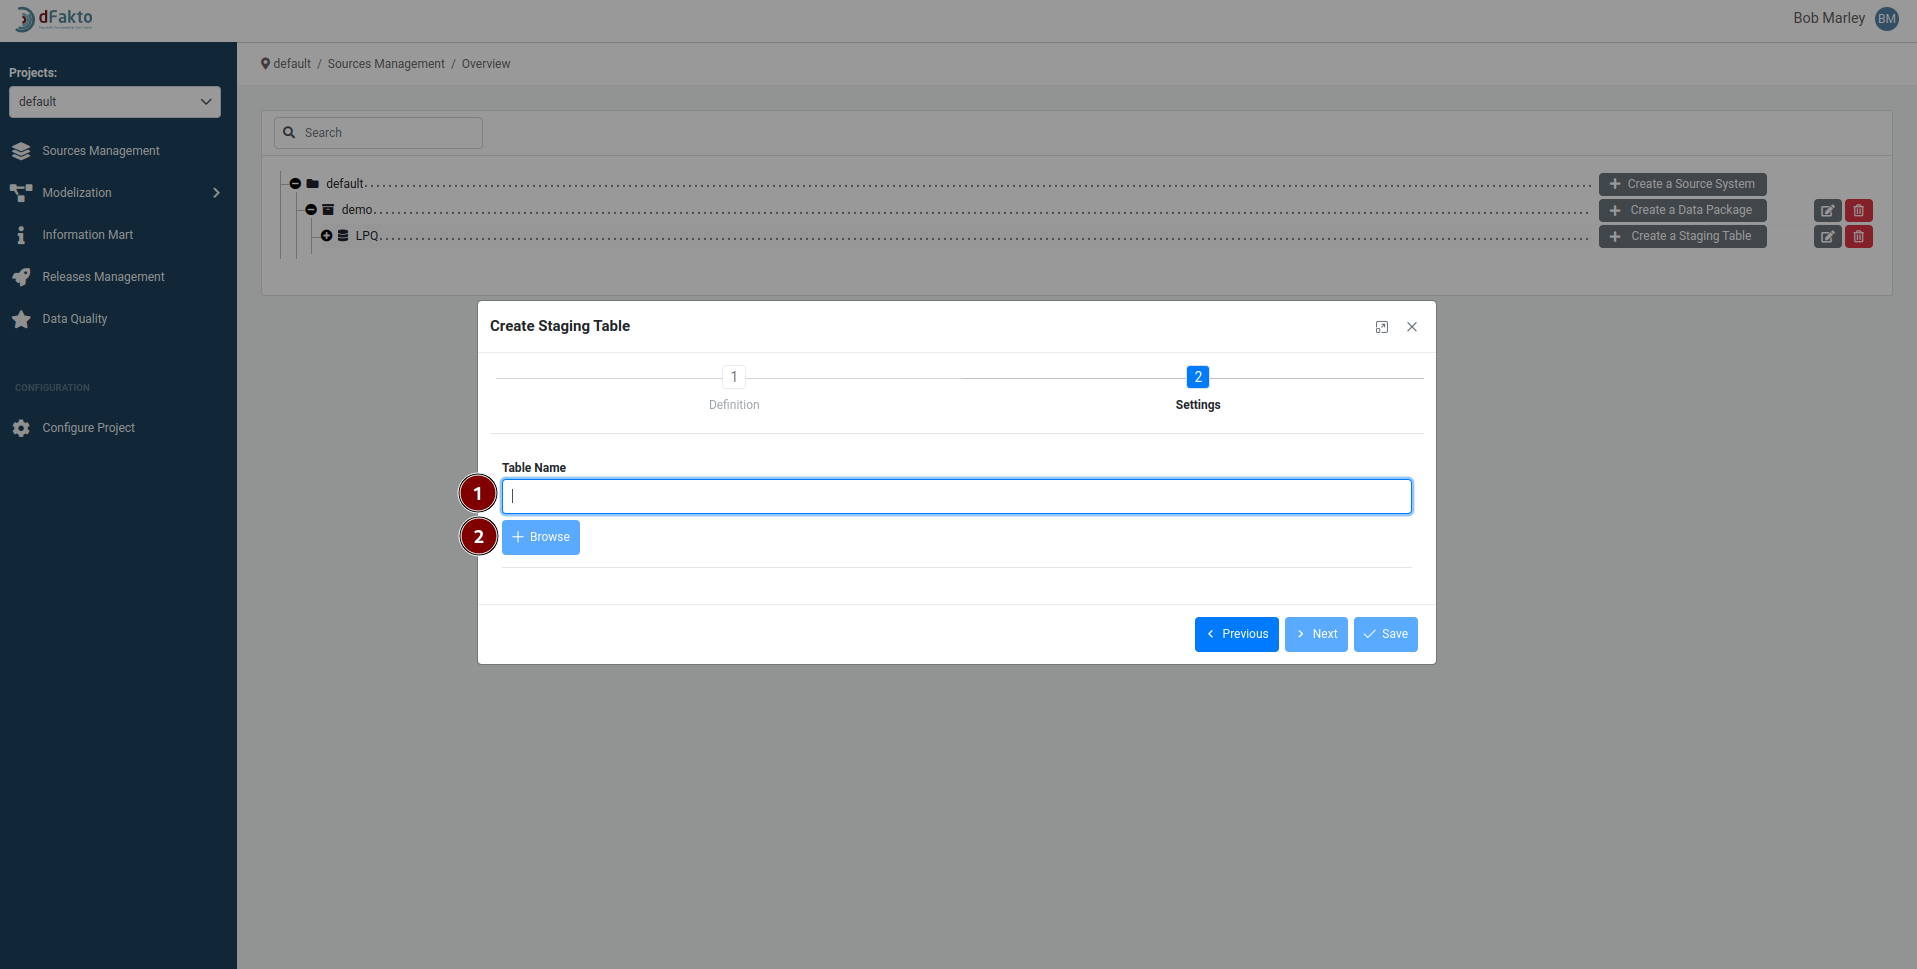
When creating a staging table by importing a file, you will need to provide the following information:
Table Name:MANDATORY - Contains min 2 character, max 25. The first character can only be an alphabetical character or an underscore. Every subsequent character can either be a letter, a number or an underscore.
Browse MANDATORY: allows you to search on your computer for a file to import. The file must be either an excel file or a csv file, and must end with one of the following suffix: .xlsx, .csvn .xls
Excel file options
The Excel file options allow you to specify the sheet name, line offset, whether the file has a header row, and whether to include empty rows in the imported data.
Sheet name: MANDATORY - Name of a specific tab in your file.
Line offset: OPTIONAL - Option that allows you to skip a certain number of rows at the beginning of the sheet.
Contains Header: MANDATORY - Option that specifies whether the first row of the sheet, or the first row after the line offset, should be used as column headers in the created staging table. If this option is not selected, the Excel column names (A, B, C, etc.) will be used as the column headers.
Include empty rows: MANDATORY - option that allows you to choose whether to include empty rows found at the end of the sheet in the imported data. This option is set to false by default.

Csv file option
The CSV file options allow you to specify the separator character used in the file and whether the file includes a header row. The separator field allows you to specify the character that is used to separate values in the CSV file. The default separator is a comma. The option to include a header row specifies whether the first line of the file should be considered as the column headers. This option is set to true by default.
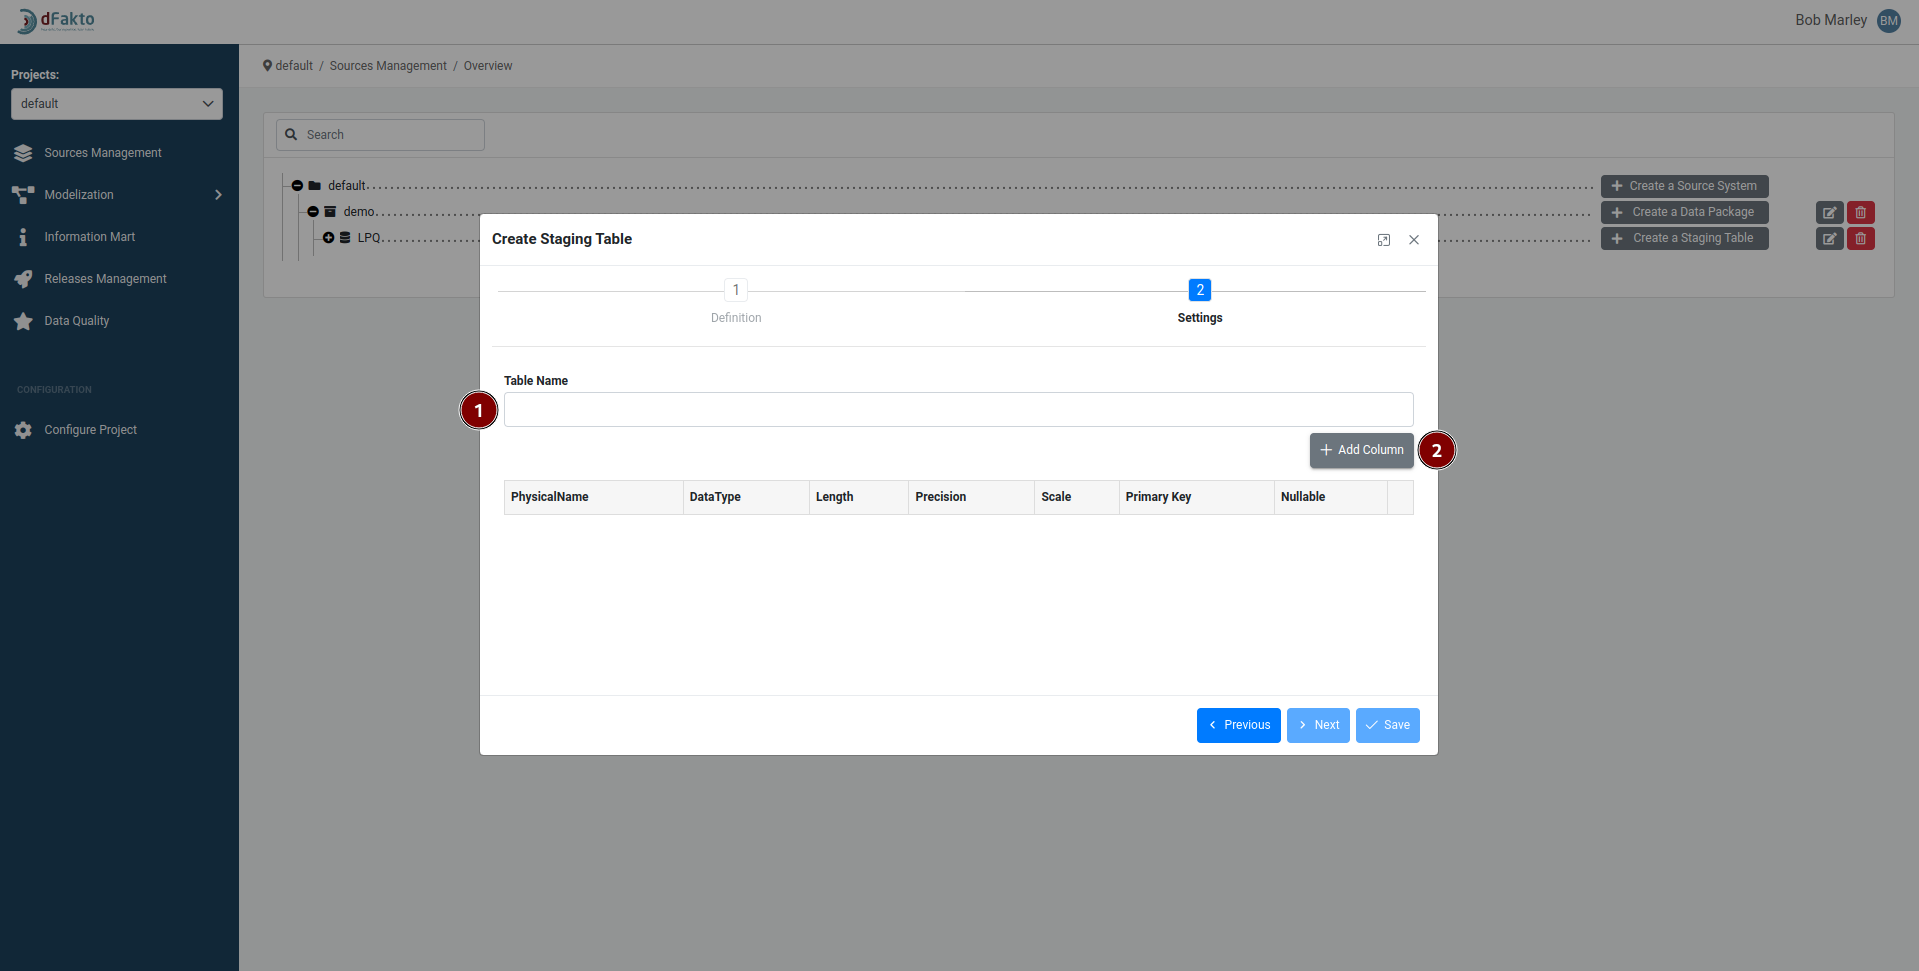
Creating a staging table using the manual creation wizard
The manual creation wizard for creating a staging table allows you to specify the table name and add columns to the table.
Table name: MANDATORY - must be at least two characters long and no more than 25 characters long. The first character must be an alphabetical character or an underscore, and every subsequent character can be a letter, number, or underscore.
Add Column: OPTIONAL - option allows you to add columns to the staging table.
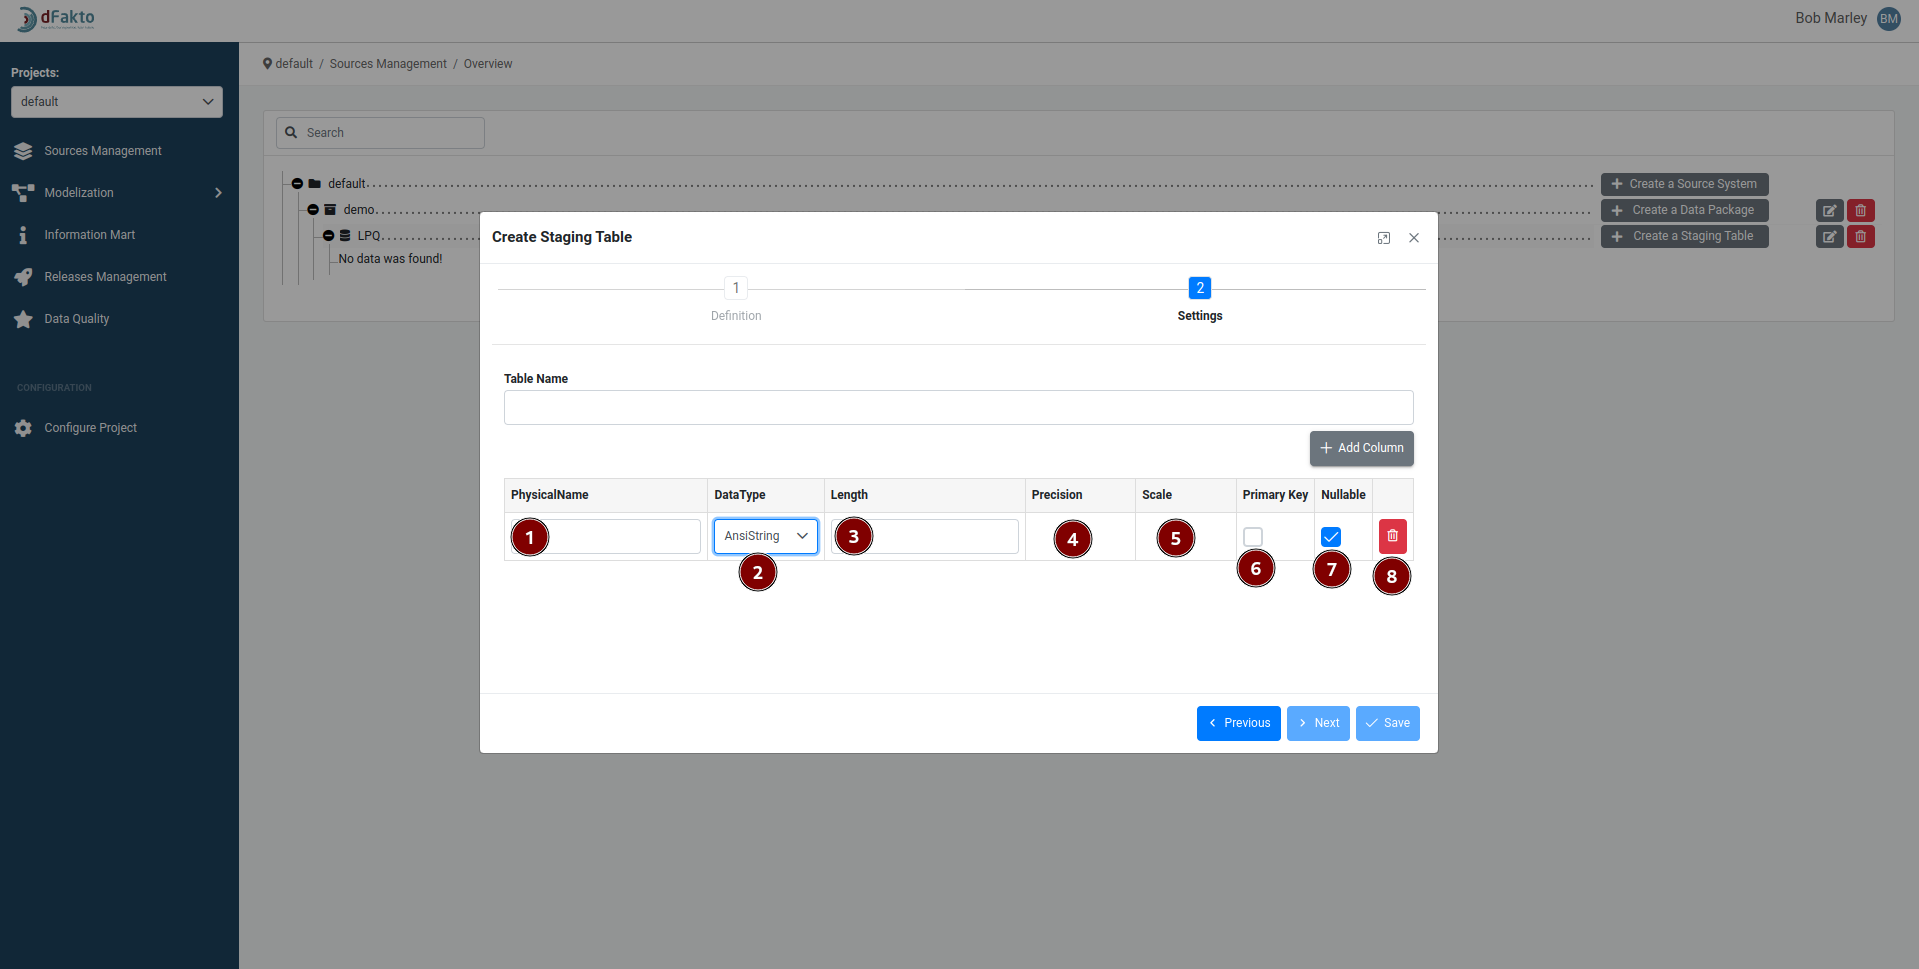
After adding a column, you can specify:
Physical Name: MANDATORY- Specifies the name of the staging column, which has a maximum length of 60 characters.
DataType: MANDATORY - The data type of the column. if the type is a text type.
The length of the column: OPTIONNAL: This field will only be settable if the data type is a text type.
The precision of the column: OPTIONNAL: This field will only be settable is the data type is a number type
The scale of the column: OPTIONNAL: This field will only be settable is the data type is a number type
The Primary key: OPTIONNAL: if this column is a primary key.
Nullable OPTIONNAL: if the column is nullable. Note that a column set a primary key cannot be nullable.
Delete button: OPTIONNAL: deletes the temporary column
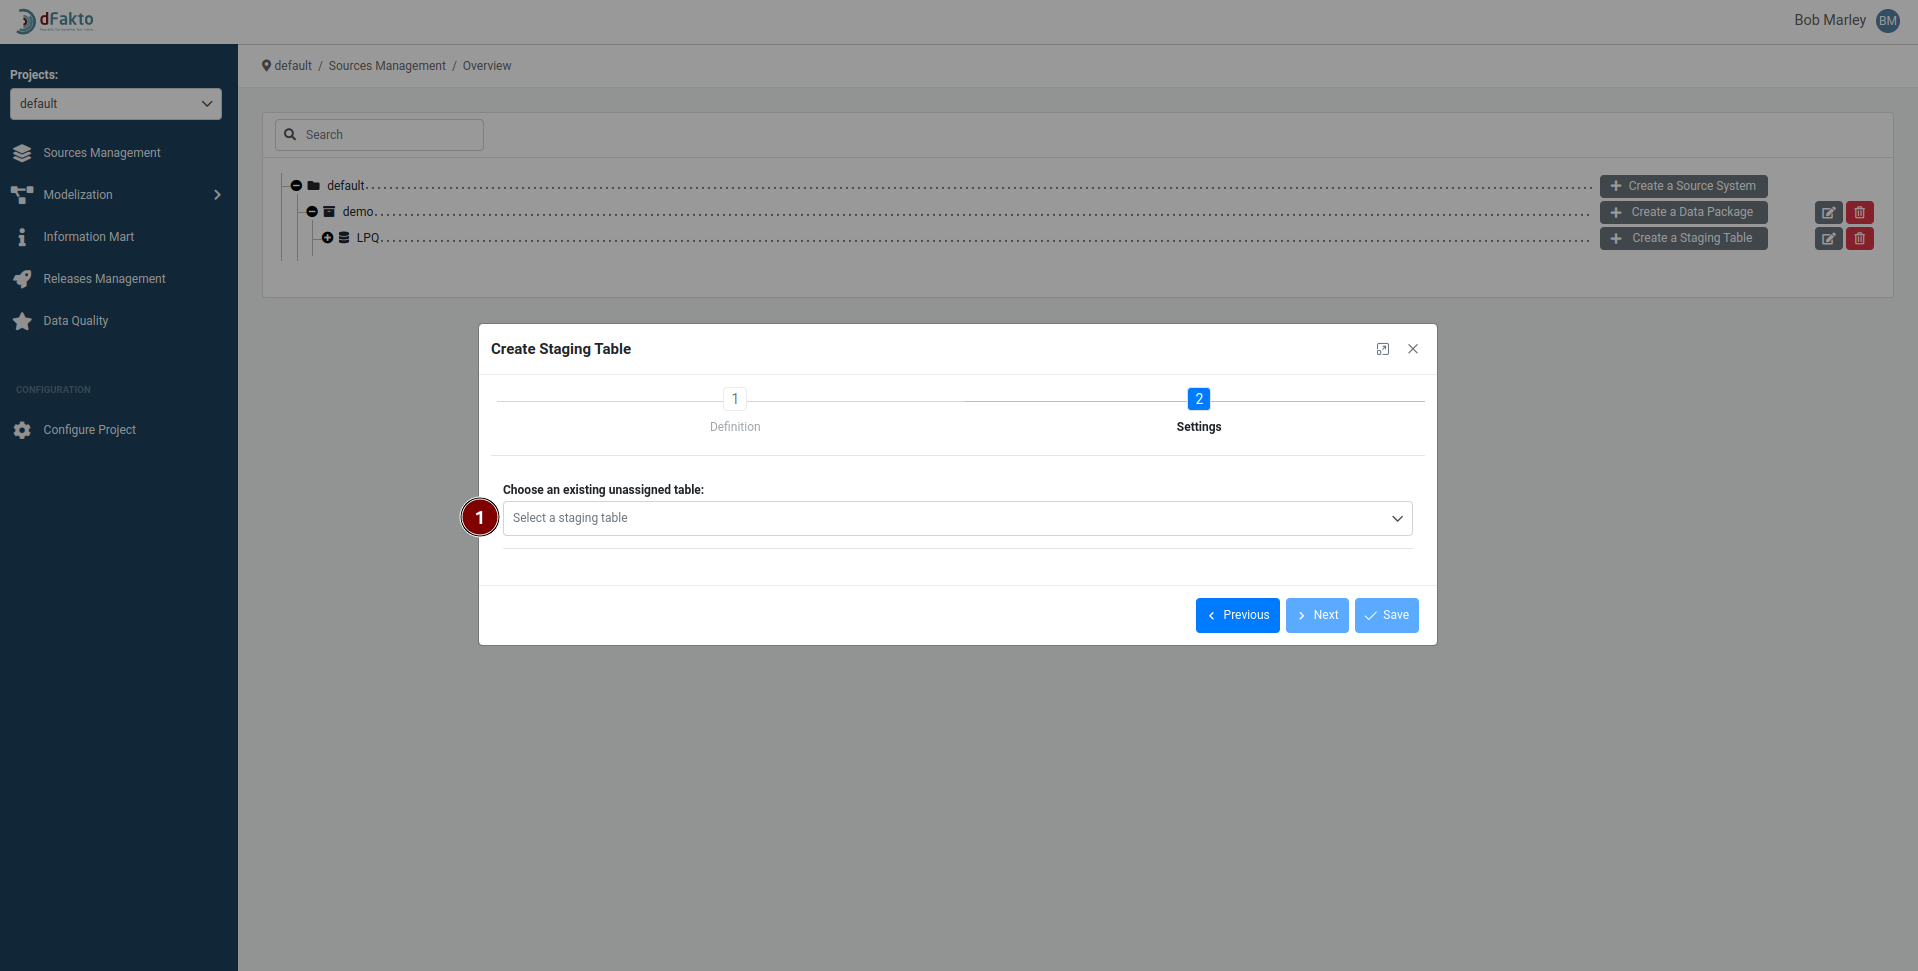
Creating a staging table by using an existing table structure
The option to create a staging table by using an existing table structure allows you to select a table from a dropdown list of all the tables present in the "stg" schema of the modeling environment databases. This will create a new staging table using the structure of the selected table.
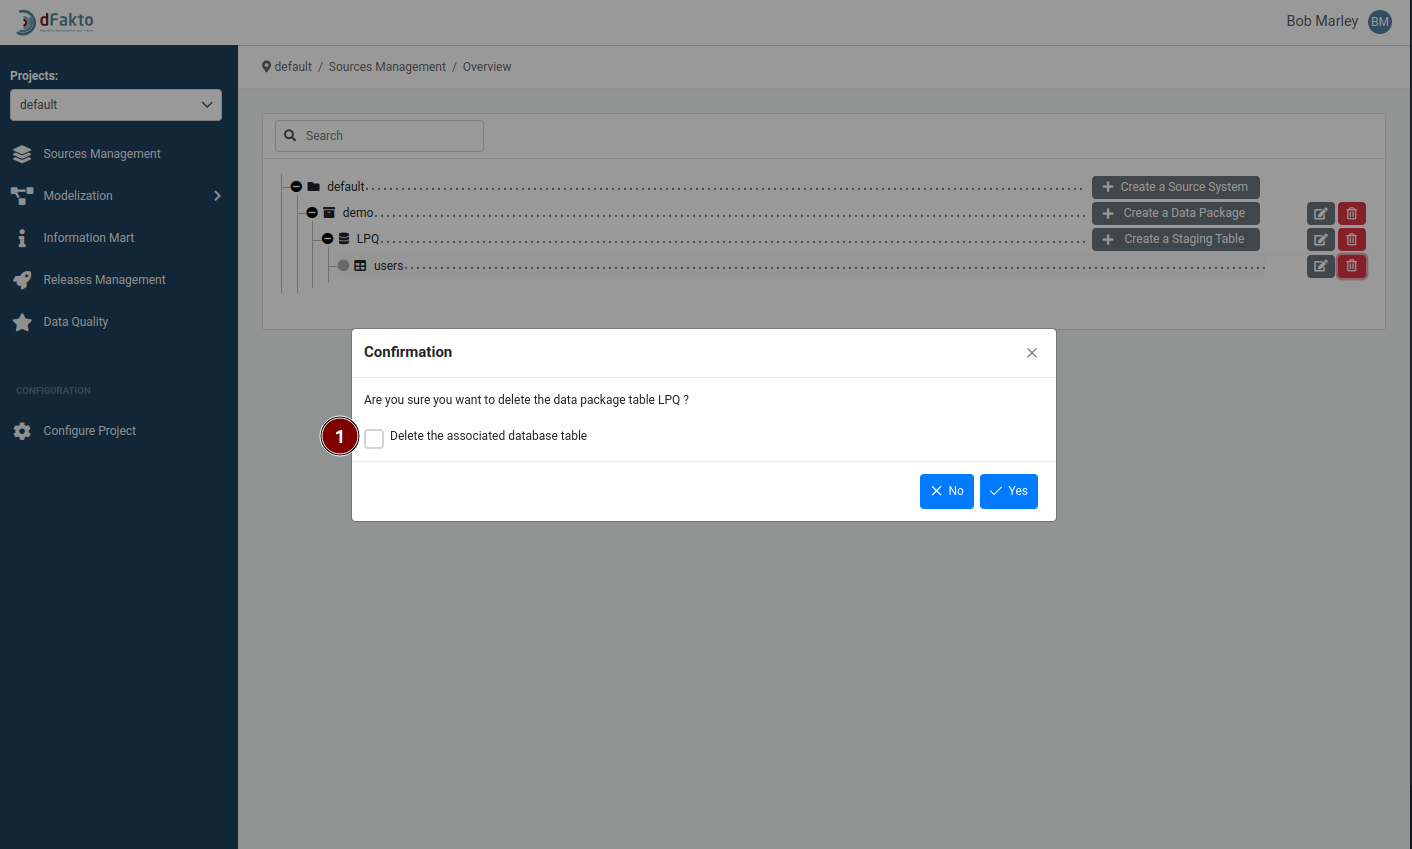
Delete a staging table
Please note that it is only possible to delete a staging table if none of its columns are mapped to a Data Vault entity. If any of the columns are mapped, the staging table cannot be deleted.
The option to delete a staging table also allows you to delete the corresponding table in the "stg" schema in the modeling environment database. If this option is not selected, only the reference to the table in the Meta Vault will be deleted, and the actual table in the database will remain.
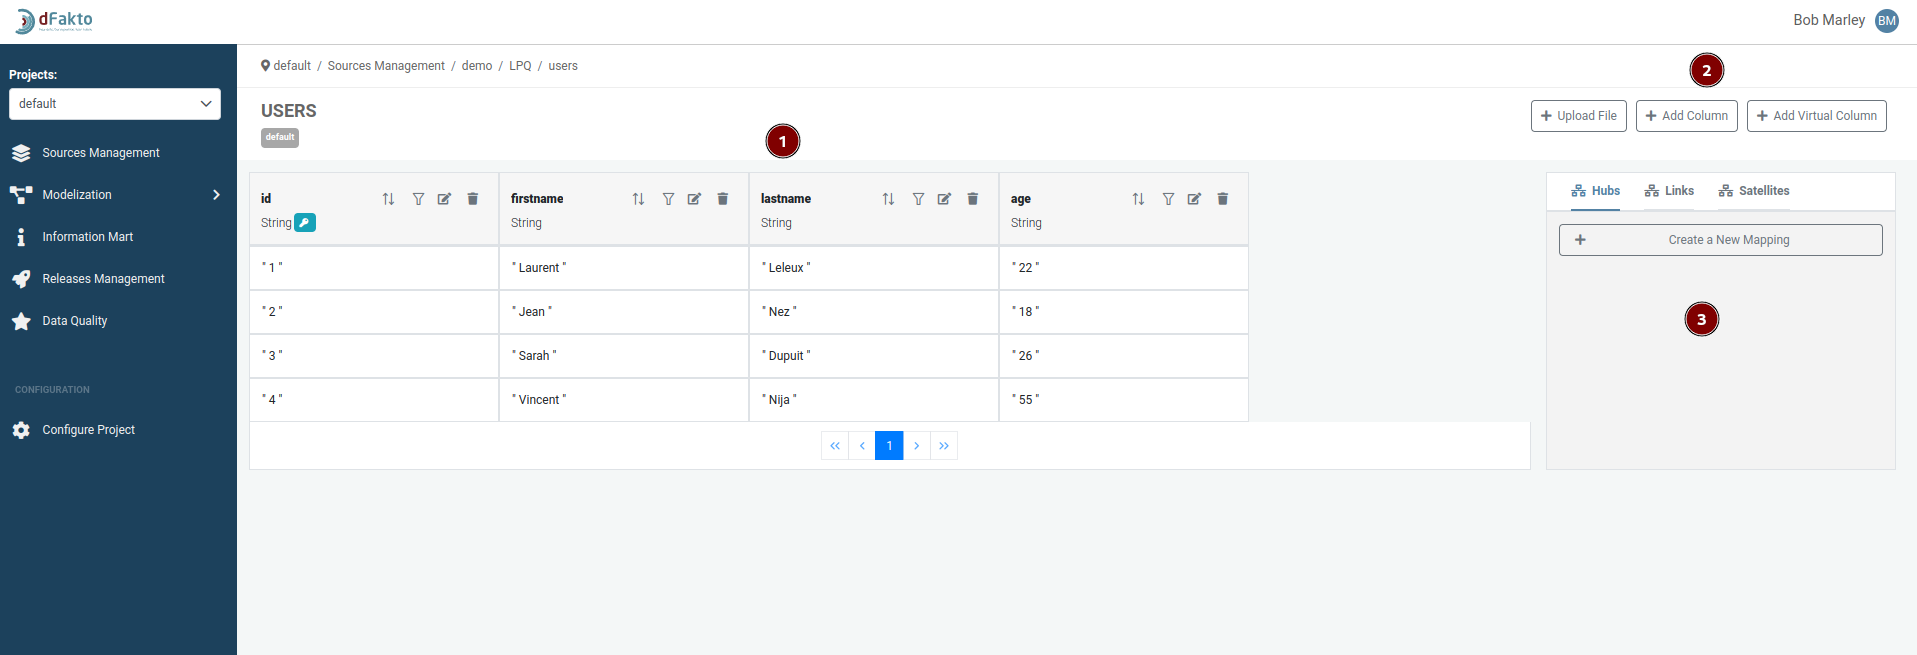
Edit a staging table
When editing a staging table, the main page is divided into 3 areas:
Central view, allowing to see the data in the staging table, as well as update and delete individual column
Staging view action buttons, where various button that update the staging tables are found
Mapping view, allowing to create mapping for the current staging table
For each column of your table, you may perform several actions by using the icons on the column header:
Indicate whether the column is the primary key
Button used to order by the data using this column. Clicking it multiple time toggle between an ascending or a descending order
Button used for filtering the data
Editing the column
Deleting the column. Note that a column can be deleted only if there is no mapping attached to it.
Upload file : Allow the user to upload the data from either an excel file or a csv file into the staging table
Add Column : Add a column to the staging table
Add Virtual Column: Add a virtual column to the table.
