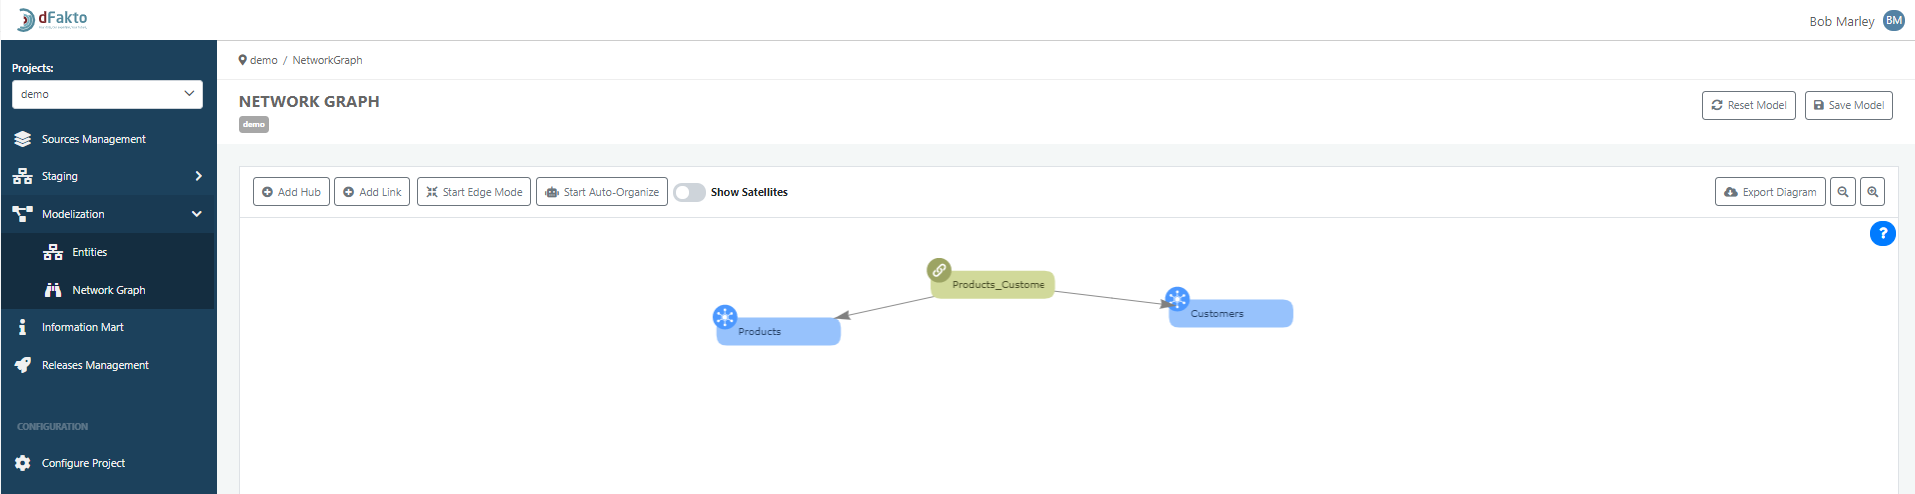
Network Graph
Starting from version 1.5, the platform includes a network graph interface which allows you to create hubs and links from a diagram interface.
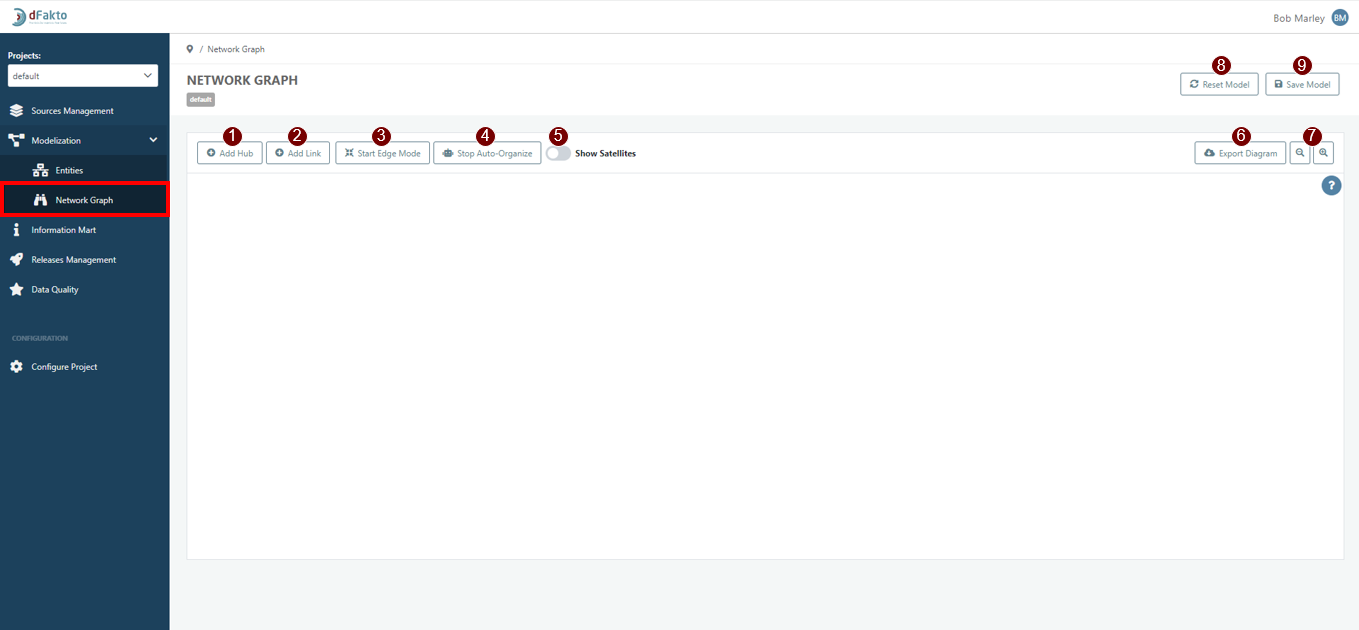
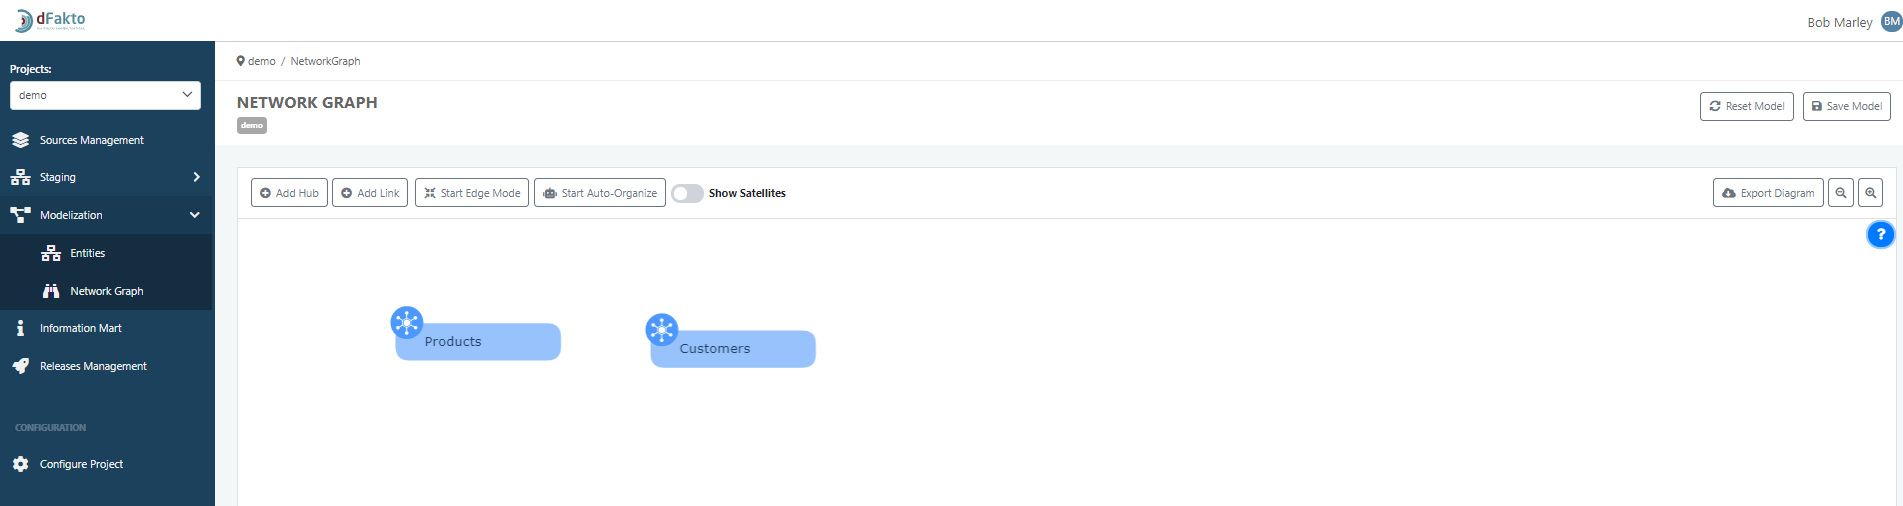
To access this feature, go to the Modelization tab and then click on Network Graph.
On the Network Graph page, you can
create a draft hub or link
start or stop "Edge Mode,"
start or stop auto-organizing the model
show or hide satellites
export the diagram
zoom in or out
reset the model
save the model
Create a hub
To create a hub, click on the "Add Hub" button, give the draft hub a name, and click "Save."
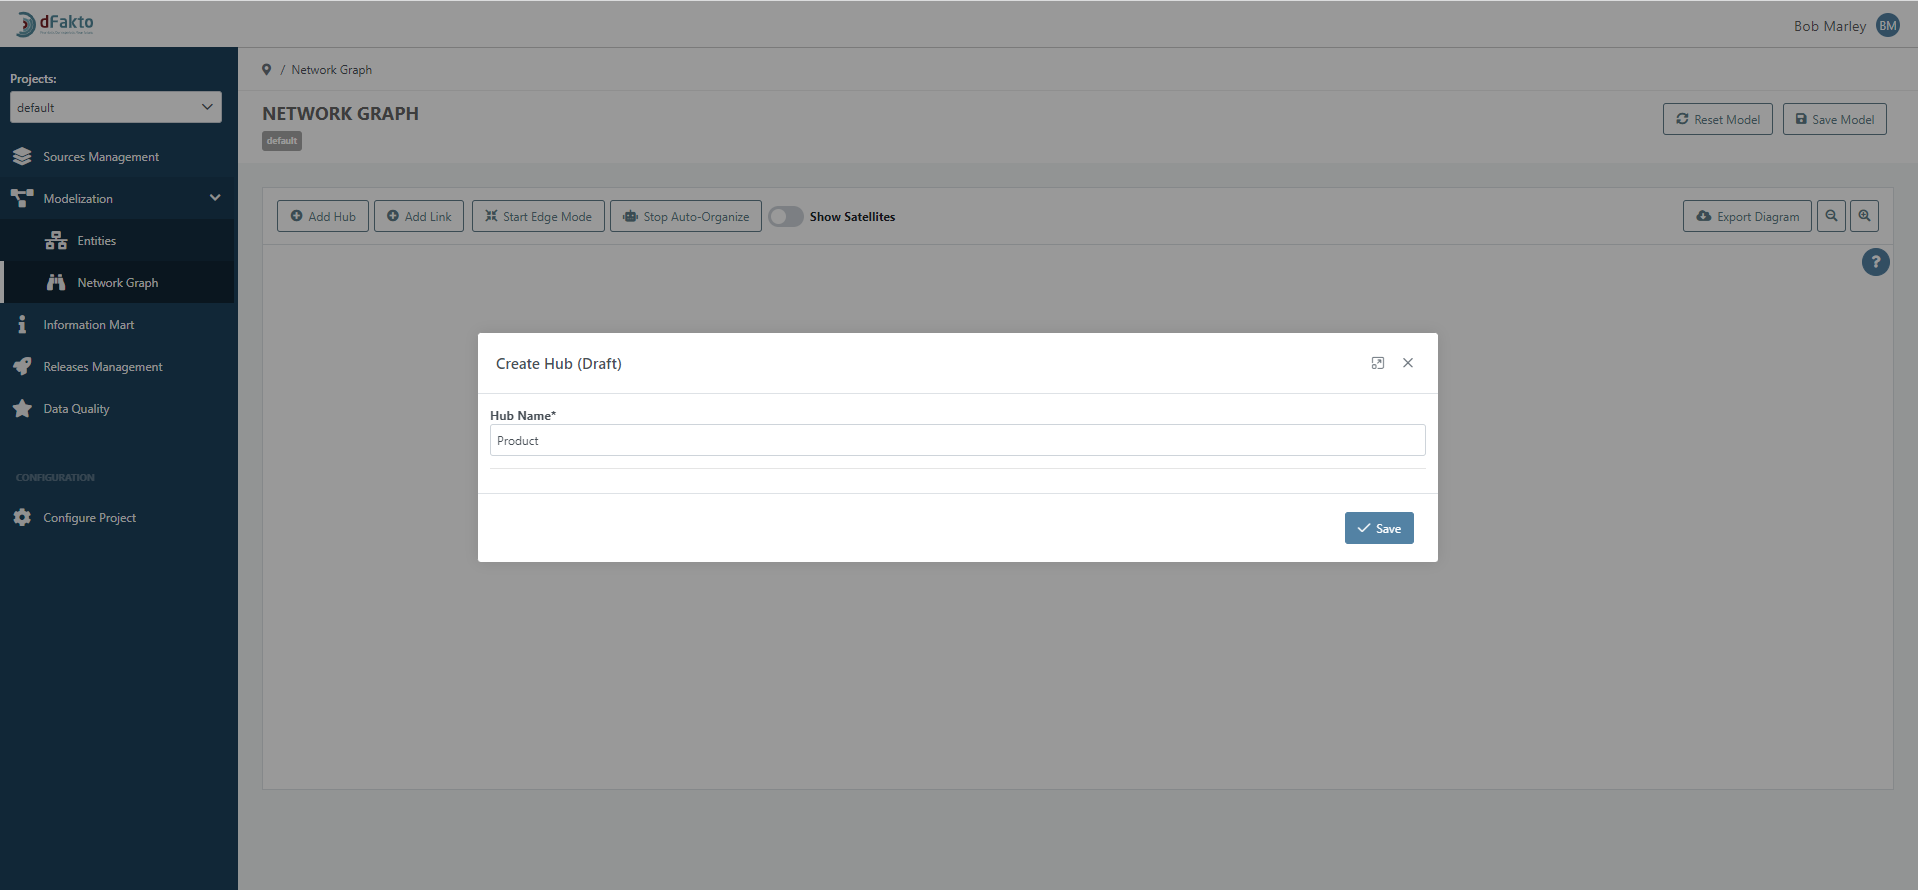
Then, you will have to drop it on the diagram zone.
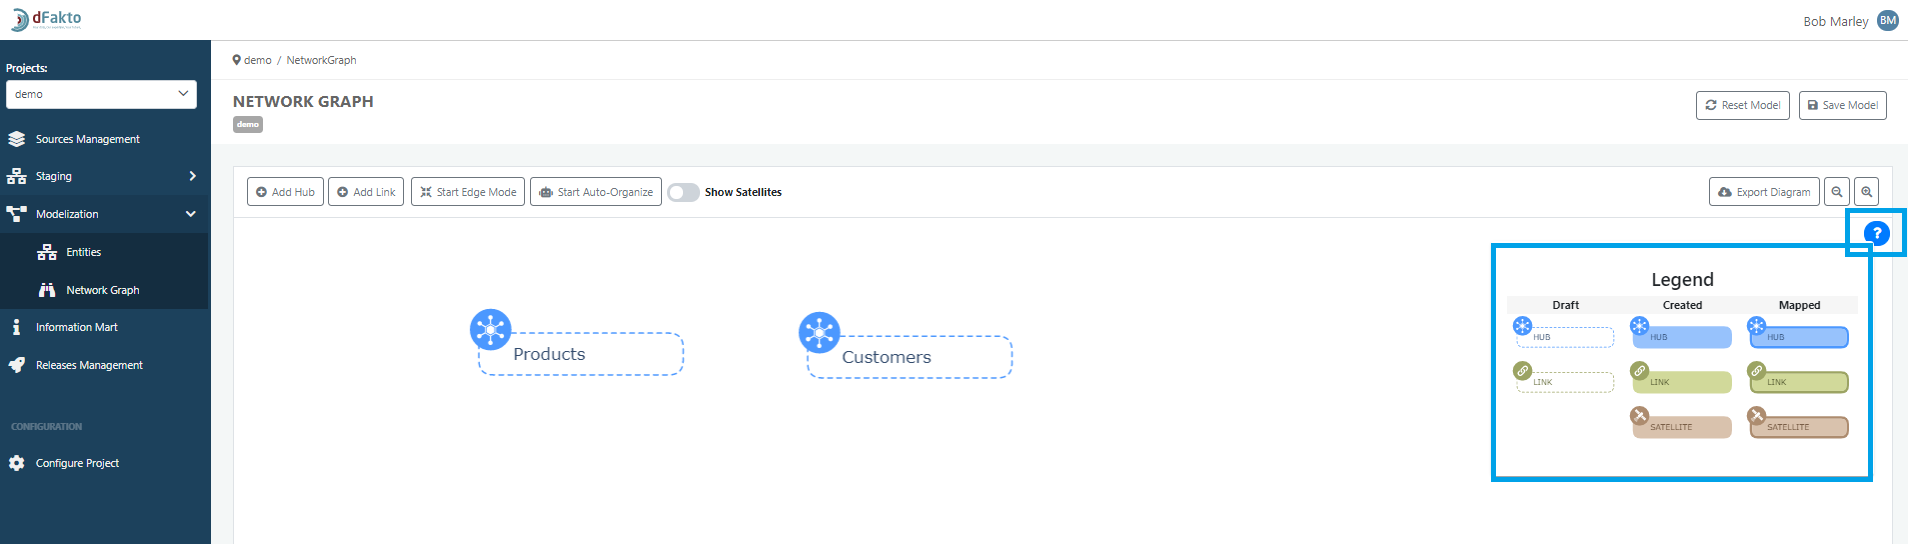
You’ll notice that the frame of hubs at this point is dotted, that means the status of the entity is “draft”. There are 3 status in total: draft, created and mapped.
If you click on the question mark in the upper-right corner, the legend will drop down.
In order to effectively create the hub, click on the icon fixed to the hub, a wizard will pop up providing multiple options:
Create the hub
Requires to set a length (32 per default)
Check or not “Use context satellites)
To complete the creation of a hub, click on the icon attached to the hub. This will open a wizard with multiple options. To create the hub, you will need to specify a length (default is 32) and choose whether to use context satellites.
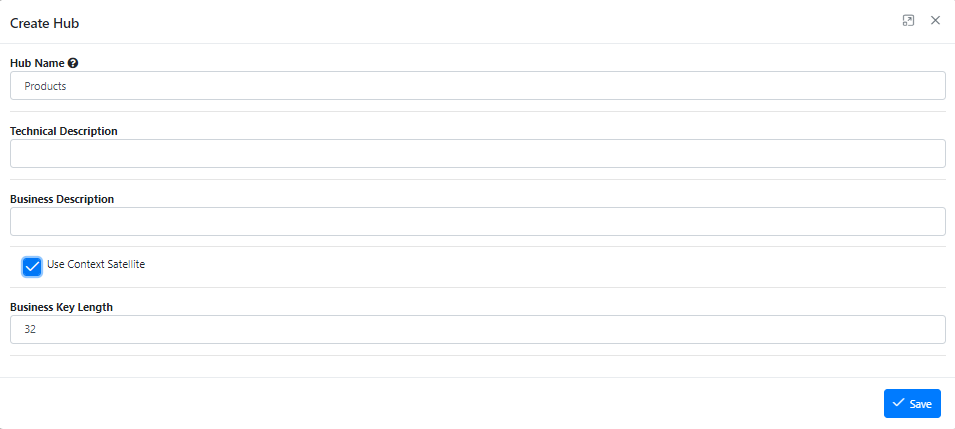
Once you have made the necessary selections and clicked "Create," the hub will be created and will appear in the diagram, framed in blue.
Create link
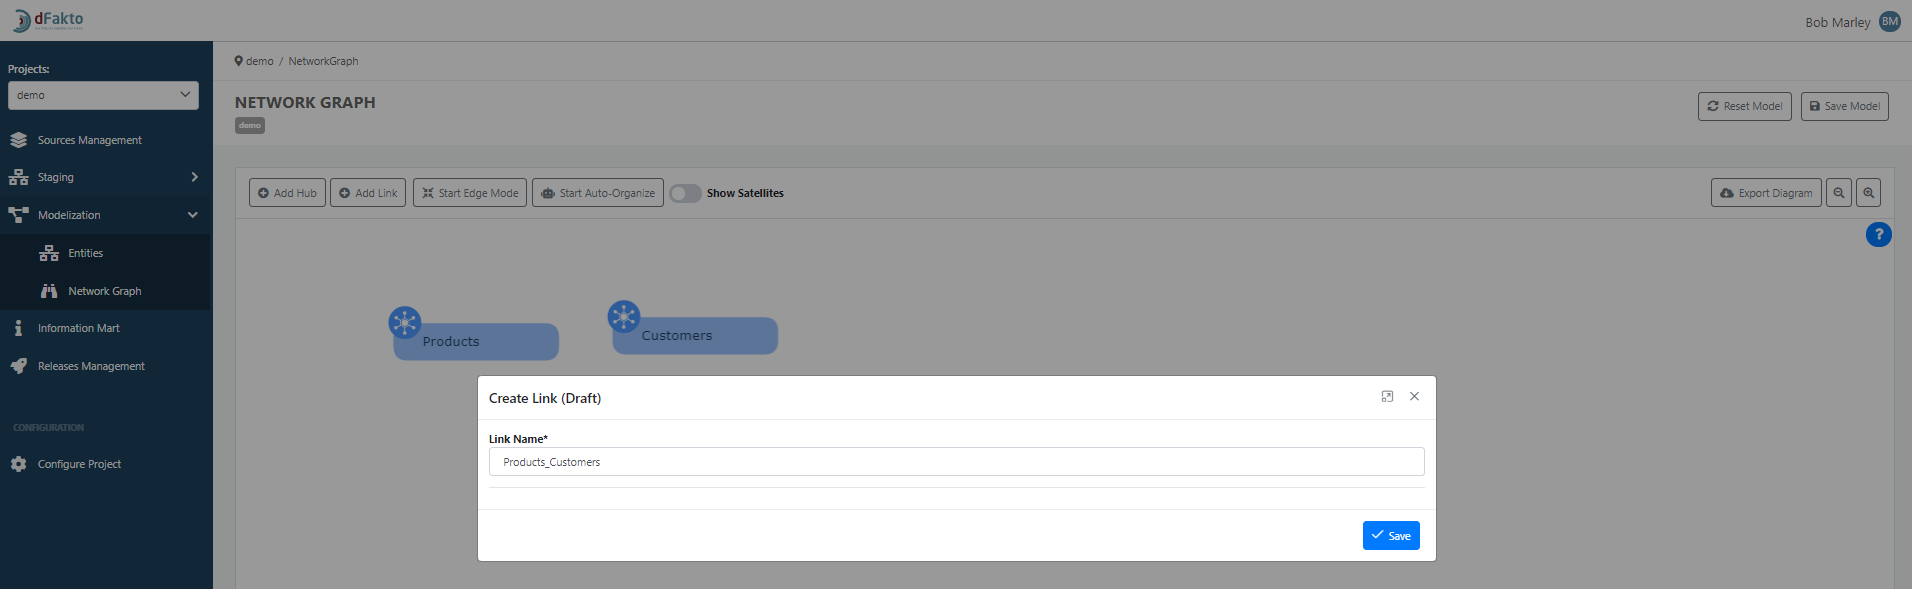
To create a link between two hubs, follow these steps:
Click on the "Add Link" button and define a name for the draft link.
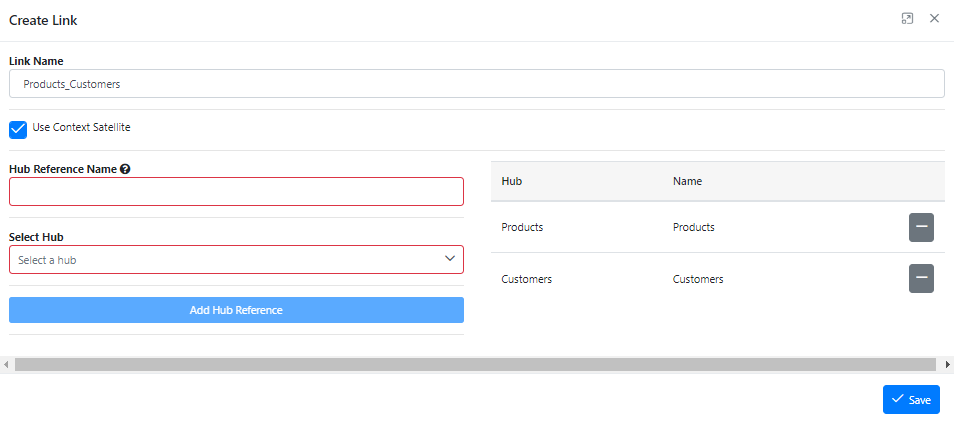
The draft link will appear in the diagram zone. Drag it to the desired location and click on its icon to open the link creation wizard.
Select the hubs to be linked and give them reference names. You can also check the "Use Context Satellite" box if desired.
Click "Save" to complete the link creation process.
Click "Save Model" to finish the modeling process.
In the upper menu, you will see three other options: "Start Edge Mode," "Start Auto-Organize," and "Show Satellites."
The "Start Edge Mode" button allows you to manually bind hubs to links, setting the relationship between entities.
The "Start Auto-Organize" button gives a clearer view of the structure of your model, which is especially useful for large models.
The "Show Satellites" button will display any satellites that have been created.
To create a link between two hubs, click on the "Add Link" button and give the draft link a name. Click "Save Model" to complete the modeling process.